Ga door naar hoofdinhoud

HTC Desire 610 Charging Port Replacement

Wat je nodig hebt

  1. HTC Desire 610 Charging Port Replacement, Black Plastic Circuit Cover: stap 1, afbeelding 1 van 3 HTC Desire 610 Charging Port Replacement, Black Plastic Circuit Cover: stap 1, afbeelding 2 van 3 HTC Desire 610 Charging Port Replacement, Black Plastic Circuit Cover: stap 1, afbeelding 3 van 3
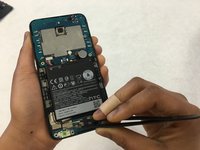
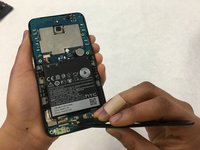
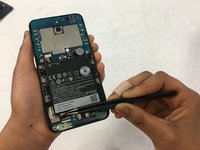
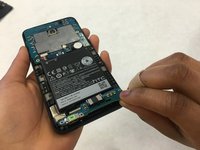
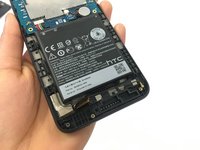
    • Using a plastic opening tool, take off the back cover of the phone.

  2. HTC Desire 610 Charging Port Replacement: stap 2, afbeelding 1 van 1
    • Remove the four black 4mm torx screws using the Torx T5 bit.

  3. HTC Desire 610 Charging Port Replacement: stap 3, afbeelding 1 van 1
    • Remove the four silver 5mm torx head screws using the Torx T5 screwdriver.

  4. HTC Desire 610 Charging Port Replacement: stap 4, afbeelding 1 van 1
    • Remove the two 2.5mm phillips head screws using the Phillips 000 screwdriver.

  5. HTC Desire 610 Charging Port Replacement: stap 5, afbeelding 1 van 1
    • Remove the black plastic circuit cover using a plastic opening tool.

  6. HTC Desire 610 Charging Port Replacement, Charging Port: stap 6, afbeelding 1 van 1
    • Remove the 4mm black Torx screw using a Torx T5 screwdriver.

  7. HTC Desire 610 Charging Port Replacement: stap 7, afbeelding 1 van 1
    • Using a pair of tweezers, disconnect the antenna wire.

  8. HTC Desire 610 Charging Port Replacement: stap 8, afbeelding 1 van 3 HTC Desire 610 Charging Port Replacement: stap 8, afbeelding 2 van 3 HTC Desire 610 Charging Port Replacement: stap 8, afbeelding 3 van 3
    • Peel back the gray adhesive strip using the precision tweezers.

  9. HTC Desire 610 Charging Port Replacement: stap 9, afbeelding 1 van 1
    • Pull up on the white strip so it sits 90 degrees using a pair of precision tweezers.

  10. HTC Desire 610 Charging Port Replacement: stap 10, afbeelding 1 van 3 HTC Desire 610 Charging Port Replacement: stap 10, afbeelding 2 van 3 HTC Desire 610 Charging Port Replacement: stap 10, afbeelding 3 van 3
    • Pry up the circuit board and pull it out using a pair of precision tweezers.

  11. HTC Desire 610 Charging Port Replacement: stap 11, afbeelding 1 van 3 HTC Desire 610 Charging Port Replacement: stap 11, afbeelding 2 van 3 HTC Desire 610 Charging Port Replacement: stap 11, afbeelding 3 van 3
    • Remove the loud speaker using a pair of precision tweezers.

    • The loud speaker is attached with adhesive and may require more force than expected to remove.

    • The prongs on the speaker should be sticking up towards the top of the phone when you put the speaker on the new circuit board.

Conclusie

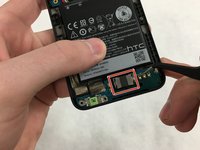
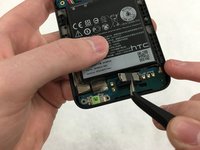
To reassemble your device, follow these instructions in reverse order.

2 andere personen hebben deze handleiding voltooid.

Kaycee Hammond

Lid sinds: 02/11/17

273 Reputatie

2 handleidingen geschreven

Team

IUPUI, Team S1-G1, Wilson Spring 2017 Lid van IUPUI, Team S1-G1, Wilson Spring 2017

IUPUI-WILSON-S17S1G1

4 Leden

6 handleidingen geschreven

Één opmerking

Super duper 5

Nizamcdk - Antwoord

Voeg opmerking toe

Weergavestatistieken:

Afgelopen 24 uren: 0

Afgelopen 7 dagen: 0

Afgelopen 30 dagen: 2

Altijd: 1,219