Ga door naar hoofdinhoud

HP iPAQ h4155 Face Plate Replacement

Wat je nodig hebt

  1. HP iPAQ h4155 Face Plate Replacement, Battery: stap 1, afbeelding 1 van 1
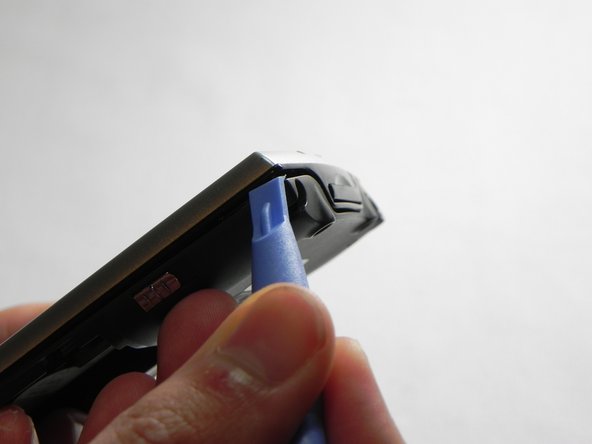
    • While sliding the silver release tab up, simultaneously lift the cover up from the left side.

  2. HP iPAQ h4155 Face Plate Replacement: stap 2, afbeelding 1 van 1
    • Push the tab left to right to remove the cover.

  3. HP iPAQ h4155 Face Plate Replacement: stap 3, afbeelding 1 van 1
    • Now, lift the battery up and away from the device to remove it.

  4. HP iPAQ h4155 Face Plate Replacement, Back Case: stap 4, afbeelding 1 van 1
    • Remove the four silver screws using the T5 Torx Screwdriver (T5 x .25 in).

  5. HP iPAQ h4155 Face Plate Replacement: stap 5, afbeelding 1 van 1
    • Remove the single black screw that is located beneath the HP sticker with the T5 Torx Screwdriver.

  6. HP iPAQ h4155 Face Plate Replacement: stap 6, afbeelding 1 van 2 HP iPAQ h4155 Face Plate Replacement: stap 6, afbeelding 2 van 2
    • Next, use your plastic removal tool to separate the gray back from the black center piece.

    • For better results, start the separation at the corner piece.

  7. HP iPAQ h4155 Face Plate Replacement: stap 7, afbeelding 1 van 1
    • Remove the back case.

  8. HP iPAQ h4155 Face Plate Replacement, Face Plate: stap 8, afbeelding 1 van 1
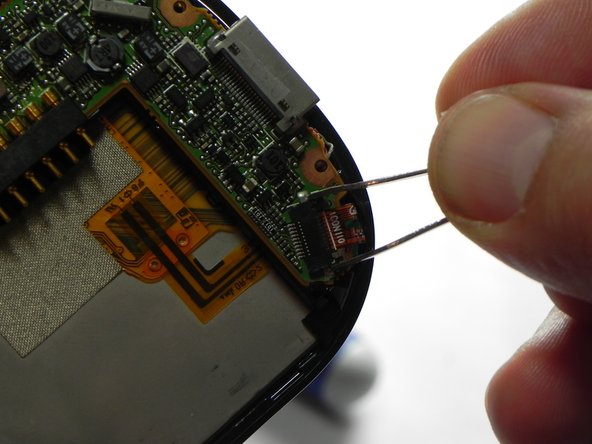
    • Now that the back cover is removed, use the #00 Philips x .17 screwdriver to remove the small screw to the left of the SD card slot.

  9. HP iPAQ h4155 Face Plate Replacement: stap 9, afbeelding 1 van 2 HP iPAQ h4155 Face Plate Replacement: stap 9, afbeelding 2 van 2
    • Next, unlock and remove the ribbon cable.

    • Using metal tweezers, carefully pull back on both sides of the brown bar unlocking the cable and slipping it out of the connector.

    • The bar, the connector, and the cable are fragile components that are easily broken.

  10. HP iPAQ h4155 Face Plate Replacement: stap 10, afbeelding 1 van 2 HP iPAQ h4155 Face Plate Replacement: stap 10, afbeelding 2 van 2
    • Next, remove the wire from the bottom of the mother board.

    • The easiest method is to use metal tweezers and grip the plug closest to the connector.

    • Make sure all the connections are properly disconnected before separation from the motherboard.

  11. HP iPAQ h4155 Face Plate Replacement: stap 11, afbeelding 1 van 1
    • Next, use a plastic removal tool and separate the silver front case from the black frame.

Conclusie

To reassemble your device, follow these instructions in reverse order.

Één andere persoon heeft deze handleiding voltooid.

John Pagliero

Lid sinds: 01/27/11

942 Reputatie

7 handleidingen geschreven

0 opmerkingen

Voeg opmerking toe

Weergavestatistieken:

Afgelopen 24 uren: 0

Afgelopen 7 dagen: 0

Afgelopen 30 dagen: 5

Altijd: 1,387