Deze versie kan foutieve bewerkingen bevatten. Schakel over naar de recentste gecontroleerde momentopname.
Wat je nodig hebt
-
Deze stap is niet vertaald. Help het te vertalen
-
In the following steps, you will use a metal spudger to lift the front panel out from the rear case of your TouchPad.
-
-
Deze stap is niet vertaald. Help het te vertalen
-
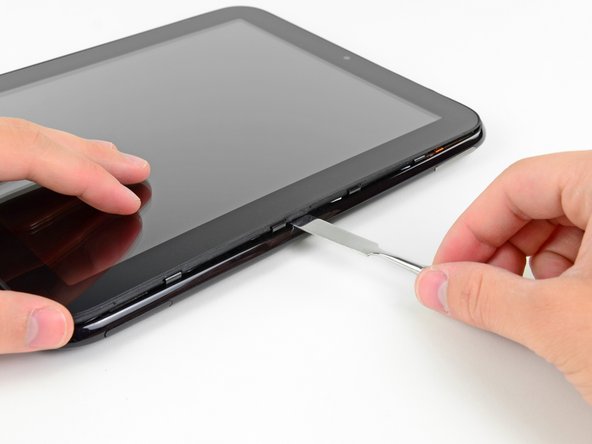
Insert a flat metal spudger in the gap between the rubber outer ring on the front panel assembly and the black plastic rear case near the USB connector.
-
Pry the front panel assembly up from the rear case, being careful not to damage the LCD or the glass panel.
-
-
Deze stap is niet vertaald. Help het te vertalen
-
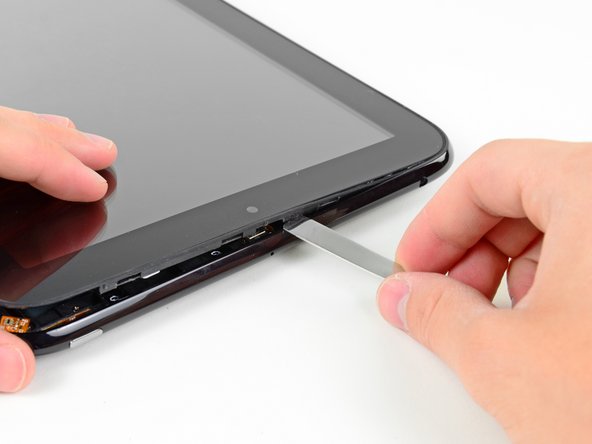
As in the previous step, use a spudger to pry the front panel up from the rear case along its long edge on the volume button side of the TouchPad.
-
Continue to pry the front panel assembly up along the volume button side of the TouchPad until there is a gap between it and the rear case.
-
-
Deze stap is niet vertaald. Help het te vertalen
-
Pry up the front panel assembly along the top edge of the TouchPad.
-
-
Deze stap is niet vertaald. Help het te vertalen
-
Pry up the front panel along the edge closest to the home screen button.
-
-
-
Deze stap is niet vertaald. Help het te vertalen
-
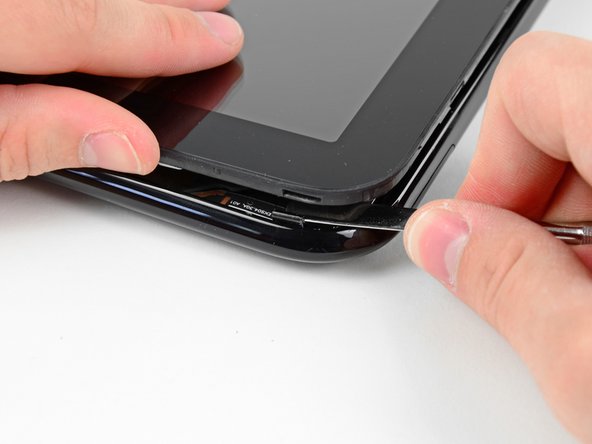
Before lifting the free side of the front panel up from the rear case, you may need to release it from the plastic retaining clips holding it down.
-
Use your metal spudger to pull the stuck retaining clips away from the edge of the front panel.
-
-
Deze stap is niet vertaald. Help het te vertalen
-
After freeing the retaining clips, lift the front panel assembly away from the rear case.
-
-
Deze stap is niet vertaald. Help het te vertalen
-
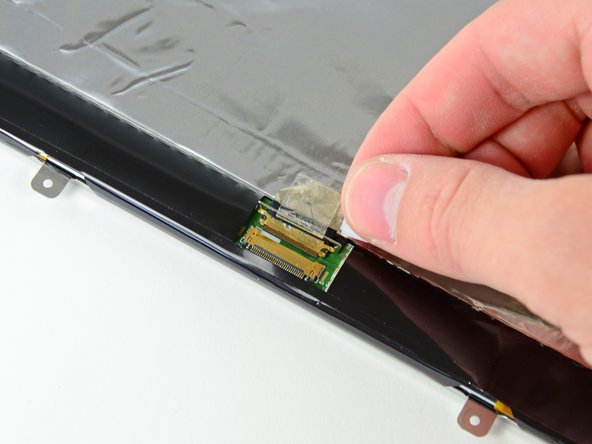
Use the attached black tab to pull the display data cable straight up and out of its socket on the motherboard.
-
-
Deze stap is niet vertaald. Help het te vertalen
-
Use your fingernail to carefully flip up the retaining flaps on the two digitizer ribbon cable ZIF sockets.
-
Pull the digitizer ribbon cable straight out of its two sockets on the motherboard.
-
-
Deze stap is niet vertaald. Help het te vertalen
-
Remove the front panel assembly from the rear case assembly.
-
-
Deze stap is niet vertaald. Help het te vertalen
-
Remove the six 2.2 mm Phillips screws securing the LCD to the front panel.
-
-
Deze stap is niet vertaald. Help het te vertalen
-
Lift up the LCD assembly and remove it from the front panel.
-
-
Deze stap is niet vertaald. Help het te vertalen
-
Use the edge of a plastic opening tool to peel up the self-adhesive pull tab stuck to the display data cable.
-
-
Deze stap is niet vertaald. Help het te vertalen
-
Pull the tab up and toward the middle of the display to unlock the display data cable connector from its socket on the LCD.
-
Pull the display data cable out of its socket on the LCD and set it aside.
-


Annuleren: ik heb deze handleiding niet afgemaakt.
11 andere personen hebben deze handleiding voltooid.

Één opmerking
This was an especially easy and very helpful guide.... If anyone finds out where to get the HP Touchpad plastic retainer clips (which break very easily as it turns out) please let me know here or at gskdesigns@gmail.com.
Great Guide!
GK