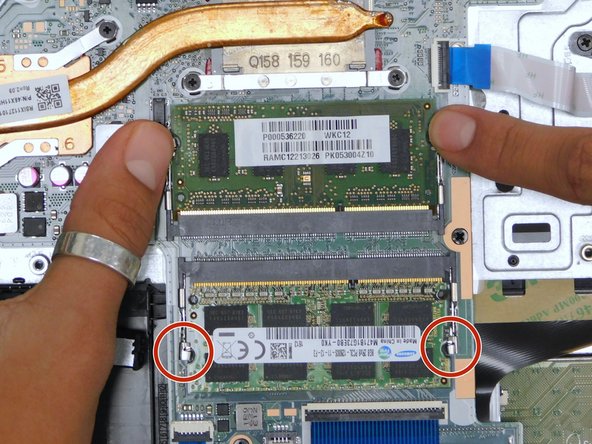
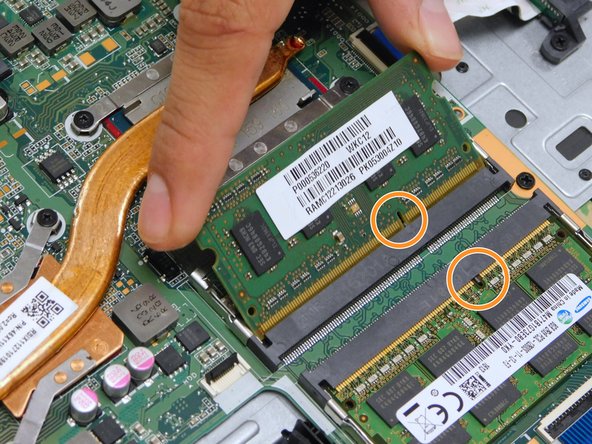
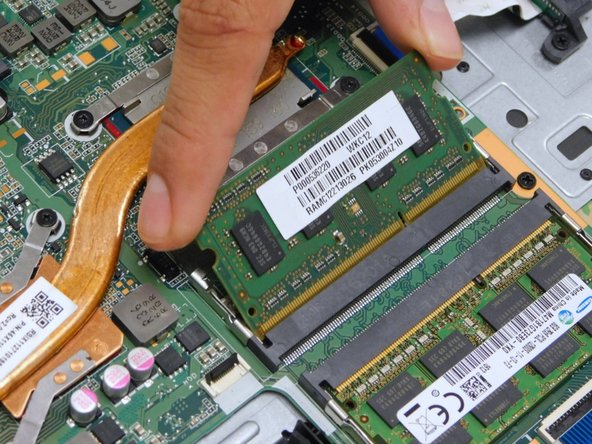
Ga door naar hoofdinhoud

HP Star Wars Special Edition 15-an051dx RAM Replacement

Wat je nodig hebt

  1. HP Star Wars Special Edition 15-an051dx RAM Replacement, RAM: stap 1, afbeelding 1 van 3 HP Star Wars Special Edition 15-an051dx RAM Replacement, RAM: stap 1, afbeelding 2 van 3 HP Star Wars Special Edition 15-an051dx RAM Replacement, RAM: stap 1, afbeelding 3 van 3
    • Make sure the laptop is fully shut down

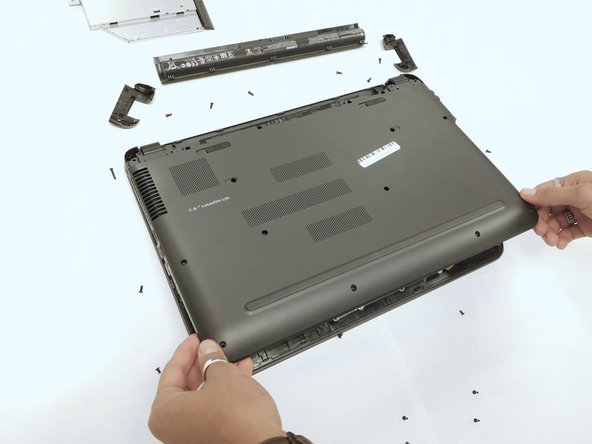
    • Remove battery by pushing slide tabs to the left.

    • Remove residual power by holding the power button down for 5 seconds.

  2. HP Star Wars Special Edition 15-an051dx RAM Replacement: stap 2, afbeelding 1 van 3 HP Star Wars Special Edition 15-an051dx RAM Replacement: stap 2, afbeelding 2 van 3 HP Star Wars Special Edition 15-an051dx RAM Replacement: stap 2, afbeelding 3 van 3
    • Set aside any screws removed separately as to not mix them up

    • Use a Phillips #1 screwdriver to remove the two 12.5 mm screws, four 5.5 mm screws, and six 7.25 mm screws.

    • Remove the two corner panels along the ends of the battery slot and this will expose another set of screws (1 under each panel).

    • Remove the remaining six 7.2 mm Phillips #1 screws hidden in the battery area and underneath the covers.

  3. HP Star Wars Special Edition 15-an051dx RAM Replacement: stap 3, afbeelding 1 van 3 HP Star Wars Special Edition 15-an051dx RAM Replacement: stap 3, afbeelding 2 van 3 HP Star Wars Special Edition 15-an051dx RAM Replacement: stap 3, afbeelding 3 van 3
    • Remove the optical drive by pulling on the plastic cover panel.

    • With a prying tool, gently pry the back panel off.

    • Start with the corners of the device and carefully slide the tool towards the middle, lifting the panel off as you go.

    • Set the optical drive and back panel somewhere safe.

  4. HP Star Wars Special Edition 15-an051dx RAM Replacement: stap 4, afbeelding 1 van 3 HP Star Wars Special Edition 15-an051dx RAM Replacement: stap 4, afbeelding 2 van 3 HP Star Wars Special Edition 15-an051dx RAM Replacement: stap 4, afbeelding 3 van 3
    • You will need to spread the two silver clips that hold the RAM down on its slot.

    • Once both clips are spread apart, this will release the RAM and it will slightly spring upward in an angle.

    • Pull the RAM away in the same orientation.

    • Keep in mind the notch on the RAM that connects on to the DIMM slot.

  5. HP Star Wars Special Edition 15-an051dx RAM Replacement: stap 5, afbeelding 1 van 3 HP Star Wars Special Edition 15-an051dx RAM Replacement: stap 5, afbeelding 2 van 3 HP Star Wars Special Edition 15-an051dx RAM Replacement: stap 5, afbeelding 3 van 3
    • Match the notch on new/replacement RAM and gently install it in the same angled orientation.

    • Once the new RAM is installed, gently press and lay the RAM down on its side until it reaches the clips on the side notches and locks in.

    • Do the same for the other DIMM/RAM if replacing or adding another RAM.

Conclusie

To reassemble your device, follow these instructions in reverse order.

2 andere personen hebben deze handleiding voltooid.

Fernando Mendez

Lid sinds: 08/25/22

643 Reputatie

5 handleidingen geschreven

Team

Gateway, Team 1-2, Pee Fall 2022 Lid van Gateway, Team 1-2, Pee Fall 2022

GCC-PEE-F22S1G2

4 Leden

5 handleidingen geschreven

2 opmerkingen

Awesome job. this is a nice guide

RETRO GAMEHEAD - Antwoord

If you could post another guide on how to clean the fans and heatsink and rethemopasting. I will look at it give you 30 more points. Thanks

RETRO GAMEHEAD - Antwoord

Voeg opmerking toe

Weergavestatistieken:

Afgelopen 24 uren: 0

Afgelopen 7 dagen: 1

Afgelopen 30 dagen: 6

Altijd: 201