Ga door naar hoofdinhoud

HP ProBook 450 G3 Fan Replacement

Wat je nodig hebt

  1. HP ProBook 450 G3 Fan Replacement, Battery: stap 1, afbeelding 1 van 2 HP ProBook 450 G3 Fan Replacement, Battery: stap 1, afbeelding 2 van 2
    • Make sure you turn off the laptop before you start.

    • Push the release on the right side of the computer to the center.

    • Push and hold the release on the left side of the computer towards the center.

  2. HP ProBook 450 G3 Fan Replacement: stap 2, afbeelding 1 van 2 HP ProBook 450 G3 Fan Replacement: stap 2, afbeelding 2 van 2
    • Once the releases are in position, pull the battery out.

  3. HP ProBook 450 G3 Fan Replacement, Hard Drive: stap 3, afbeelding 1 van 3 HP ProBook 450 G3 Fan Replacement, Hard Drive: stap 3, afbeelding 2 van 3 HP ProBook 450 G3 Fan Replacement, Hard Drive: stap 3, afbeelding 3 van 3
    • The screw will not come out, after you unscrew it.

    • Unscrew the 2.5 mm screw with PH00 screwdriver.

    • Pull the cover off the computer using two hands.

  4. HP ProBook 450 G3 Fan Replacement: stap 4, afbeelding 1 van 1
    • Unscrew the all four 2.5 mm screws with the PH00 screwdriver.

    • Then carefully pull to the right the hard-drive. It should release from its container.

  5. HP ProBook 450 G3 Fan Replacement, Optical Drive: stap 5, afbeelding 1 van 1
    • Remove the 2.5 torx screw.

    • Pivot the spudger between the hard-drive and the optical drive. Push the optical drive away from the center of the computer.

  6. HP ProBook 450 G3 Fan Replacement: stap 6, afbeelding 1 van 1
    • Using the spudger carefully place the pointed end into the gap that covers the optical drive.

  7. HP ProBook 450 G3 Fan Replacement, Fan: stap 7, afbeelding 1 van 2 HP ProBook 450 G3 Fan Replacement, Fan: stap 7, afbeelding 2 van 2
    • Once the battery, hard drive, and optical drive cover are removed, begin removing all of the screws on the bottom plate of the laptop.

    • These are Phillips 00 5mm screws.

    • There are also several Phillips 00 2.5mm screws under the battery, optical drive cover, and hard drive.

  8. HP ProBook 450 G3 Fan Replacement: stap 8, afbeelding 1 van 1
    • Once all of the Phillips 00 screws are removed, use a spudger to remove the four rubber stops in each corner. Underneath, there will be four Torx bit 8 size 5mm screws that need to be removed.

  9. HP ProBook 450 G3 Fan Replacement: stap 9, afbeelding 1 van 1
    • Once all of the screws on the bottom are removed, flip your laptop over and open it so the keyboard is visible.

  10. HP ProBook 450 G3 Fan Replacement: stap 10, afbeelding 1 van 1
    • To remove the keyboard, gently insert the spudger underneath it along an edge and work it around to unsnap

  11. HP ProBook 450 G3 Fan Replacement: stap 11, afbeelding 1 van 2 HP ProBook 450 G3 Fan Replacement: stap 11, afbeelding 2 van 2
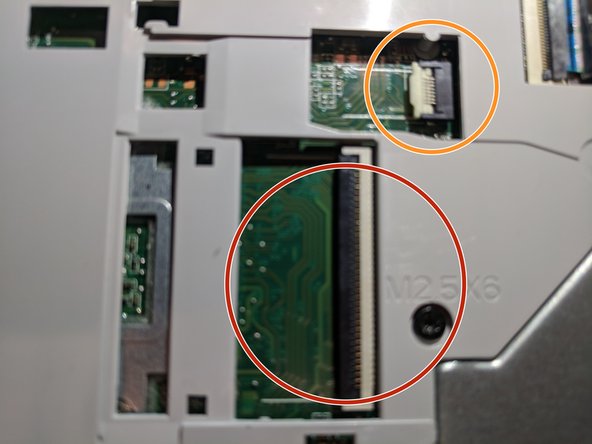
    • Once keyboard is removed, there will be two ribbon cables connecting the keyboard to the laptop. there will be two latches holding the cables in place on the laptop. to undo these latches, insert a spudger underneath the latch and lift up to free the cable.

  12. HP ProBook 450 G3 Fan Replacement: stap 12, afbeelding 1 van 2 HP ProBook 450 G3 Fan Replacement: stap 12, afbeelding 2 van 2
    • Do the same for the removal of the ribbon cable connecting the motherboard to the wireless card.

  13. HP ProBook 450 G3 Fan Replacement: stap 13, afbeelding 1 van 1
    • Underneath where the keyboard was, there will be more Phillips 00 5mm screws. Remove all of them.

  14. HP ProBook 450 G3 Fan Replacement: stap 14, afbeelding 1 van 1
    • Once all of the screws are removed, you can open the laptop case itself. Begin by inserting a metal spudger between the top and bottom halves of the case. work your way all the way around slowly, unsnapping the snaps that hold the case together.

  15. HP ProBook 450 G3 Fan Replacement: stap 15, afbeelding 1 van 1
    • Once the case is separated, you can remove the metal part of the case from the laptop.

  16. HP ProBook 450 G3 Fan Replacement: stap 16, afbeelding 1 van 1
    • Once the top part of the case is removed, you can access the fan, as well as other internal parts.

  17. HP ProBook 450 G3 Fan Replacement: stap 17, afbeelding 1 van 1
    • To remove the fan, begin by unlatching this cable, as you did in step 3.

  18. HP ProBook 450 G3 Fan Replacement: stap 18, afbeelding 1 van 2 HP ProBook 450 G3 Fan Replacement: stap 18, afbeelding 2 van 2
    • Once this cable is undone, there will be a Phillips 00 2.5mm screw holding the fan in place. Remove it and the fan will be removable.

Conclusie

To reassemble your device, follow these instructions in reverse order.

8 andere personen hebben deze handleiding voltooid.

Jingyuan Zhang

Lid sinds: 10/20/17

637 Reputatie

5 handleidingen geschreven

Team

UMass Dartmouth, Team S2-G3, Julie Fall 2017 Lid van UMass Dartmouth, Team S2-G3, Julie Fall 2017

UMASSD-JULIE-F17S2G3

3 Leden

5 handleidingen geschreven

2 opmerkingen

Multiple mistakes with the screws, the one’s underneath the Keyboard are T9’s, many screw positions are wrong or missing, changed were already made.

Juan Lara - Antwoord

The 4 screws in the corners under the black rubber pads are missing in this guide!

Marc Brehm - Antwoord

Voeg opmerking toe

Weergavestatistieken:

Afgelopen 24 uren: 0

Afgelopen 7 dagen: 11

Afgelopen 30 dagen: 45

Altijd: 9,738