Inleiding
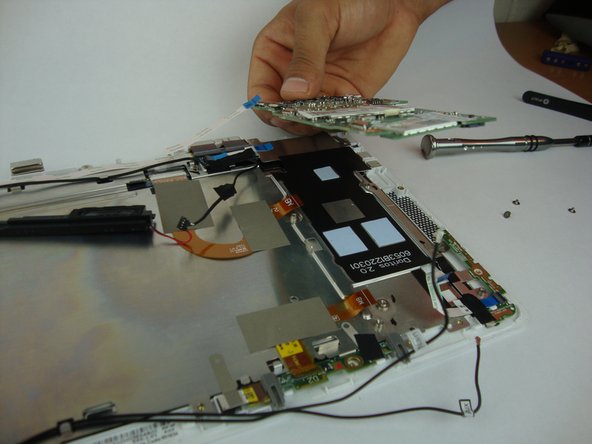
The mainboard (also called motherboard, system board, main circuit board, etc.) is the part of a computer that allows for the connection and communication between the many other components. Mainboards are usually flat and green, and have important components like the CPU, memory, and peripherals attached. A damaged or malfunctioning mainboard’s common symptoms are failure to boot, blue screen errors, randomly freezing, screen or audio failure, connected devices failure, and hardware failure.
If your HP Pavilion x2 10-n113dx laptop is experiencing these symptoms, this is a good time to replace its mainboard. This guide provides a walk-through of the steps needed to expose the mainboard to replace it with a new one.
There is no specific training required before executing the guide. Please turn off your laptop before starting and be careful when doing each step to avoid any damages to other electronic parts. Make sure you have all the necessary tools and 15 to 20 minutes to get this done.
Wat je nodig hebt
-
-
Using the blue plastic opening tool or a flat bladed tool, carefully slide the blade in between the display panel and gently slide to prop open the assembly.
-
-
-
-
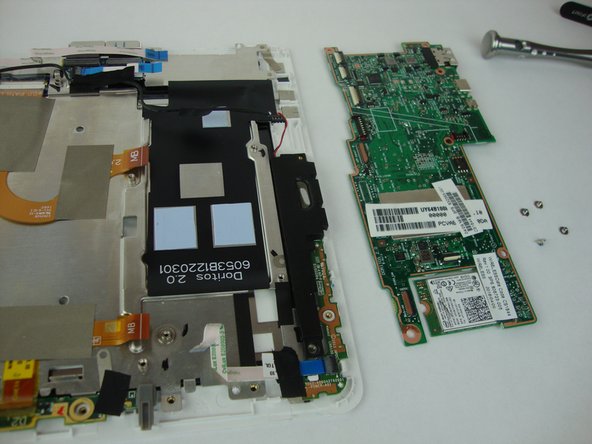
To unscrew the mainboard use the Phillips #0 Screwdriver to remove two types of screws. Three 4.15mm head, 2.35mm in length screws and three 3.32mm head, 3.99mm in length screws
-


To reassemble your device, follow these instructions in reverse order.
To reassemble your device, follow these instructions in reverse order.
Annuleren: ik heb deze handleiding niet afgemaakt.
4 andere personen hebben deze handleiding voltooid.
Team

USF Tampa, Team S13-G4, Boczar Fall 2017 Lid van USF Tampa, Team S13-G4, Boczar Fall 2017
USFT-BOCZAR-F17S13G4
4 Leden
5 handleidingen geschreven
4 opmerkingen
Is this about the WiFi card? Because I cant see the SSD in any of your pictures.
So, where is the SSD? You’ve taken apart the whole logic board, but not evidence of any SSD module from your photos….
has anyone figured out where is the SSD (eMMC) by the way ?