Inleiding
This guide will provide instructions on how to remove and replace a hard drive in an HP Pavilion g7-1365dx. Use this guide when having issues with a hard drive that is faulty.
Wat je nodig hebt
-
-
Flip the laptop so that it is upside down and opens away from you. This exposes the battery, it will be centered at the bottom of the laptop .
-
Push the switch above the battery towards the center of the laptop .
-
-
-
-
Using a Phillips size 0 screwdriver, unscrew the 2 Phillips screws.
-
Use the opening tool around the edges of the service door to loosen it and remove it.
-
-
-
Disconnect the drive connector cable from the system board by pulling the plastic tab on top of the connector.
-
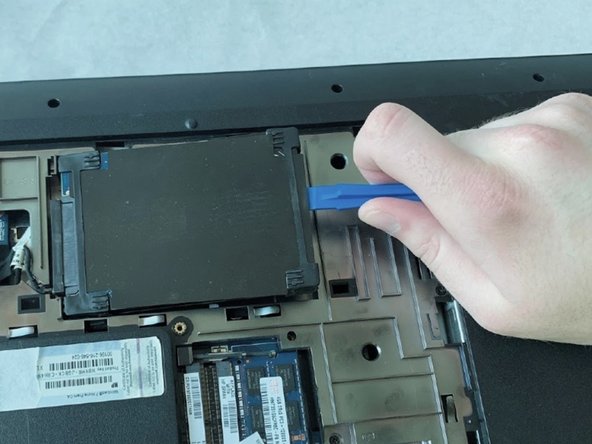
Use the opening tool to lift the hard drive out.
-
Remove the hard drive.
-


To reassemble your device, follow these instructions in reverse order.
To reassemble your device, follow these instructions in reverse order.
Team

UMass Dartmouth, Team S1-G1, Simcock Spring 2019 Lid van UMass Dartmouth, Team S1-G1, Simcock Spring 2019
UMASSD-SIMCOCK-S19S1G1
4 Leden
8 handleidingen geschreven