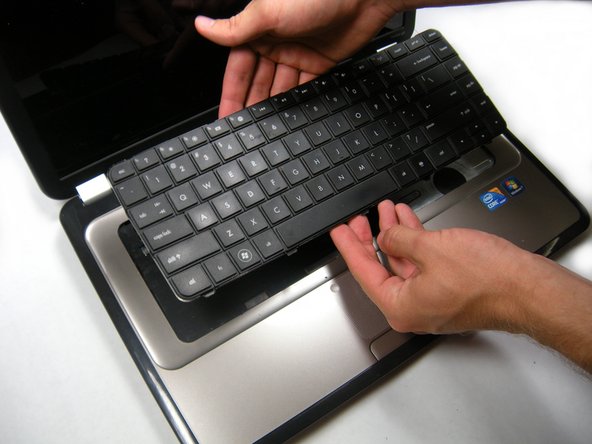
Ga door naar hoofdinhoud

HP Pavilion g6-1b79dx Keyboard Replacement

Wat je nodig hebt

  1. HP Pavilion g6-1b79dx Keyboard Replacement, Battery: stap 1, afbeelding 1 van 1
    • Flip the computer so the bottom is facing up with the battery away from you.

    • Turn off the computer and disconnect the charger.

  2. HP Pavilion g6-1b79dx Keyboard Replacement: stap 2, afbeelding 1 van 2 HP Pavilion g6-1b79dx Keyboard Replacement: stap 2, afbeelding 2 van 2
    • Slide the battery switch to the left until the battery unlatches from the base of the laptop.

  3. HP Pavilion g6-1b79dx Keyboard Replacement: stap 3, afbeelding 1 van 2 HP Pavilion g6-1b79dx Keyboard Replacement: stap 3, afbeelding 2 van 2
    • Lift the battery from its compartment away from the laptop.

  4. HP Pavilion g6-1b79dx Keyboard Replacement, Bottom Panel: stap 4, afbeelding 1 van 1
    • Loosen the two 5.7 mm screws on the bottom panel using a PH00 screwdriver.

    • The screws do not come out of the panel due to small washers. Do not try to remove the screws completely.

  5. HP Pavilion g6-1b79dx Keyboard Replacement: stap 5, afbeelding 1 van 1
    • Use the metal spudger all around the panel to pop it up from the base.

    • When working with electronics, it's important to choose a tool that's ESD-safe to avoid accidental damage to the device. The regular black nylon spudger or a plastic opening tool should be used whenever possible.

    • Using your finger is acceptable but not entirely recommended. Be gentle if you choose to use your hands.

  6. HP Pavilion g6-1b79dx Keyboard Replacement: stap 6, afbeelding 1 van 3 HP Pavilion g6-1b79dx Keyboard Replacement: stap 6, afbeelding 2 van 3 HP Pavilion g6-1b79dx Keyboard Replacement: stap 6, afbeelding 3 van 3
    • With your hands, lift the panel completely off the base of the laptop.

  7. HP Pavilion g6-1b79dx Keyboard Replacement, Keyboard: stap 7, afbeelding 1 van 1
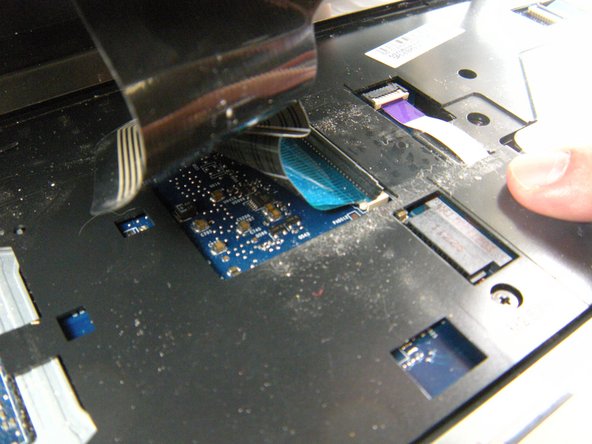
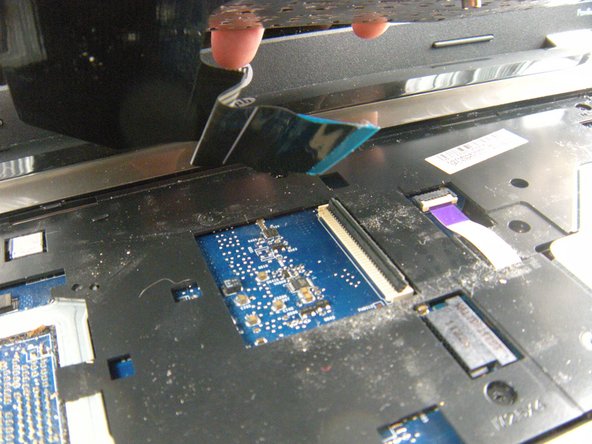
    • Using a PH 00 screwdriver, remove the screw located next to the wireless card.

    • You can remove the wireless card for this process but it is not necessary.

    • This screw has a small keyboard icon next to it.

  8. HP Pavilion g6-1b79dx Keyboard Replacement: stap 8, afbeelding 1 van 1
    • Flip the laptop over and open it.

    • The components beneath your computer may be loose and fall out when you flip the laptop. Be careful when turning it over.

  9. HP Pavilion g6-1b79dx Keyboard Replacement: stap 9, afbeelding 1 van 3 HP Pavilion g6-1b79dx Keyboard Replacement: stap 9, afbeelding 2 van 3 HP Pavilion g6-1b79dx Keyboard Replacement: stap 9, afbeelding 3 van 3
    • Insert a plastic spudger or similar pry tool, beneath the keyboard, near the "insert" key, and pop the keyboard up from the laptop.

    • When working with electronics, it's important to choose a tool that's ESD-safe to avoid accidental damage to the device. The regular black nylon spudger or a plastic opening tool should be used whenever possible.

    • Starting at the opening you just created, run your fingers around the outside of the keyboard separating it from the rest of the computer.

    • Only lift the keyboard up a few inches because it is attached to the laptop by a ribbon cable.

  10. HP Pavilion g6-1b79dx Keyboard Replacement: stap 10, afbeelding 1 van 3 HP Pavilion g6-1b79dx Keyboard Replacement: stap 10, afbeelding 2 van 3 HP Pavilion g6-1b79dx Keyboard Replacement: stap 10, afbeelding 3 van 3
    • Slightly angle the keyboard back so the ribbon connector underneath it is visible.

    • Remove the ribbon cable by using your fingers to pull up and away from the connector.

  11. HP Pavilion g6-1b79dx Keyboard Replacement: stap 11, afbeelding 1 van 1
    • With the ribbon cable detached, you can now completely remove the keyboard.

Conclusie

To reassemble your device, follow these instructions in reverse order.

9 andere personen hebben deze handleiding voltooid.

patrickhall

Lid sinds: 09/23/15

730 Reputatie

3 handleidingen geschreven

Team

Baylor, Team 10-12, Williams Fall 2015 Lid van Baylor, Team 10-12, Williams Fall 2015

BU-WILLIAMS-F15S10G12

3 Leden

8 handleidingen geschreven

0 opmerkingen

Voeg opmerking toe

Weergavestatistieken:

Afgelopen 24 uren: 1

Afgelopen 7 dagen: 11

Afgelopen 30 dagen: 42

Altijd: 6,712