Inleiding
If your HP Pavilion G6-1d16dx won't close/open correctly, you could have a faulty screen hinge. This guide walks users through the process of accessing/replacing the screen hinges so that their computer will open and close correctly.
Before following this guide, check to see if there is anything external that may be inhibiting your screen from closing correctly, or if there is any sort of dust or debris buildup in the hinges of your computer; any buildup can typically be removed with an air duster.
Before beginning, be sure that your computer is fully turned off and unplugged from any power source.
Wat je nodig hebt
-
-
Flip the computer so that the bottom side is facing up, and locate the battery above the screen hinges.
-
-
-
Unscrew the two silver screws holding the protective cover in place until they make a clicking noise.
-
-
-
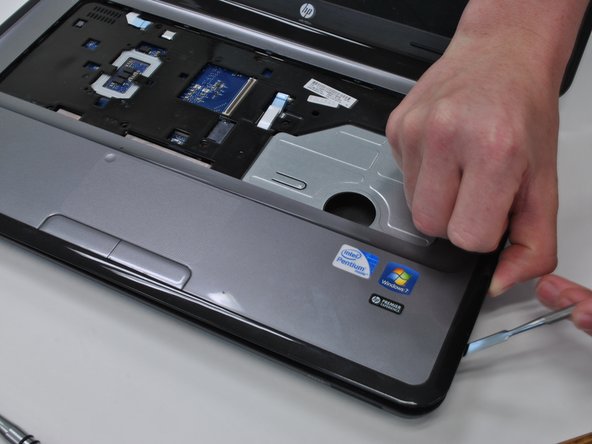
Unsnap the Cover by lifting the edge along the battery compartment.
-
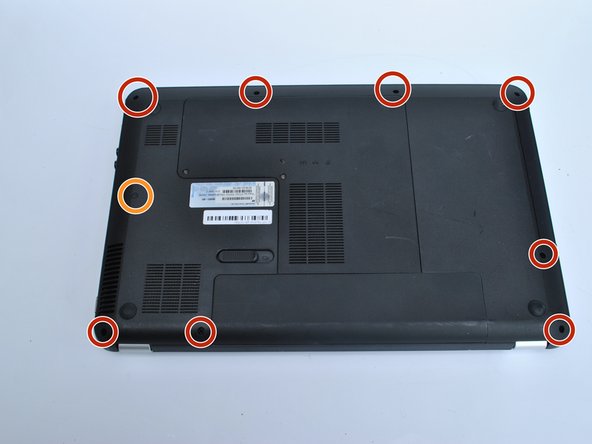
Remove all of the body screws.
-
Remove the rubber cap and the screw underneath it.
There are 10 body screws plus one that holds the hard disk cover!
“Remove the rubber cap and the screw underneath it.”
I assume you mean the rubber feet at the four corners? Which of the rubber feet hides that screw?
There are body screws under the protective hard - disk - and - memory - cover! That cover has to be removed first!
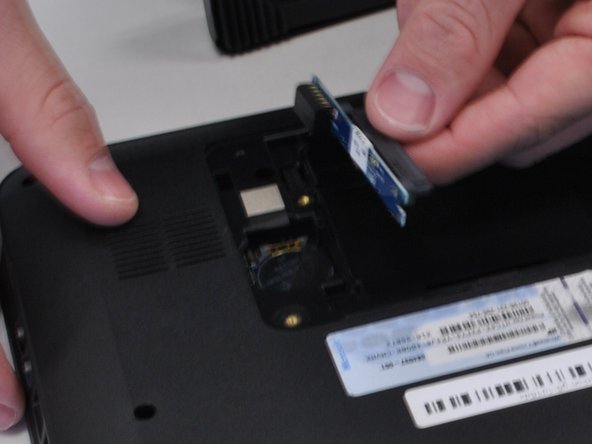
Remove the hard disk (described much to late in step 11).
There are 2 screws under the hard disk.
The memory can stay in place.
-
-
-
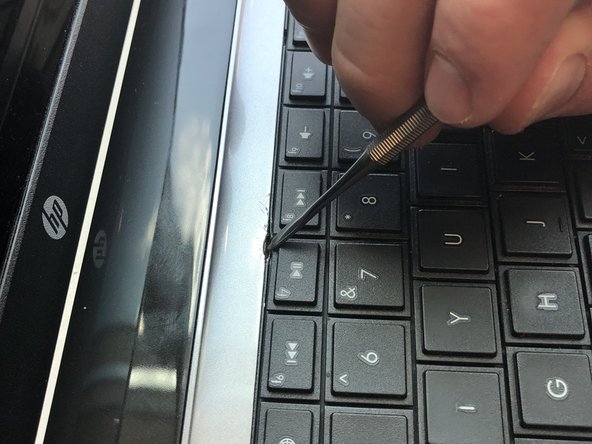
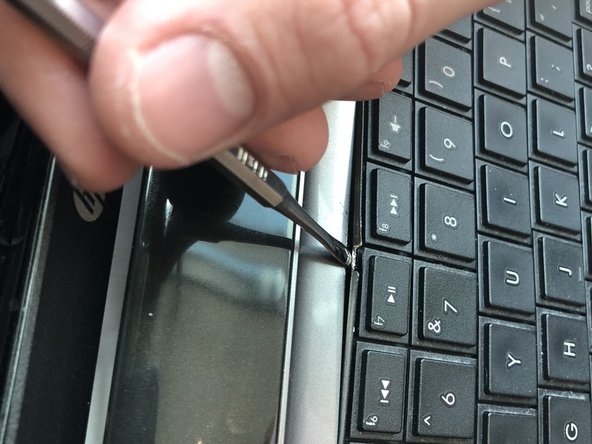
Using a metal tool, depress the center tab and pry up the keyboard by pivoting the tool towards the screen.
A plastic card (credit card or the like) is handy to keep the keyboard up while opening the nine tabs.
Make sure you did remove the screw that is at the under side between the memory compartment and the radio compartment!
A plastic card (credit card or the like) is handy to keep the keyboard up while opening the nine tabs.
The screw that is at the underside between the memory compartment and the radio compartment is the one screw holding the keyboard in place, apart from the 9 tabs.
-
-
-
-
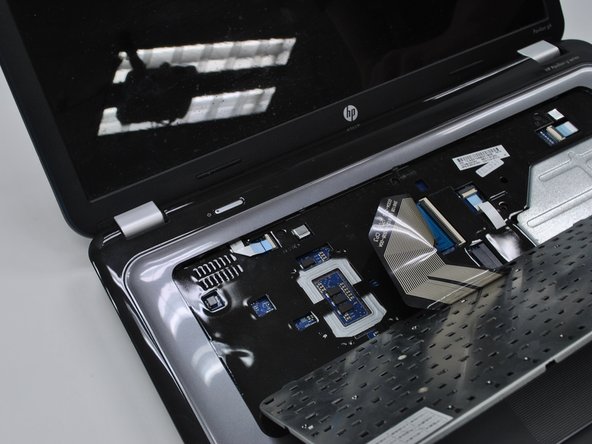
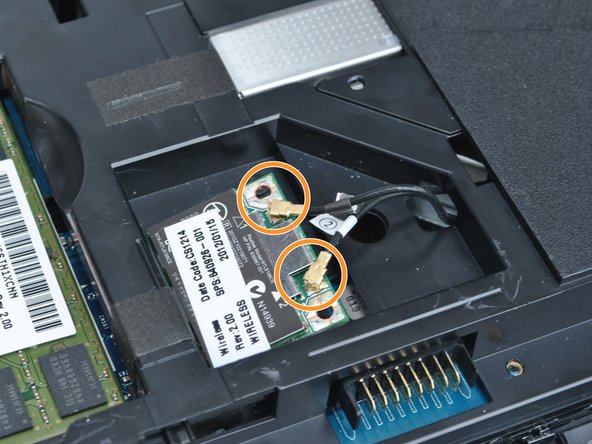
Remove the two remaining ribbon cables.
-
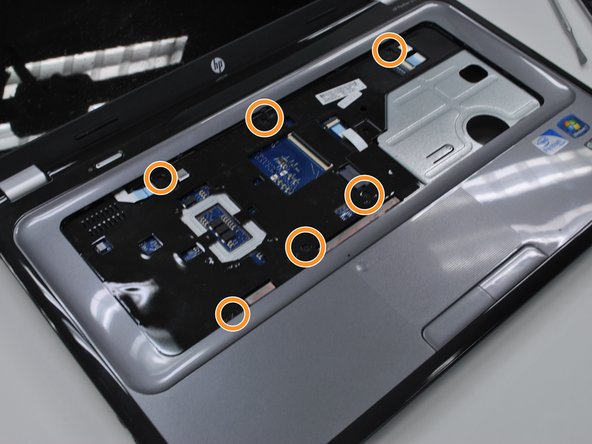
Remove the screws holding in the protective cover underneath the keyboard.
-
Pop the cover off using any flat metal tool, starting with where you took out the optical drive
“Remove the screws holding in the protective cover underneath the keyboard. “ there are 6 of them, see image
“Pop the cover off using any flat metal tool, starting with where you took out the optical drive “
When did we remove the optical drive? How?
“Remove the screws holding in the protective cover underneath the keyboard.” There is only one screw holding the cover protecting the hard disk and memory.
-
-
-
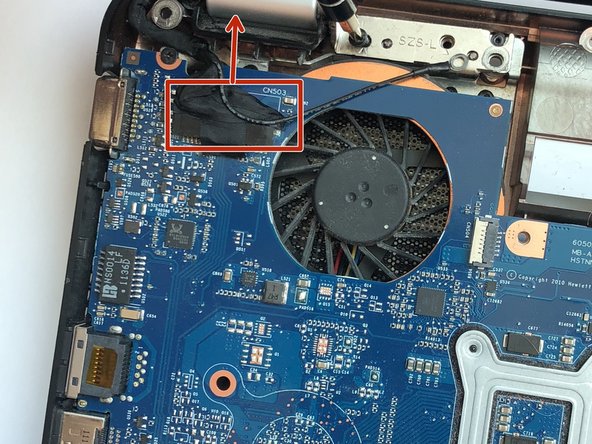
Unplug the ribbon cable on the right side of the motherboard.
Before removing the top, the dolby speaker units and their cable of have to be freed!
-
-
-
Unscrew all mother board screws and lift the motherboard out of the body.
-
-
-
Pry off the plastic surrounding the screen with any flat metal tool.
-
-
-
Use a pair of pliers to unscrew the nut and pull out the hinge.
When the issue with the hinge is: ‘it hardly moves’ it is also very hard to pull the hinge halves apart. Maybe you need to apply a solvent.
This laptop is of extremely poor building quality. Disaster lures in every badly made detail.
Here is additional info: https://www.youtube.com/watch?v=cTjSLfXM...
-


To reassemble your device, follow these instructions in reverse order.
To reassemble your device, follow these instructions in reverse order.
Annuleren: ik heb deze handleiding niet afgemaakt.
2 andere personen hebben deze handleiding voltooid.
Team

Linn Benton Community College, Team S2-G6, Johnson Spring 2018 Lid van Linn Benton Community College, Team S2-G6, Johnson Spring 2018
LBCC-JOHNSON-S18S2G6
4 Leden
8 handleidingen geschreven
Één opmerking
Not so good a manual. See my remarks.
This laptop is of extremely poor building quality. Disaster lures in every badly made detail.