Deze versie kan foutieve bewerkingen bevatten. Schakel over naar de recentste gecontroleerde momentopname.
Wat je nodig hebt
-
Deze stap is niet vertaald. Help het te vertalen
-
Step 1 – Battery: Locate the battery release slider on the bottom of the laptop and move it in the direction of the arrow to the unlock position.
-
The yellow highlighted edge of the battery should pop up slightly when the switch is moved
-
-
Deze stap is niet vertaald. Help het te vertalen
-
Step 2: Using the edge of the battery that has popped up, lift the battery out of the computer.
-
-
Deze stap is niet vertaald. Help het te vertalen
-
Remove the 3.5 mm diameter, 7 mm long screw with your Phillips PH1 screwdriver.
-
-
Deze stap is niet vertaald. Help het te vertalen
-
Grab the raised edge of the cover lift up. This will separate the cover from the laptop.
-
Put the cover and screw to the.
-
-
Deze stap is niet vertaald. Help het te vertalen
-
With your fingers, grab the clear tab.
-
Pull right first, and then upwards (towards you).
-
-
Deze stap is niet vertaald. Help het te vertalen
-
With the laptop upside down, locate the three screws on the wireless card cover and unscrew the screws.
-
All three screws will have a 3.5 mm diameter head.
-
Two of the screws will be silver, 7mm in length, and will stay attached to the cover.
-
One screw will be black, 13mm in length, and will separate from the cover. Set this screw aside.
-
-
Deze stap is niet vertaald. Help het te vertalen
-
Grab one of the edges to the cover and lift up (towards you).
-
Set the cover to the side.
-
-
Deze stap is niet vertaald. Help het te vertalen
-
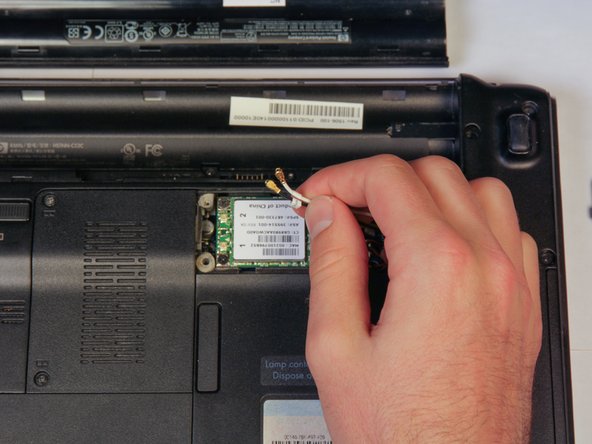
Using your hand, pull the black and white antenna wires upwards.
-
-
Deze stap is niet vertaald. Help het te vertalen
-
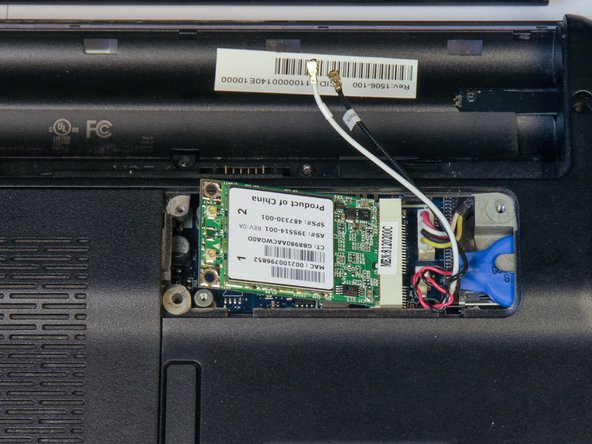
Locate the two black screws connecting the wireless card to the laptop. They will have a 3.5 mm diameter head and be 4mm long. Remove the screws.
-
-
Deze stap is niet vertaald. Help het te vertalen
-
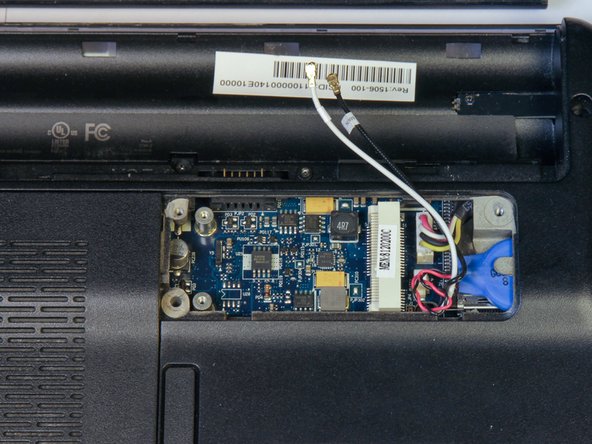
Grab the sides of the wireless card and pull it up and to the left to disconnect from the laptop.
-
-
Deze stap is niet vertaald. Help het te vertalen
-
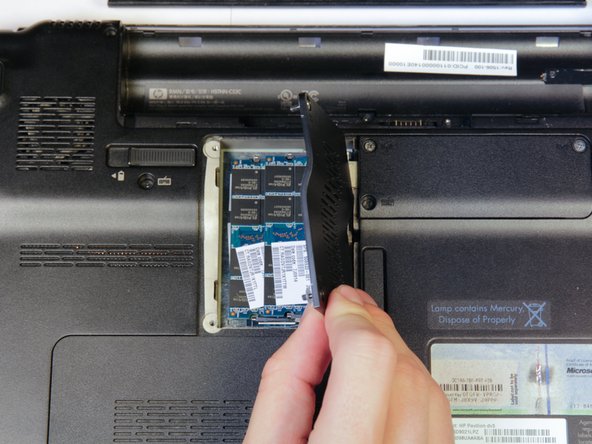
Remove the two 3.5 mm diameter head and 7 mm long screws using the Philips PH1 screwdriver.
-
Set the cover with attached screws to the side.
-
The RAM will now be exposed
-
-
Deze stap is niet vertaald. Help het te vertalen
-
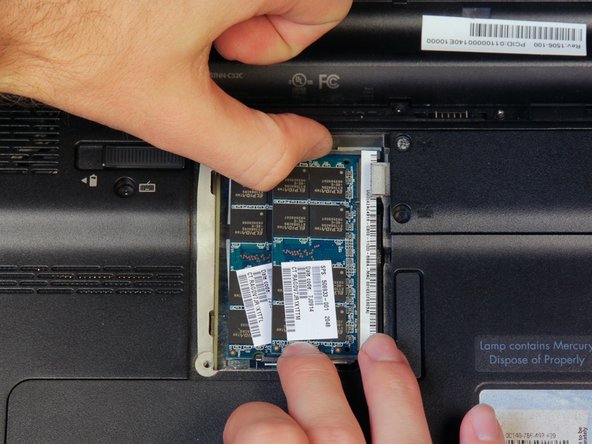
Find the two clips located on each side of the RAM.
-
Using both hands, simultaneously grab each clip and open them away from the RAM stick.
-
-
-
Deze stap is niet vertaald. Help het te vertalen
-
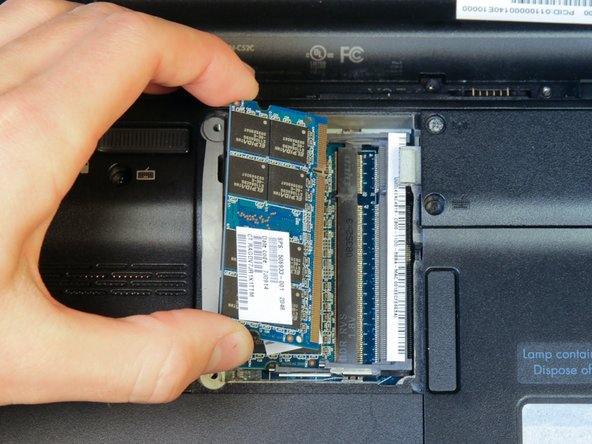
Using one hand, pull the RAM up and to the left to remove it.
-
-
Deze stap is niet vertaald. Help het te vertalen
-
If there is a second RAM module present (as shown), repeat steps 2 and 3 to remove it.
-
-
Deze stap is niet vertaald. Help het te vertalen
-
Locate and remove all 12 black screws on the back cover. They have a 3.5 mm diameter head and are 13 mm in length.
-
-
Deze stap is niet vertaald. Help het te vertalen
-
Locate and remove the 4 silver screws beneath where the hard drive was located. They have a 3.5 mm diameter head and will be 3mm in length.
-
-
Deze stap is niet vertaald. Help het te vertalen
-
Locate and remove the three black screws beneath where the battery was located.
-
-
Deze stap is niet vertaald. Help het te vertalen
-
Turn the laptop over so that it is right side up and the screen is open.
-
-
Deze stap is niet vertaald. Help het te vertalen
-
Locate the top trim piece, pull it up from the edges that are next to the keyboard, and rotate it open and away from you as shown.
-
Lean the trim piece against the screen.
-
-
Deze stap is niet vertaald. Help het te vertalen
-
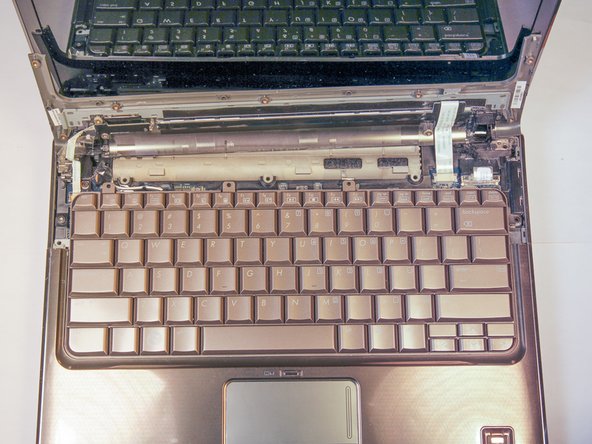
Grab the top corners of the keyboard and pull the top towards you.
-
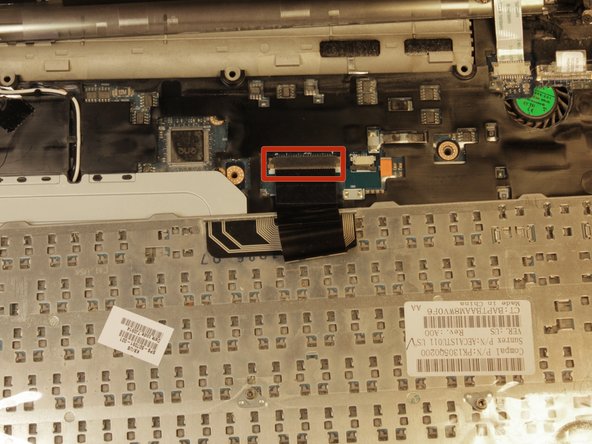
Locate the black connector holding the keyboard ribbon cable.
-
Use the screwdriver or your finger to slide the brown locks on each side of the black connector towards you.
-
-
Deze stap is niet vertaald. Help het te vertalen
-
Grab the ribbon cable and slide it towards you, out of the black connector.
-
Lift the keyboard up and set it to the side.
-
-
Deze stap is niet vertaald. Help het te vertalen
-
Locate the clip for the right ribbon cable attached to the top trim piece that was previously lifted up and push the locks away from you to open them.
-
Once both locks are opened, slide the ribbon cable away from you and out of the clip.
-
-
Deze stap is niet vertaald. Help het te vertalen
-
Locate the clip for the left ribbon cable attached to the top trim piece that was previously lifted up. Repeat the process for the right ribbon cable in the previous step.
-
-
Deze stap is niet vertaald. Help het te vertalen
-
Locate and remove the 3 black 5mm long screws and set them aside. They will have a 3.5 mm diameter head.
-
Locate the four connectors holding the four ribbon cables.
-
Slide the lock clips down for each connector (as in step 9) and slide each ribbon cable out.
-
-
Deze stap is niet vertaald. Help het te vertalen
-
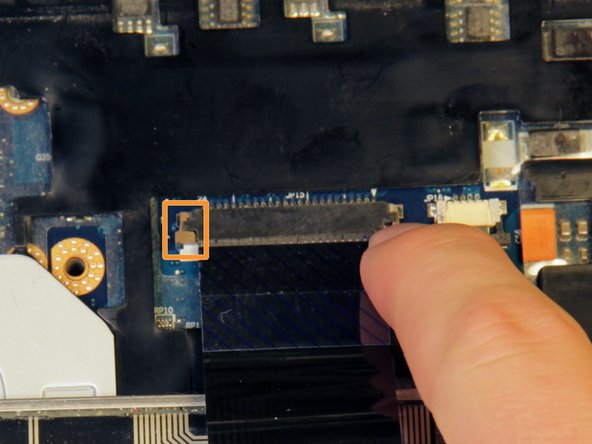
Locate the connector holding the black screen cable and pull the clear tab up to detach the cable.
-
Pull the black cable out of the two clips holding it to the frame.
-
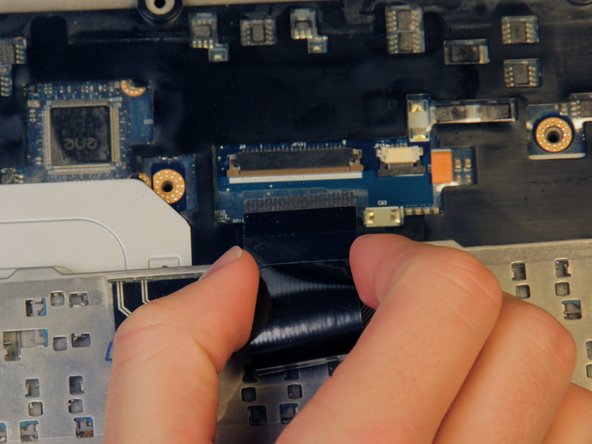
Once the cable is detached, lift the screen straight up out of the laptop to remove it. Set the screen down right above the laptop body, facing up.
-
-
Deze stap is niet vertaald. Help het te vertalen
-
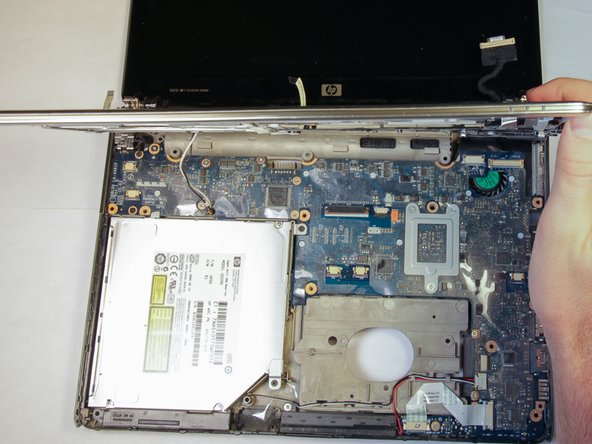
Grab the bottom part of the palm rest and pull it up from the base of the laptop. Continue to pull up around the piece until all the clips release.
-
Rotate the piece up and away from you.
-
Lift the piece off the laptop and set it aside
-
-
Deze stap is niet vertaald. Help het te vertalen
-
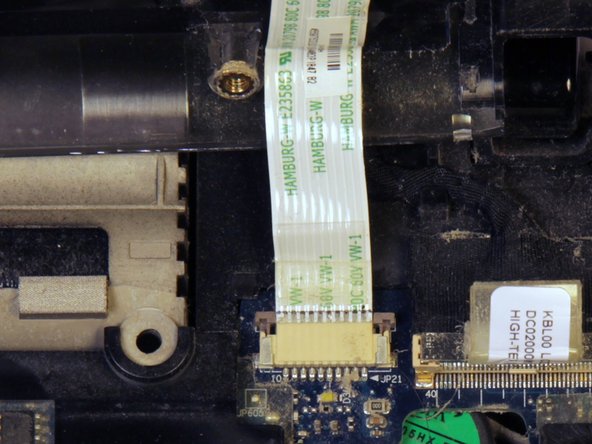
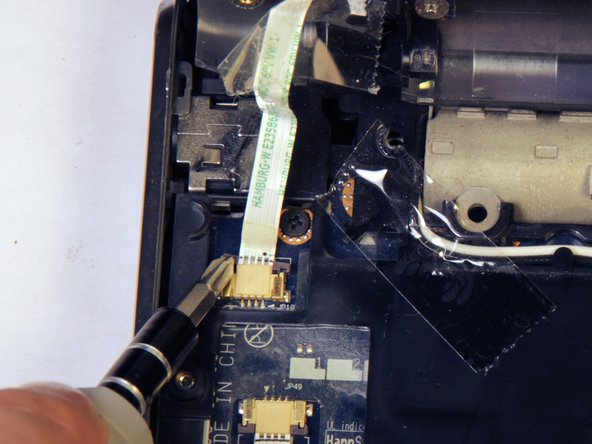
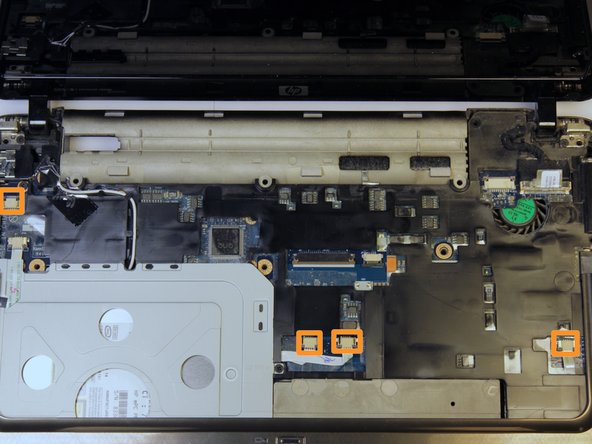
Locate the connector for the ribbon cable at the bottom right of the laptop and push each lock to the left using a screwdriver or your finger.
-
Once both locks are opened, slide the ribbon cable to the left and out of the clip.
-
-
Deze stap is niet vertaald. Help het te vertalen
-
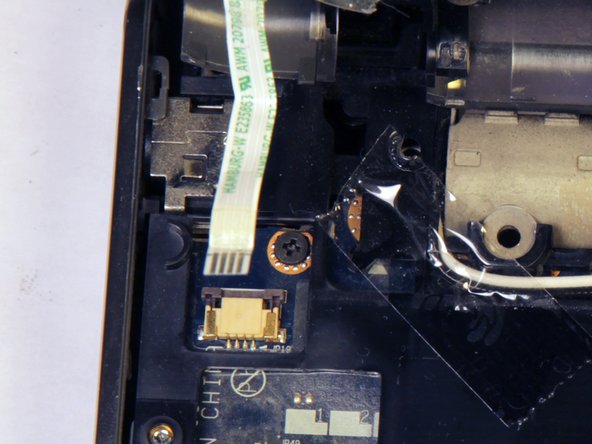
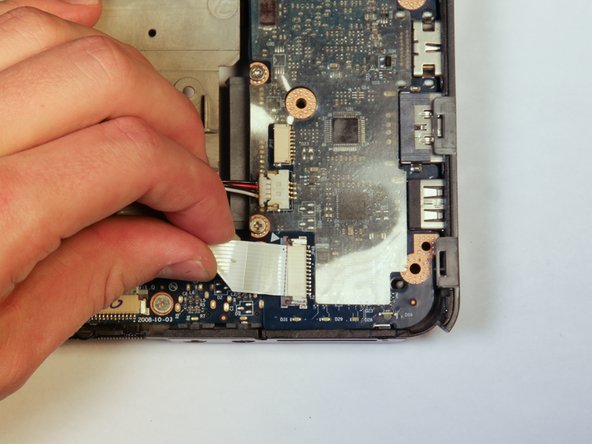
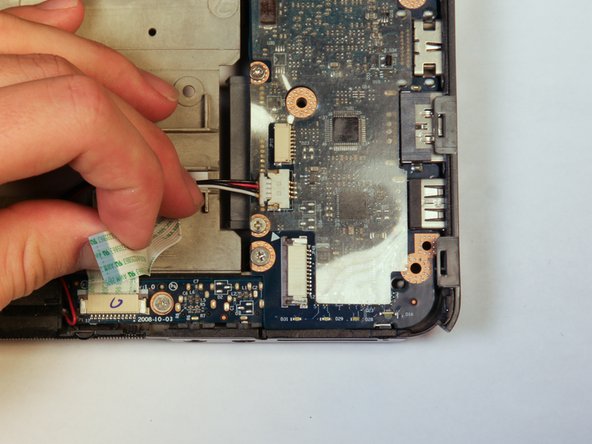
Locate the small white connector holding red, white, and black cables and pull it to the left to remove it from the clip.
-
Pull the clip to the left to remove it from the connector.
-
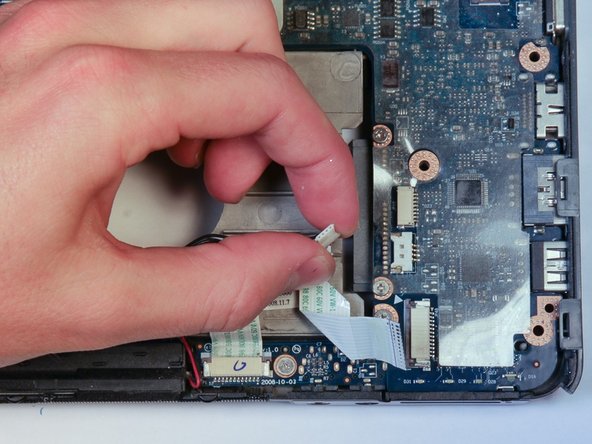
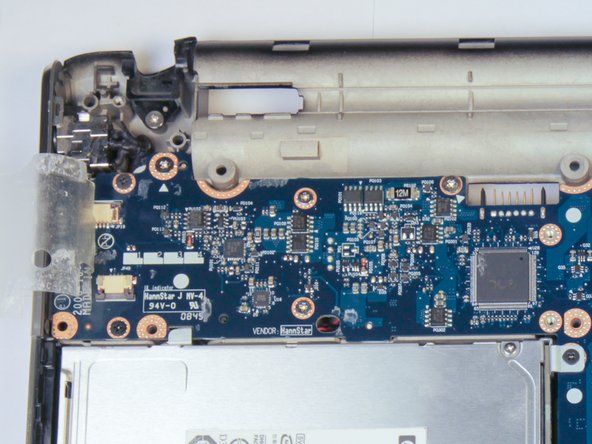
There may be a plastic film covering the motherboard. Start at the front right corner (as pictured) and peel the film off, leaving about one cm of the top, left edge attached.
-
-
Deze stap is niet vertaald. Help het te vertalen
-
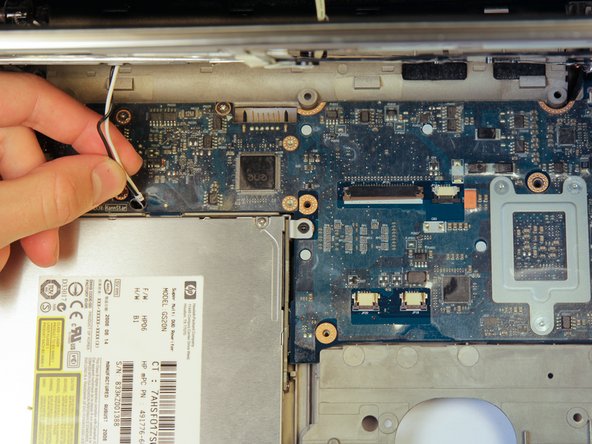
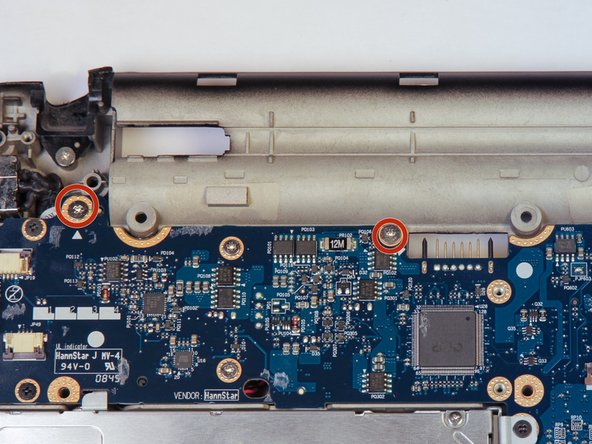
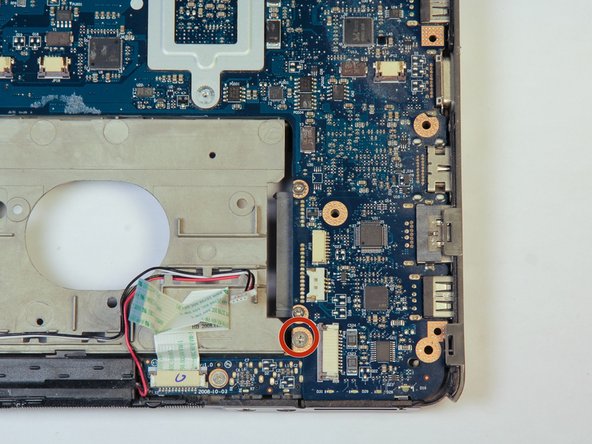
Locate and unscrew the three, silver, 3.5mm diameter head, 3mm long screws on the motherboard.
-
-
Deze stap is niet vertaald. Help het te vertalen
-
Locate and remove the two black longscrews holding the CD drive. They will be 5 mm long and have a 3.5 mm diameter head.
-
-
Deze stap is niet vertaald. Help het te vertalen
-
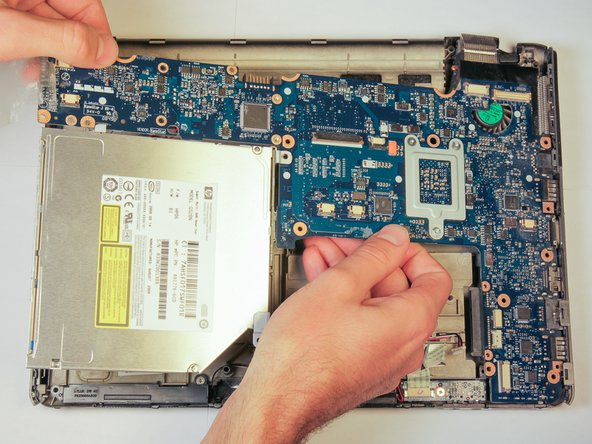
Lift from the top left side of the motherboard and the bottom right lip of the CD drive.
-
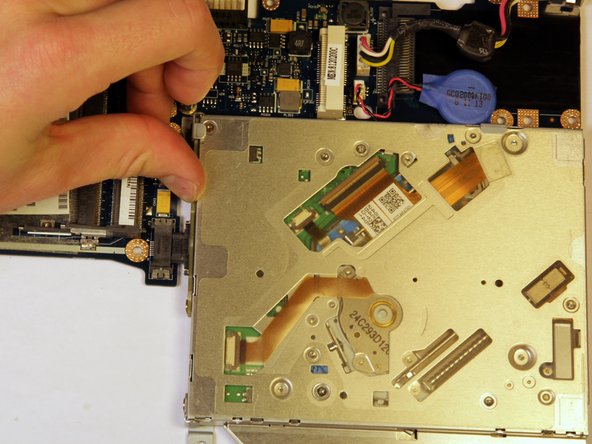
Lift the whole assembly up and slide it to the left to remove it from the laptop.
-
Move the bottom case out of the way and then turn the motherboard assembly over and set it down in front of you.
-
-
Deze stap is niet vertaald. Help het te vertalen
-
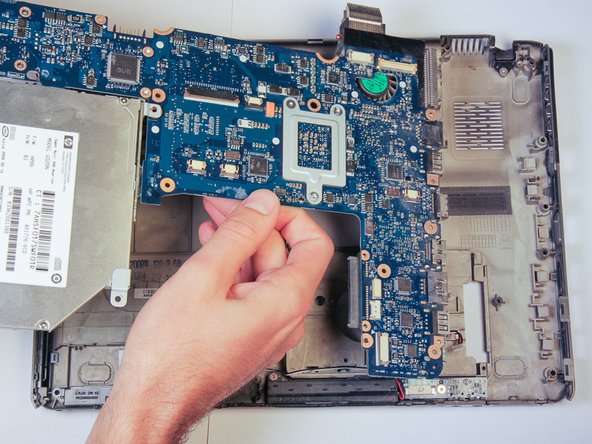
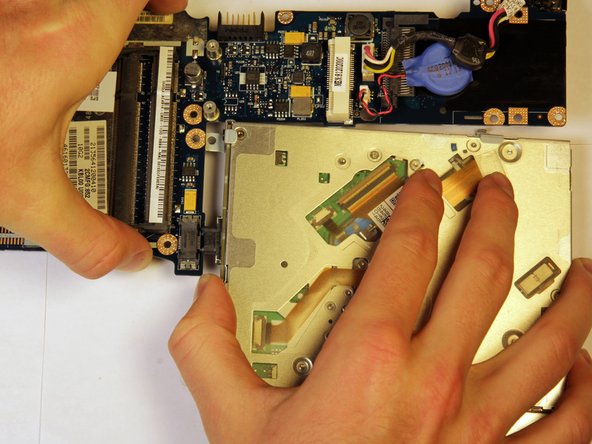
Slide the CD drive to the right until it hits a stop.
-
Hold the drive down and lift the motherboard up and away from the drive.
-
-
Deze stap is niet vertaald. Help het te vertalen
-
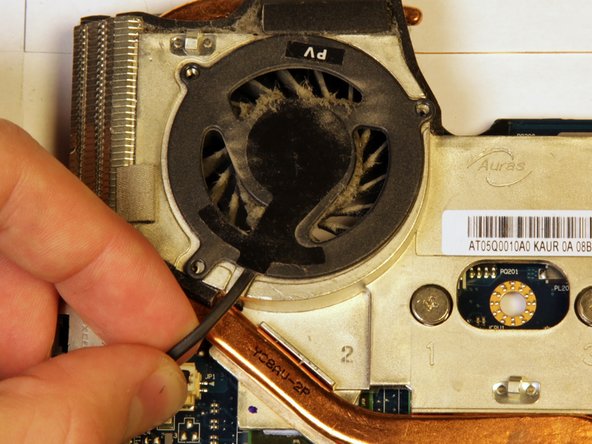
Locate and remove the three 3.5 mm diameter and 2.5mm long screws holding the fan in place.
-
Locate the plug for the fan and pull up on it with your fingers to disconnect it.
-
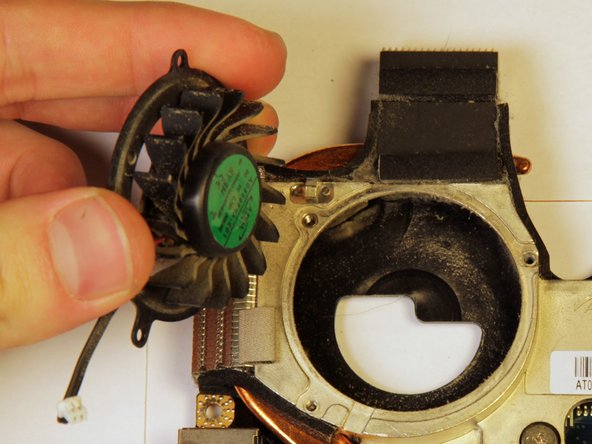
Lift the fan out.
-
-
Deze stap is niet vertaald. Help het te vertalen
-
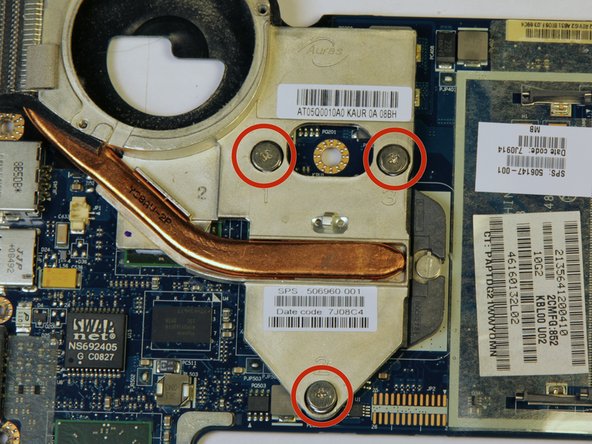
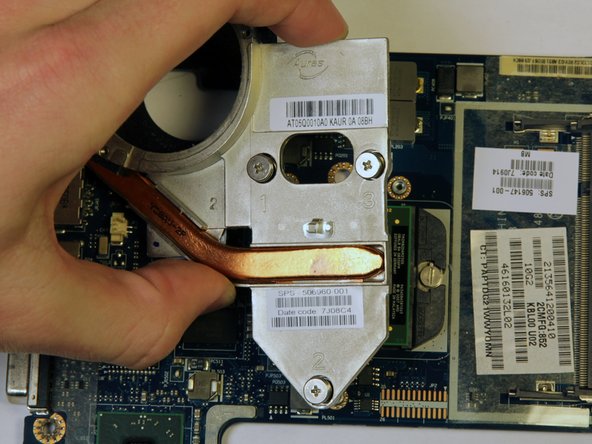
Locate and unscrew the three large screws on the heatsink assembly. They will have a 3.5 mm diameter head and be 8 mm long.
-
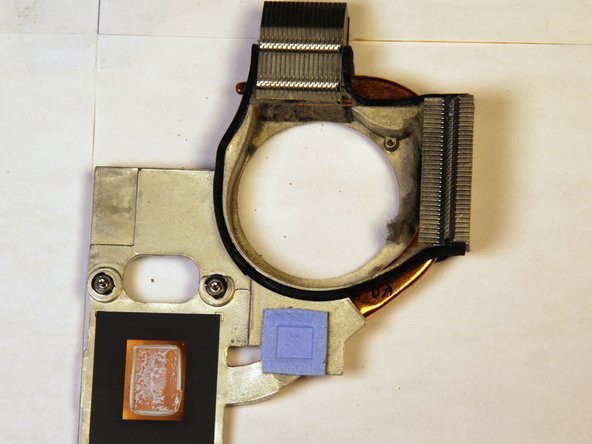
Carefully remove the heatsink and set it upside down to avoid damaging the component.
-


Annuleren: ik heb deze handleiding niet afgemaakt.
12 andere personen hebben deze handleiding voltooid.
Team

Cal Poly, Team 14-10, Forte Fall 2013 Lid van Cal Poly, Team 14-10, Forte Fall 2013
CPSU-FORTE-F13S14G10
4 Leden
5 handleidingen geschreven