Ga door naar hoofdinhoud

HP Pavilion 15-d035dx Disk Drive Replacement

Wat je nodig hebt

  1. HP Pavilion 15-d035dx Disk Drive Replacement, Battery: stap 1, afbeelding 1 van 3 HP Pavilion 15-d035dx Disk Drive Replacement, Battery: stap 1, afbeelding 2 van 3 HP Pavilion 15-d035dx Disk Drive Replacement, Battery: stap 1, afbeelding 3 van 3
    • Switch the first lock, with the padlock icon, to the open position.

    • Then hold the second lock with the battery icon to the open position, while sliding out the battery pack.

  2. HP Pavilion 15-d035dx Disk Drive Replacement, Back Panel: stap 2, afbeelding 1 van 1
    • Flip the laptop so that the back is facing upwards.

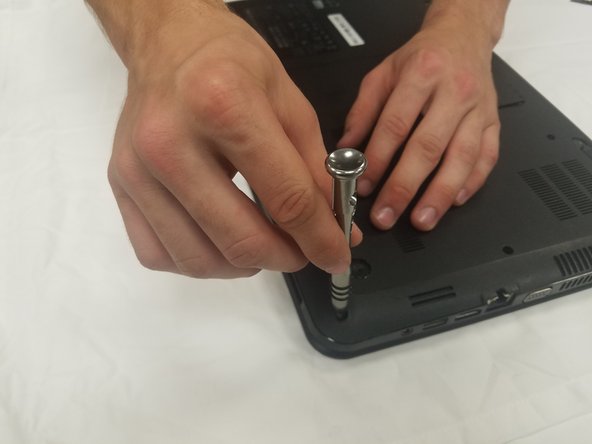
    • Locate the small screw on the back that holds the "L" shaped panel.

    • Using a 0 Phillip Screwdriver (4.0x4.7mm sized screw), unscrew the screw. It will not become detached from the panel but it will allow you to remove the back panel.

  3. HP Pavilion 15-d035dx Disk Drive Replacement: stap 3, afbeelding 1 van 3 HP Pavilion 15-d035dx Disk Drive Replacement: stap 3, afbeelding 2 van 3 HP Pavilion 15-d035dx Disk Drive Replacement: stap 3, afbeelding 3 van 3
    • Using a plastic opening tool, pry the back panel from the computer, going all the way around it.

    • This will take a good amount of force and you will hear clicking noises as you snap each of the connections out of place.

  4. HP Pavilion 15-d035dx Disk Drive Replacement: stap 4, afbeelding 1 van 1
    • Once the back panel is completely removed you will have access to the RAM and many other connections in the computer.

  5. HP Pavilion 15-d035dx Disk Drive Replacement, Disk Drive: stap 5, afbeelding 1 van 1
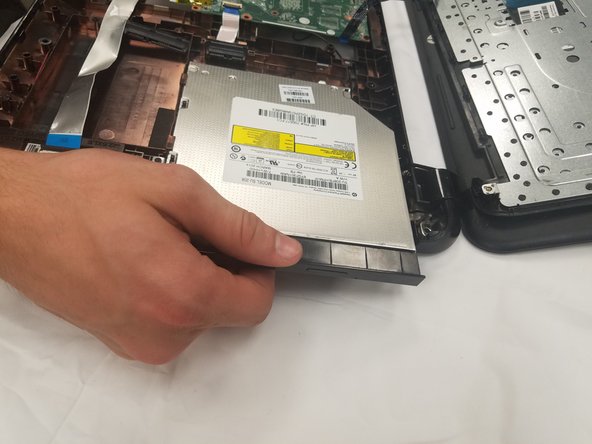
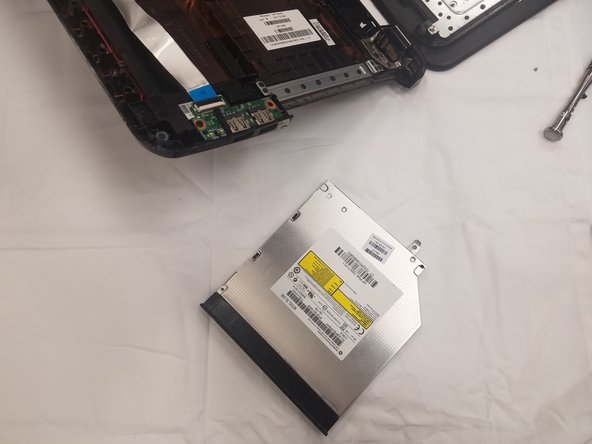
    • Once you have removed the panel there is one screw (2.5x6mm) that will need to be unscrewed.

  6. HP Pavilion 15-d035dx Disk Drive Replacement: stap 6, afbeelding 1 van 2 HP Pavilion 15-d035dx Disk Drive Replacement: stap 6, afbeelding 2 van 2
    • After unscrewing the back screw for the disc drive another 14 screws (2.5x6.0mm) will need to be removed.

  7. HP Pavilion 15-d035dx Disk Drive Replacement: stap 7, afbeelding 1 van 1
    • Now flip the computer back to right side up.

    • Using the plastic opening tool from iFixit to pry open the top half of laptop case. Take off the top half.

  8. HP Pavilion 15-d035dx Disk Drive Replacement: stap 8, afbeelding 1 van 2 HP Pavilion 15-d035dx Disk Drive Replacement: stap 8, afbeelding 2 van 2
    • Now seeing the inside of the laptop. Unscrew one more screw (2.0x3.0mm).

  9. HP Pavilion 15-d035dx Disk Drive Replacement: stap 9, afbeelding 1 van 3 HP Pavilion 15-d035dx Disk Drive Replacement: stap 9, afbeelding 2 van 3 HP Pavilion 15-d035dx Disk Drive Replacement: stap 9, afbeelding 3 van 3
    • Now you should be able slide the disk drive out to the side.

    • Do not pull up on the disk drive. This could damage the plug ins and/or the case that help holds it all together.

Conclusie

To reassemble your device, follow these instructions in reverse order.

2 andere personen hebben deze handleiding voltooid.

John Atkins

Lid sinds: 09/25/17

273 Reputatie

2 handleidingen geschreven

0 opmerkingen

Voeg opmerking toe

Weergavestatistieken:

Afgelopen 24 uren: 2

Afgelopen 7 dagen: 4

Afgelopen 30 dagen: 9

Altijd: 1,094