Ga door naar hoofdinhoud

HP Mini 1000 WWAN Board Replacement

Wat je nodig hebt

  1. HP Mini 1000 WWAN Board Replacement, Battery: stap 1, afbeelding 1 van 2 HP Mini 1000 WWAN Board Replacement, Battery: stap 1, afbeelding 2 van 2
    • With the case closed, place the Mini 1000 top-side down on a flat surface.

    • Push both of the battery release latches toward each other.

  2. HP Mini 1000 WWAN Board Replacement: stap 2, afbeelding 1 van 1
    • Lift the battery out of the Mini 1000 from the edge closest to the release latches.

  3. HP Mini 1000 WWAN Board Replacement, Keyboard: stap 3, afbeelding 1 van 1
    • Remove the following two screws:

    • One 6 mm Phillips screw

    • One 4 mm Phillips screw

  4. HP Mini 1000 WWAN Board Replacement: stap 4, afbeelding 1 van 3 HP Mini 1000 WWAN Board Replacement: stap 4, afbeelding 2 van 3 HP Mini 1000 WWAN Board Replacement: stap 4, afbeelding 3 van 3
    • To facilitate the removal of the keyboard, it is recommended to push the keyboard outwards with one hand through the opening (highlighted in the third picture) located on the backside of the Mini 1000.

    • While pushing through the opening with one hand, grasp the left upper edge with the other hand and slightly pull the keyboard towards you.

    • Once an opening has been established, grasp the keyboard and slowly lift it upwards along the upper perimeter of the top edge.

  5. HP Mini 1000 WWAN Board Replacement: stap 5, afbeelding 1 van 1
    • Lift the keyboard out of the upper case, minding the cable that is still connecting it to the motherboard.

  6. HP Mini 1000 WWAN Board Replacement: stap 6, afbeelding 1 van 1
    • Use your fingernail or the flat end of a spudger to flip up the retaining flap on the keyboard cable ZIF socket.

    • Be sure you are prying up on the retaining flap, not the socket itself.

    • Pull the cable out of its socket and remove the keyboard.

  7. HP Mini 1000 WWAN Board Replacement, Hard Drive: stap 7, afbeelding 1 van 2 HP Mini 1000 WWAN Board Replacement, Hard Drive: stap 7, afbeelding 2 van 2
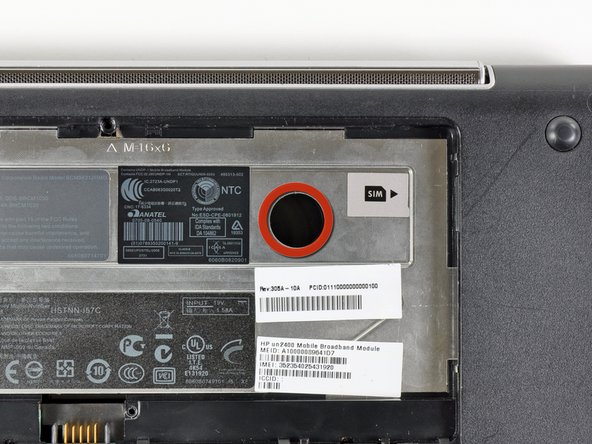
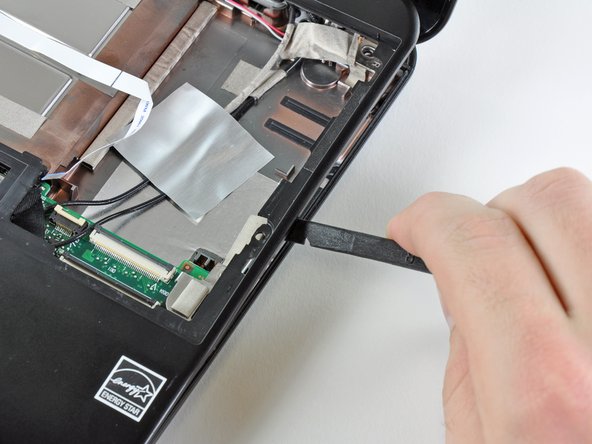
    • Use your fingernail or the flat end of a spudger to flip up the retaining flap on the SIM card ribbon cable ZIF socket.

    • Be sure you are prying up on the retaining flap, not the socket itself.

    • Pull the SIM card ribbon cable out of its socket and peel it off the top of the hard drive enclosure.

  8. HP Mini 1000 WWAN Board Replacement: stap 8, afbeelding 1 van 1
    • Use your fingernail or the flat end of a spudger to flip up the retaining flap on the hard drive cable ZIF socket.

    • Be sure you are prying up on the retaining flap, not the socket itself.

  9. HP Mini 1000 WWAN Board Replacement: stap 9, afbeelding 1 van 1
    • Remove the two 4.5 mm Phillips screws securing the hard drive to the lower case.

  10. HP Mini 1000 WWAN Board Replacement: stap 10, afbeelding 1 van 2 HP Mini 1000 WWAN Board Replacement: stap 10, afbeelding 2 van 2
    • Lift the hard drive up and out of the lower case, being careful not to damage its cable in the process.

  11. HP Mini 1000 WWAN Board Replacement, Upper Case: stap 11, afbeelding 1 van 1
    • Using the sharp tip of a spudger, pry and remove the four plastic screw covers from the underside of the HP Mini 1000.

    • There are three different variations of the covers:

    • The two bottom covers are short in height and are notched to prevent incorrect insertion

    • The upper right cover is taller in height and is notched.

    • The upper left cover is taller in height and is not notched.

  12. HP Mini 1000 WWAN Board Replacement: stap 12, afbeelding 1 van 1
    • Remove the four 7 mm Phillips screws that secure the upper case to the lower case.

  13. HP Mini 1000 WWAN Board Replacement: stap 13, afbeelding 1 van 1
    • Flip the computer over and open the display.

    • Remove the two 4.5 mm Phillips screws securing the upper case to the lower case.

  14. HP Mini 1000 WWAN Board Replacement: stap 14, afbeelding 1 van 2 HP Mini 1000 WWAN Board Replacement: stap 14, afbeelding 2 van 2
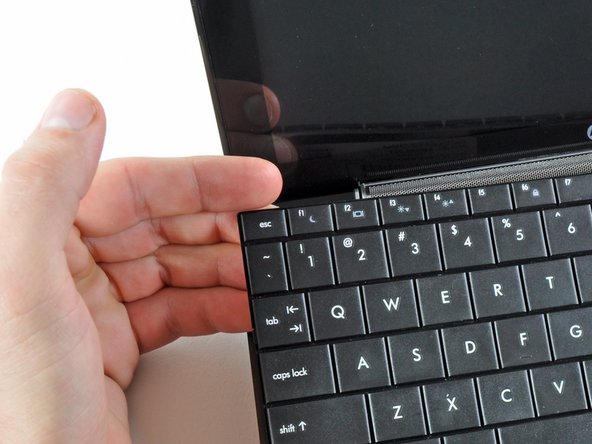
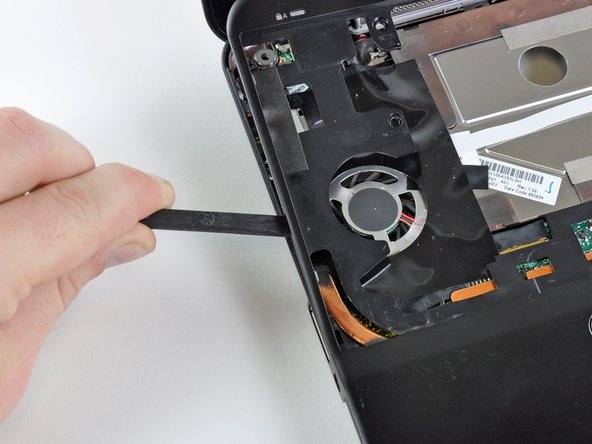
    • Wedge the flat end of a spudger in between the upper case and lower case near the bottom right corner of the display.

    • Carefully pry and rock the spudger upwards to create a small gap between the upper case and lower case.

    • Continue the previously described motion along the right edge of the upper case to release the clips securing the upper case to the lower case.

  15. HP Mini 1000 WWAN Board Replacement: stap 15, afbeelding 1 van 2 HP Mini 1000 WWAN Board Replacement: stap 15, afbeelding 2 van 2
    • Repeat the same procedure as mentioned in the previous step to release the clips along the left side of the upper case.

  16. HP Mini 1000 WWAN Board Replacement: stap 16, afbeelding 1 van 1
    • Grasp the upper case and carefully lift it slightly upwards, freeing it from any remaining clips.

    • The upper case is still attached via the TouchPad ribbon cable that is connected to the motherboard. Do not remove it completely just yet.

  17. HP Mini 1000 WWAN Board Replacement: stap 17, afbeelding 1 van 1
    • Lay the upper case on top of the upper portion of the motherboard.

    • Use your fingernail or the flat end of a spudger to flip up the retaining flap on the TouchPad cable ZIF socket.

    • Be sure you are prying up on the retaining flap, not the socket itself.

    • Pull the TouchPad ribbon cable out of its socket.

    • Remove the upper case from the HP Mini 1000.

  18. HP Mini 1000 WWAN Board Replacement, WWAN Board: stap 18, afbeelding 1 van 2 HP Mini 1000 WWAN Board Replacement, WWAN Board: stap 18, afbeelding 2 van 2
    • If present, carefully remove the piece of tape covering the WWAN board.

  19. HP Mini 1000 WWAN Board Replacement: stap 19, afbeelding 1 van 2 HP Mini 1000 WWAN Board Replacement: stap 19, afbeelding 2 van 2
    • Pry the WWAN antenna connectors (2 total) up off the WWAN board.

    • During reassembly, remember to correctly connect the antenna cables to their respective terminals. The red labeled antenna is connected to the "MAIN" terminal and the blue labeled antenna is connected to the "AUX" terminal.

  20. HP Mini 1000 WWAN Board Replacement: stap 20, afbeelding 1 van 3 HP Mini 1000 WWAN Board Replacement: stap 20, afbeelding 2 van 3 HP Mini 1000 WWAN Board Replacement: stap 20, afbeelding 3 van 3
    • Remove the single 3 mm Phillips screw securing the WWAN metal bracket and WWAN board to the motherboard.

    • During reassembly, before securing the WWAN board to the upper case, be sure the metal bracket is correctly placed (as highlighted in the second picture).

    • Be cautious of the metal bracket's displacement. It can easily become lost during disassembly.

  21. HP Mini 1000 WWAN Board Replacement: stap 21, afbeelding 1 van 2 HP Mini 1000 WWAN Board Replacement: stap 21, afbeelding 2 van 2
    • Upon removing the Phillips screw that secures the WWAN board to the motherboard, the WWAN board should pop up from its left side.

    • Grasp the WWAN board and pull it straight out of its socket on the motherboard.

Conclusie

To reassemble your device, follow these instructions in reverse order.

2 andere personen hebben deze handleiding voltooid.

0 opmerkingen

Voeg opmerking toe

Weergavestatistieken:

Afgelopen 24 uren: 0

Afgelopen 7 dagen: 0

Afgelopen 30 dagen: 4

Altijd: 3,847