Ga door naar hoofdinhoud
Word lid van de reparatiegemeenschap - Account aanmaken

HP Folio 13t-1000 Cooling Fan Replacement

Wat je nodig hebt

    1. HP Folio 13t-1000 Cooling Fan Replacement, Keyboard: stap 1, afbeelding 1 van 2 HP Folio 13t-1000 Cooling Fan Replacement, Keyboard: stap 1, afbeelding 2 van 2
      • Use an antistatic wrist wrap, or periodically touch unpainted metal to minimize the risk of damaging the laptop by electrostatic shock.

      • Use a PH1 screw head to remove the 16, 6mm screws from the bottom case housing of the laptop.

      Vraag FixBot

      Voeg opmerking toe

    2. HP Folio 13t-1000 Cooling Fan Replacement: stap 2, afbeelding 1 van 3 HP Folio 13t-1000 Cooling Fan Replacement: stap 2, afbeelding 2 van 3 HP Folio 13t-1000 Cooling Fan Replacement: stap 2, afbeelding 3 van 3
      • This step requires unlocking the very fragile plastic clips along the frame; take care not to damage them.

      • Slide the spudger with a twisting motion along the entire perimeter of the laptop until the top cover is separated from the frame of the device.

      Vraag FixBot

      Voeg opmerking toe

    3. HP Folio 13t-1000 Cooling Fan Replacement: stap 3, afbeelding 1 van 1
      • Using the flat portion of the plastic spudger, push the corner of the black surface until the first clip unlocks.

      • The top right corner of the keyboard should now be sticking out slightly.

      • Repeat the same process for the top left corner.

      Vraag FixBot

      Voeg opmerking toe

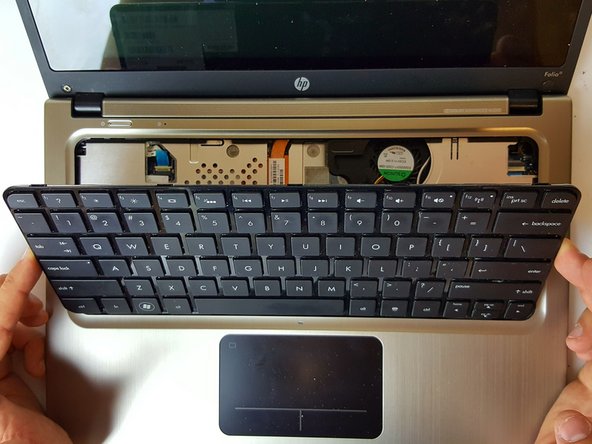
    4. HP Folio 13t-1000 Cooling Fan Replacement: stap 4, afbeelding 1 van 2 HP Folio 13t-1000 Cooling Fan Replacement: stap 4, afbeelding 2 van 2
      • Slide the keyboard up and towards the screen just enough to separate the keyboard from the top cover.

      Vraag FixBot

      Voeg opmerking toe

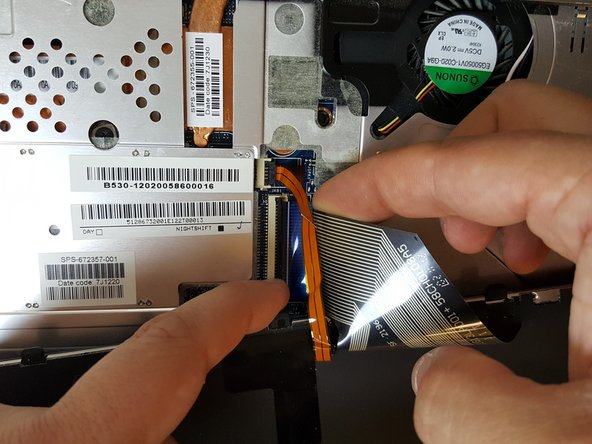
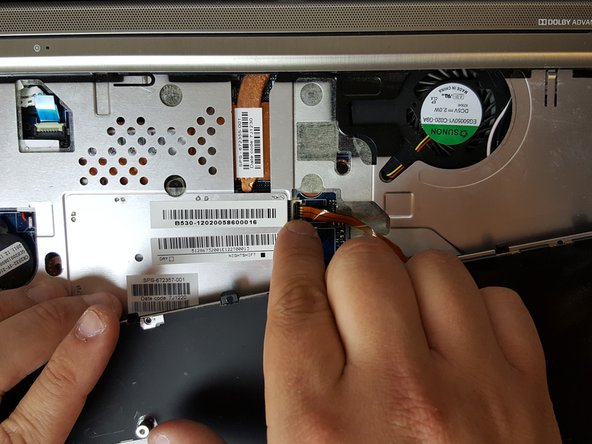
    5. HP Folio 13t-1000 Cooling Fan Replacement: stap 5, afbeelding 1 van 3 HP Folio 13t-1000 Cooling Fan Replacement: stap 5, afbeelding 2 van 3 HP Folio 13t-1000 Cooling Fan Replacement: stap 5, afbeelding 3 van 3
      • To unlock the clamps connected to the motherboard, use your fingers or insert the pointed edge of the spudger between the first clamp and the cable.

      • Repeat the same process for the second clamp.

      Vraag FixBot

      Voeg opmerking toe

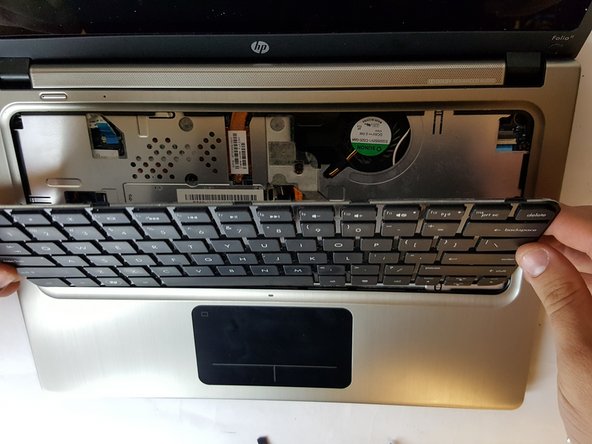
    6. HP Folio 13t-1000 Cooling Fan Replacement: stap 6, afbeelding 1 van 3 HP Folio 13t-1000 Cooling Fan Replacement: stap 6, afbeelding 2 van 3 HP Folio 13t-1000 Cooling Fan Replacement: stap 6, afbeelding 3 van 3
      • Remove the keyboard from the laptop.

      Vraag FixBot

      Voeg opmerking toe

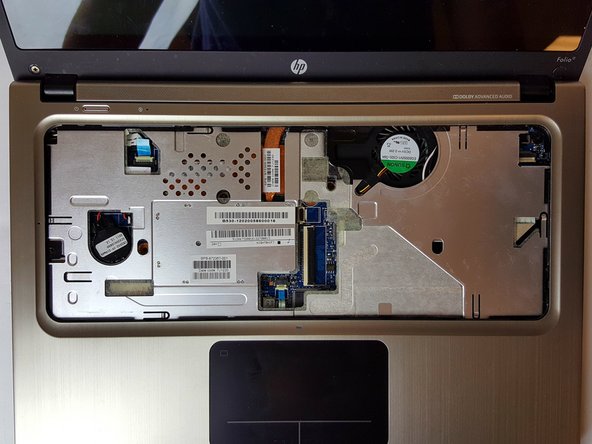
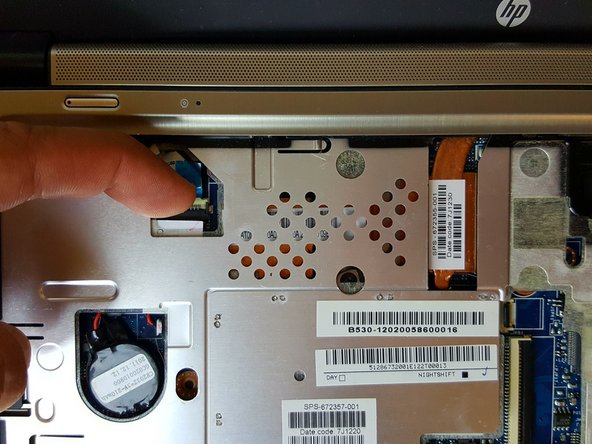
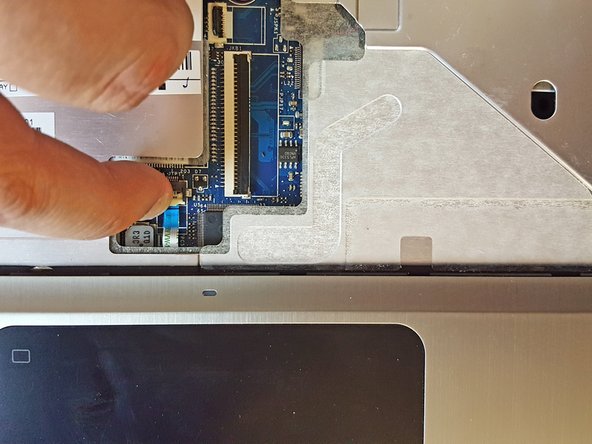
    1. HP Folio 13t-1000 Cooling Fan Replacement, Top Hardware Cover: stap 7, afbeelding 1 van 3 HP Folio 13t-1000 Cooling Fan Replacement, Top Hardware Cover: stap 7, afbeelding 2 van 3 HP Folio 13t-1000 Cooling Fan Replacement, Top Hardware Cover: stap 7, afbeelding 3 van 3
      • Place your finger between one of the plastic clamps and the cable and apply a slight leveraging force until the clamp pops up.

      • Do the same for the second connection.

      Vraag FixBot

      Voeg opmerking toe

    2. HP Folio 13t-1000 Cooling Fan Replacement: stap 8, afbeelding 1 van 2 HP Folio 13t-1000 Cooling Fan Replacement: stap 8, afbeelding 2 van 2
      • Remove the top hardware cover.

      Vraag FixBot

      Voeg opmerking toe

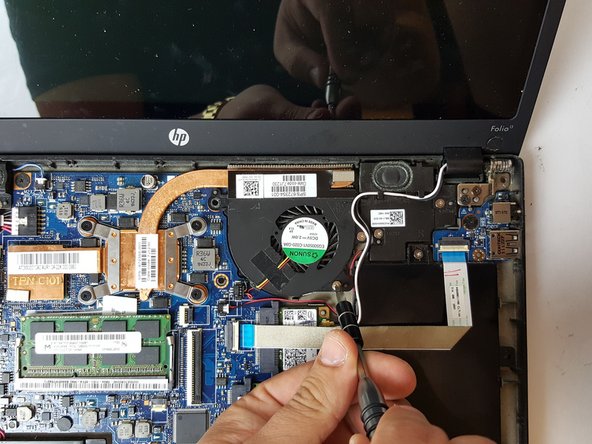
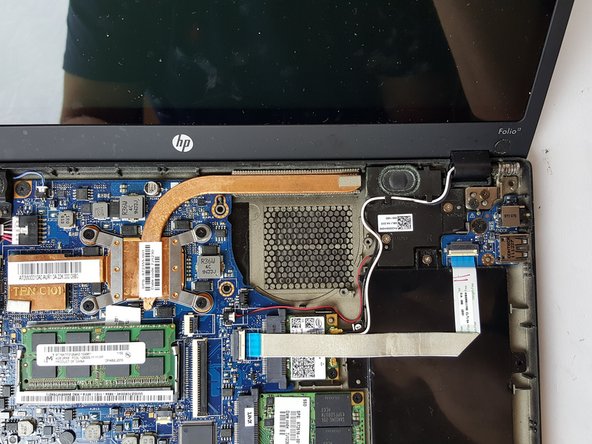
    1. HP Folio 13t-1000 Cooling Fan Replacement, Cooling Fan: stap 9, afbeelding 1 van 2 HP Folio 13t-1000 Cooling Fan Replacement, Cooling Fan: stap 9, afbeelding 2 van 2
      • Use a PH1 screw head to remove the two, 3mm screws.

      Vraag FixBot

      Voeg opmerking toe

    2. HP Folio 13t-1000 Cooling Fan Replacement: stap 10, afbeelding 1 van 2 HP Folio 13t-1000 Cooling Fan Replacement: stap 10, afbeelding 2 van 2
      • Remove the connection from the fan to the motherboard by using the nylon spudger or your fingers.

      Vraag FixBot

      Voeg opmerking toe

    3. HP Folio 13t-1000 Cooling Fan Replacement: stap 11, afbeelding 1 van 2 HP Folio 13t-1000 Cooling Fan Replacement: stap 11, afbeelding 2 van 2
      • Remove and replace the cooling fan.

      Vraag FixBot

      Voeg opmerking toe

Conclusie

To reassemble your device, follow these instructions in reverse order.

Annuleren: ik heb deze handleiding niet afgemaakt.

Josh Rollins

Lid sinds: 09/28/16

152 Reputatie

3 handleidingen geschreven

Team

USF Tampa, Team 1-2, Cagle Fall 2016 Lid van USF Tampa, Team 1-2, Cagle Fall 2016

USFT-CAGLE-F16S1G2

4 Leden

77 handleidingen geschreven

0Gids Commentaar

Voeg opmerking toe

Weergavestatistieken:

Afgelopen 24 uren: 4

Afgelopen 7 dagen: 29

Afgelopen 30 dagen: 43

Altijd: 1,716