Ga door naar hoofdinhoud

HP Envy x360 m6-w103dx Memory (RAM) Replacement

Wat je nodig hebt

  1. HP Envy x360 m6-w103dx Memory (RAM) Replacement, Keyboard: stap 1, afbeelding 1 van 2 HP Envy x360 m6-w103dx Memory (RAM) Replacement, Keyboard: stap 1, afbeelding 2 van 2
    • Before you begin, be sure to power off your laptop.

    • Using an opening pick, remove the 4 rubber feet and 4 screw covers.

  2. HP Envy x360 m6-w103dx Memory (RAM) Replacement: stap 2, afbeelding 1 van 2 HP Envy x360 m6-w103dx Memory (RAM) Replacement: stap 2, afbeelding 2 van 2
    • Unscrew the twelve 6 mm screws from the bottom of the laptop using a Phillips #0 screwdriver.

  3. HP Envy x360 m6-w103dx Memory (RAM) Replacement: stap 3, afbeelding 1 van 3 HP Envy x360 m6-w103dx Memory (RAM) Replacement: stap 3, afbeelding 2 van 3 HP Envy x360 m6-w103dx Memory (RAM) Replacement: stap 3, afbeelding 3 van 3
    • Open the laptop carefully, with the keyboard face up.

    • Pry around the outside of the keyboard with the plastic opening tool until the keyboard can be lifted slightly.

    • When lifting the keyboard do not pull too hard. There are cables that must be disconnected before the keyboard can be removed.

  4. HP Envy x360 m6-w103dx Memory (RAM) Replacement: stap 4, afbeelding 1 van 3 HP Envy x360 m6-w103dx Memory (RAM) Replacement: stap 4, afbeelding 2 van 3 HP Envy x360 m6-w103dx Memory (RAM) Replacement: stap 4, afbeelding 3 van 3
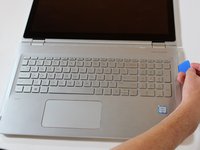
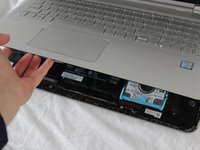
    • Lift the keyboard until you can see the cables connected to the motherboard.

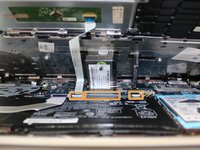
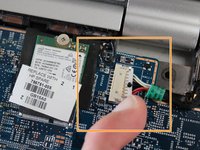
    • Gently lift the tab on each ZIF connector that connects each cable to the motherboard using a spudger. Once each tab is flipped up, the corresponding ribbon cable will come out easily.

    • Detach the keyboard.

  5. HP Envy x360 m6-w103dx Memory (RAM) Replacement, Motherboard: stap 5, afbeelding 1 van 1
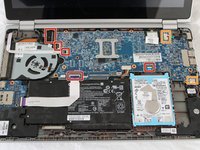
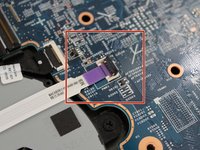
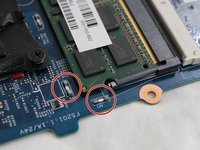
    • Disconnect the pin head battery connection to remove power from the motherboard.

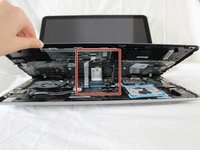
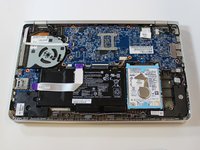
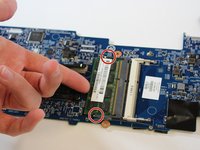
    • Unscrew the five 4mm screws holding the motherboard in place using a #0 Phillips screwdriver.

    • It's possible the positions of the screws will be different on your board. If the motherboard resists lifting, double-check that all screws have been removed.

  6. HP Envy x360 m6-w103dx Memory (RAM) Replacement: stap 6, afbeelding 1 van 3 HP Envy x360 m6-w103dx Memory (RAM) Replacement: stap 6, afbeelding 2 van 3 HP Envy x360 m6-w103dx Memory (RAM) Replacement: stap 6, afbeelding 3 van 3
    • Remove the five flat ribbon cables by gently lifting the head of the cable up and back.

    • Remove the two remaining multicolored ribbon cables by pulling the white plastic head backwards.

    • Do not pull directly on the wires.

    • If the head of the multicolored ribbon cable doesn't come out, try gently wiggling it side to side as you pull.

  7. HP Envy x360 m6-w103dx Memory (RAM) Replacement: stap 7, afbeelding 1 van 3 HP Envy x360 m6-w103dx Memory (RAM) Replacement: stap 7, afbeelding 2 van 3 HP Envy x360 m6-w103dx Memory (RAM) Replacement: stap 7, afbeelding 3 van 3
    • Lift the motherboard up from the left side at a shallow angle.

    • Gently pull the motherboard to the left and gently wiggle it side to side until the ports on the right side of the board detach from the case.

    • Ensure the laptop is well supported, as the motherboard is a heavy component and removing it may make the laptop off-balance.

  8. HP Envy x360 m6-w103dx Memory (RAM) Replacement, Memory (RAM): stap 8, afbeelding 1 van 3 HP Envy x360 m6-w103dx Memory (RAM) Replacement, Memory (RAM): stap 8, afbeelding 2 van 3 HP Envy x360 m6-w103dx Memory (RAM) Replacement, Memory (RAM): stap 8, afbeelding 3 van 3
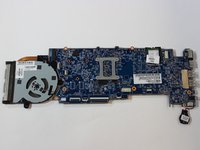
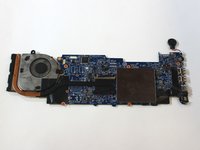
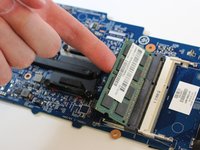
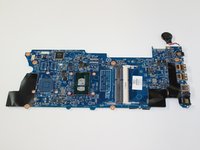
    • Carefully lay the motherboard on a flat surface with the metal plate facing up.

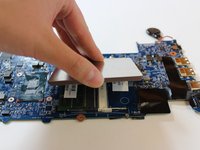
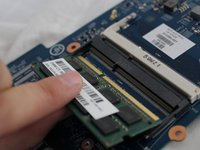
    • Remove the metal plate from the eight surrounding inserts.

    • It should lift directly off of the motherboard without much fuss.

  9. HP Envy x360 m6-w103dx Memory (RAM) Replacement: stap 9, afbeelding 1 van 2 HP Envy x360 m6-w103dx Memory (RAM) Replacement: stap 9, afbeelding 2 van 2
    • Move the two locking tabs on either side of the RAM stick away from each other.

    • The RAM should clear the tabs and spring up to rest at an angle to the motherboard.

  10. HP Envy x360 m6-w103dx Memory (RAM) Replacement: stap 10, afbeelding 1 van 2 HP Envy x360 m6-w103dx Memory (RAM) Replacement: stap 10, afbeelding 2 van 2
    • Gently pull the memory stick away from the memory slot with respect to the angle at which it rests.

    • To reinstall, insert the RAM stick at the same angle that it rested before, then press the stick down until the locking tabs on either side hold it down in place.

Conclusie

To reassemble your device, follow these instructions in reverse order.

3 andere personen hebben deze handleiding voltooid.

Steven Ngo

Lid sinds: 10/10/19

927 Reputatie

7 handleidingen geschreven

Team

Cal Poly, Team S12-G2, Regan Fall 2019 Lid van Cal Poly, Team S12-G2, Regan Fall 2019

CPSU-REGAN-F19S12G2

4 Leden

23 handleidingen geschreven

Één opmerking

Great tutorial! The only things that weren't mentioned are the fact that you have to detach the little metal wires from the Wi-Fi card in the top-right of the motherboard, and you also have to take out the audio jack if you want to lay the motherboard upside down. Otherwise, this was exactly what I was looking for. Thanks!

Aleksandr - Antwoord

Voeg opmerking toe

Weergavestatistieken:

Afgelopen 24 uren: 3

Afgelopen 7 dagen: 13

Afgelopen 30 dagen: 37

Altijd: 1,380