Ga door naar hoofdinhoud

HP Envy x360 15-bp143cl Daughterboard Replacement

Wat je nodig hebt

  1. HP Envy x360 15-bp143cl Daughterboard Replacement, Battery: stap 1, afbeelding 1 van 1
    • Flip the laptop over.

    • Peel off the rubber strip closest to the hinges.

  2. HP Envy x360 15-bp143cl Daughterboard Replacement: stap 2, afbeelding 1 van 1
    • Use a Phillips #1 screwdriver (PH1 bit) to remove the four 6.5mm screws that were underneath the rubber strip.

  3. HP Envy x360 15-bp143cl Daughterboard Replacement: stap 3, afbeelding 1 van 1
    • Use a Torx T5 screwdriver (T5 bit) to remove the three 5mm screws near the bottom edge of the laptop.

  4. HP Envy x360 15-bp143cl Daughterboard Replacement: stap 4, afbeelding 1 van 1
    • Lift the back panel to remove it from the laptop.

    • Use an opening tool to pry open the back panel if it does not easily lift apart.

  5. HP Envy x360 15-bp143cl Daughterboard Replacement: stap 5, afbeelding 1 van 2 HP Envy x360 15-bp143cl Daughterboard Replacement: stap 5, afbeelding 2 van 2
    • Use a Phillips #1 screwdriver (PH1) to remove the seven 4mm screws indicated by the gray arrows on the battery.

  6. HP Envy x360 15-bp143cl Daughterboard Replacement: stap 6, afbeelding 1 van 1
    • Pull the battery from the connecting port and lift to remove it from the laptop.

  7. HP Envy x360 15-bp143cl Daughterboard Replacement, Motherboard: stap 7, afbeelding 1 van 1
    • Peel off the tape securing the heatsink.

  8. HP Envy x360 15-bp143cl Daughterboard Replacement: stap 8, afbeelding 1 van 1
    • Use a Phillips #1 screwdriver to remove the seven 4 mm screws securing the fan.

    • Detach the fan cable from the mother board.

  9. HP Envy x360 15-bp143cl Daughterboard Replacement: stap 9, afbeelding 1 van 1
    • Lift the fan up and off the motherboard.

  10. HP Envy x360 15-bp143cl Daughterboard Replacement: stap 10, afbeelding 1 van 1
    • Use a Phillips #1 screwdriver to remove the ten 4 mm screws securing the motherboard.

    • Pull the four cables directly out of their ports.

    • Flip up the lock-bar on the two ZIF connectors, then gently pull the two ribbon cables directly out of their ports.

  11. HP Envy x360 15-bp143cl Daughterboard Replacement: stap 11, afbeelding 1 van 1
    • Gently lift the motherboard up and out of the chassis.

  12. HP Envy x360 15-bp143cl Daughterboard Replacement, Daughterboard: stap 12, afbeelding 1 van 1
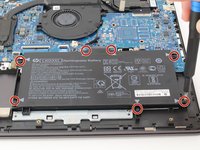
    • Use a Phillips #1 screwdriver to remove the single 4 mm screw securing the daughterboard.

    • Disconnect the ribbon cable.

  13. HP Envy x360 15-bp143cl Daughterboard Replacement: stap 13, afbeelding 1 van 1
    • Gently lift the daughterboard up and out of the laptop.

Conclusie

To reassemble your device, follow these instructions in reverse order.

0 opmerkingen

Voeg opmerking toe

Weergavestatistieken:

Afgelopen 24 uren: 0

Afgelopen 7 dagen: 0

Afgelopen 30 dagen: 7

Altijd: 203