Ga door naar hoofdinhoud

HP Envy M6-1205DX Motherboard Replacement

Wat je nodig hebt

  1. HP Envy M6-1205DX Motherboard Replacement, Battery: stap 1, afbeelding 1 van 1
    • Lay the device face down to begin.

  2. HP Envy M6-1205DX Motherboard Replacement: stap 2, afbeelding 1 van 1
    • Slide the release mechanism to the left to release the battery.

  3. HP Envy M6-1205DX Motherboard Replacement: stap 3, afbeelding 1 van 2 HP Envy M6-1205DX Motherboard Replacement: stap 3, afbeelding 2 van 2
    • Remove the battery.

  4. HP Envy M6-1205DX Motherboard Replacement, Touchpad: stap 4, afbeelding 1 van 1
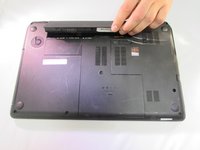
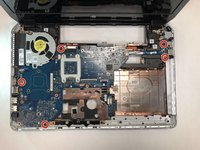
    • Using a Phillips #1, remove the 8 10.6mm screws.

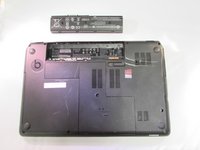
    • Also using a Phillips #1, remove the 8.6mm screw.

  5. HP Envy M6-1205DX Motherboard Replacement: stap 5, afbeelding 1 van 1
    • Slide the center panel down to remove it.

  6. HP Envy M6-1205DX Motherboard Replacement: stap 6, afbeelding 1 van 1
    • Using a Phillips #1, remove the 3.5mm screw.

    • Our computer did not come with a hard drive so you should have one in the empty hole. We have marked where we believe the screws will be in orange.

    • Using a Phillips #1, remove the four 10.6mm screws.

  7. HP Envy M6-1205DX Motherboard Replacement: stap 7, afbeelding 1 van 1
    • Pull the disk drive out to remove it.

  8. HP Envy M6-1205DX Motherboard Replacement: stap 8, afbeelding 1 van 2 HP Envy M6-1205DX Motherboard Replacement: stap 8, afbeelding 2 van 2
    • Using a Phillips #1, remove the two 2.4mm screws.

  9. HP Envy M6-1205DX Motherboard Replacement: stap 9, afbeelding 1 van 2 HP Envy M6-1205DX Motherboard Replacement: stap 9, afbeelding 2 van 2
    • Flip the black tab up on the clamp that holds the ribbon cable in place.

    • Pull the cable back with your fingers or a pair of tweezers.

  10. HP Envy M6-1205DX Motherboard Replacement: stap 10, afbeelding 1 van 2 HP Envy M6-1205DX Motherboard Replacement: stap 10, afbeelding 2 van 2
    • Flip the computer back over

    • Use the plastic opening tool to pry the keyboard up .

  11. HP Envy M6-1205DX Motherboard Replacement: stap 11, afbeelding 1 van 3 HP Envy M6-1205DX Motherboard Replacement: stap 11, afbeelding 2 van 3 HP Envy M6-1205DX Motherboard Replacement: stap 11, afbeelding 3 van 3
    • Carefully lift the keyboard up.

    • Flip up the black tab holding the large ribbon cable down.

    • Push both sides of the small white tab forward to release the small ribbon cable.

    • Pull both the cables out to remove them.

    • Remove the keyboard.

  12. HP Envy M6-1205DX Motherboard Replacement: stap 12, afbeelding 1 van 3 HP Envy M6-1205DX Motherboard Replacement: stap 12, afbeelding 2 van 3 HP Envy M6-1205DX Motherboard Replacement: stap 12, afbeelding 3 van 3
    • Flip the small white tab up to release the ribbon cable.

    • Pull to remove.

    • Repeat the same steps for the other cable.

  13. HP Envy M6-1205DX Motherboard Replacement: stap 13, afbeelding 1 van 1
    • Using a Phillips #1, remove the four 5.6mm silver screws.

  14. HP Envy M6-1205DX Motherboard Replacement: stap 14, afbeelding 1 van 2 HP Envy M6-1205DX Motherboard Replacement: stap 14, afbeelding 2 van 2
    • Use the plastic opening tool to pry the face plate off the rest of the frame.

    • Once you pry all of the snaps up lift the face plate off.

  15. HP Envy M6-1205DX Motherboard Replacement, Fan: stap 15, afbeelding 1 van 1
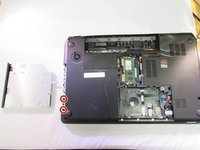
    • Using a Phillips #1, remove the two 10.6 mm screws.

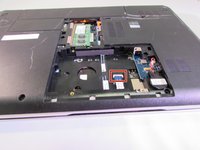
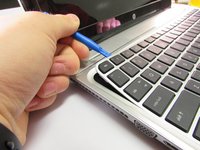
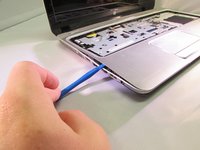
    • Gently pull back on on the cable to unplug it.

  16. HP Envy M6-1205DX Motherboard Replacement: stap 16, afbeelding 1 van 1
    • Pull the fan out to remove it.

  17. HP Envy M6-1205DX Motherboard Replacement, Motherboard: stap 17, afbeelding 1 van 2 HP Envy M6-1205DX Motherboard Replacement, Motherboard: stap 17, afbeelding 2 van 2
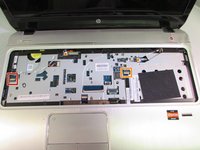
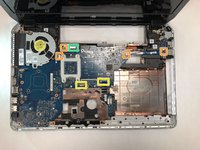
    • Using a Philips #1, remove the five 5.0 mm screws.

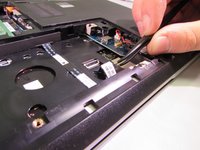
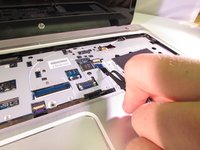
    • Gently pull the mini power connectors to remove them.

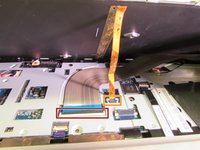
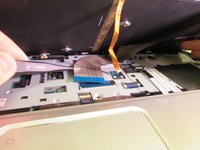
    • Gently pull the two ribbon cables to remove them.

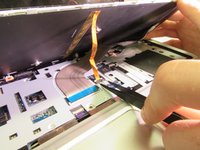
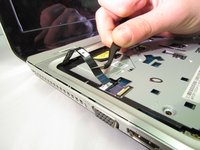
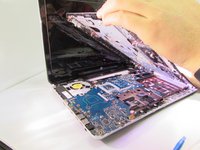
    • Pull the black tab to remove the LCD screen connector.

  18. HP Envy M6-1205DX Motherboard Replacement: stap 18, afbeelding 1 van 1
    • Gently pull the motherboard away from the case on the lower left-hand corner.

  19. HP Envy M6-1205DX Motherboard Replacement: stap 19, afbeelding 1 van 1
    • Gently pull the case away from the motherboard on the upper right-hand corner.

  20. HP Envy M6-1205DX Motherboard Replacement: stap 20, afbeelding 1 van 1
    • Pull the motherboard out of the laptop, taking care to detach the cable on the underside as you do so.

Conclusie

To reassemble your device, follow these instructions in reverse order.

3 andere personen hebben deze handleiding voltooid.

Ryan Hatton

Lid sinds: 11/16/19

634 Reputatie

5 handleidingen geschreven

Team

IUPUI, Team S2-G2, Wilson Fall 2019 Lid van IUPUI, Team S2-G2, Wilson Fall 2019

IUPUI-WILSON-F19S2G2

4 Leden

5 handleidingen geschreven

0 opmerkingen

Voeg opmerking toe

Weergavestatistieken:

Afgelopen 24 uren: 0

Afgelopen 7 dagen: 1

Afgelopen 30 dagen: 6

Altijd: 914