Ga door naar hoofdinhoud

HP Envy M6-1205DX Fan Replacement

Wat je nodig hebt

  1. HP Envy M6-1205DX Fan Replacement, Battery: stap 1, afbeelding 1 van 1
    • Lay the device face down to begin.

  2. HP Envy M6-1205DX Fan Replacement: stap 2, afbeelding 1 van 1
    • Slide the release mechanism to the left to release the battery.

  3. HP Envy M6-1205DX Fan Replacement: stap 3, afbeelding 1 van 2 HP Envy M6-1205DX Fan Replacement: stap 3, afbeelding 2 van 2
    • Remove the battery.

  4. HP Envy M6-1205DX Fan Replacement, Touchpad: stap 4, afbeelding 1 van 1
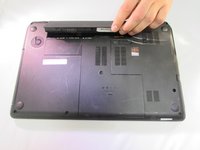
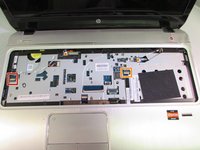
    • Using a Phillips #1, remove the 8 10.6mm screws.

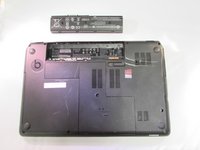
    • Also using a Phillips #1, remove the 8.6mm screw.

  5. HP Envy M6-1205DX Fan Replacement: stap 5, afbeelding 1 van 1
    • Slide the center panel down to remove it.

  6. HP Envy M6-1205DX Fan Replacement: stap 6, afbeelding 1 van 1
    • Using a Phillips #1, remove the 3.5mm screw.

    • Our computer did not come with a hard drive so you should have one in the empty hole. We have marked where we believe the screws will be in orange.

    • Using a Phillips #1, remove the four 10.6mm screws.

  7. HP Envy M6-1205DX Fan Replacement: stap 7, afbeelding 1 van 1
    • Pull the disk drive out to remove it.

  8. HP Envy M6-1205DX Fan Replacement: stap 8, afbeelding 1 van 2 HP Envy M6-1205DX Fan Replacement: stap 8, afbeelding 2 van 2
    • Using a Phillips #1, remove the two 2.4mm screws.

  9. HP Envy M6-1205DX Fan Replacement: stap 9, afbeelding 1 van 2 HP Envy M6-1205DX Fan Replacement: stap 9, afbeelding 2 van 2
    • Flip the black tab up on the clamp that holds the ribbon cable in place.

    • Pull the cable back with your fingers or a pair of tweezers.

  10. HP Envy M6-1205DX Fan Replacement: stap 10, afbeelding 1 van 2 HP Envy M6-1205DX Fan Replacement: stap 10, afbeelding 2 van 2
    • Flip the computer back over

    • Use the plastic opening tool to pry the keyboard up .

  11. HP Envy M6-1205DX Fan Replacement: stap 11, afbeelding 1 van 3 HP Envy M6-1205DX Fan Replacement: stap 11, afbeelding 2 van 3 HP Envy M6-1205DX Fan Replacement: stap 11, afbeelding 3 van 3
    • Carefully lift the keyboard up.

    • Flip up the black tab holding the large ribbon cable down.

    • Push both sides of the small white tab forward to release the small ribbon cable.

    • Pull both the cables out to remove them.

    • Remove the keyboard.

  12. HP Envy M6-1205DX Fan Replacement: stap 12, afbeelding 1 van 3 HP Envy M6-1205DX Fan Replacement: stap 12, afbeelding 2 van 3 HP Envy M6-1205DX Fan Replacement: stap 12, afbeelding 3 van 3
    • Flip the small white tab up to release the ribbon cable.

    • Pull to remove.

    • Repeat the same steps for the other cable.

  13. HP Envy M6-1205DX Fan Replacement: stap 13, afbeelding 1 van 1
    • Using a Phillips #1, remove the four 5.6mm silver screws.

  14. HP Envy M6-1205DX Fan Replacement: stap 14, afbeelding 1 van 2 HP Envy M6-1205DX Fan Replacement: stap 14, afbeelding 2 van 2
    • Use the plastic opening tool to pry the face plate off the rest of the frame.

    • Once you pry all of the snaps up lift the face plate off.

  15. HP Envy M6-1205DX Fan Replacement, Fan: stap 15, afbeelding 1 van 1
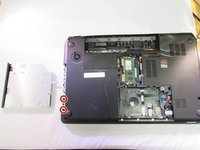
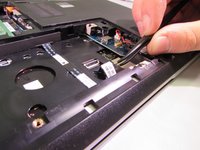
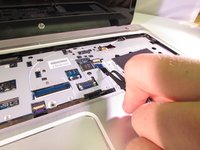
    • Using a Phillips #1, remove the two 10.6 mm screws.

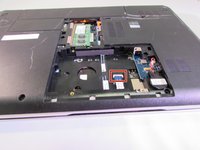
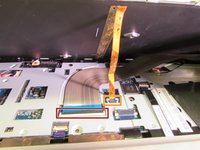
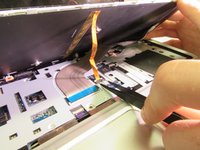
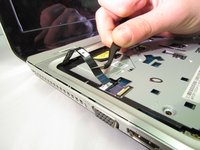
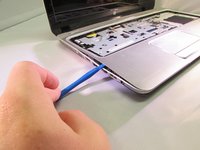
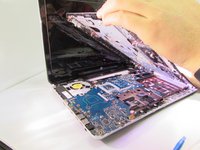
    • Gently pull back on on the cable to unplug it.

  16. HP Envy M6-1205DX Fan Replacement: stap 16, afbeelding 1 van 1
    • Pull the fan out to remove it.

Conclusie

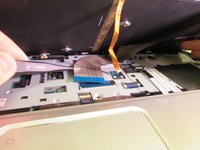
To reassemble your device, follow these instructions in reverse order.

7 andere personen hebben deze handleiding voltooid.

0 opmerkingen

Voeg opmerking toe

Weergavestatistieken:

Afgelopen 24 uren: 0

Afgelopen 7 dagen: 1

Afgelopen 30 dagen: 4

Altijd: 5,688