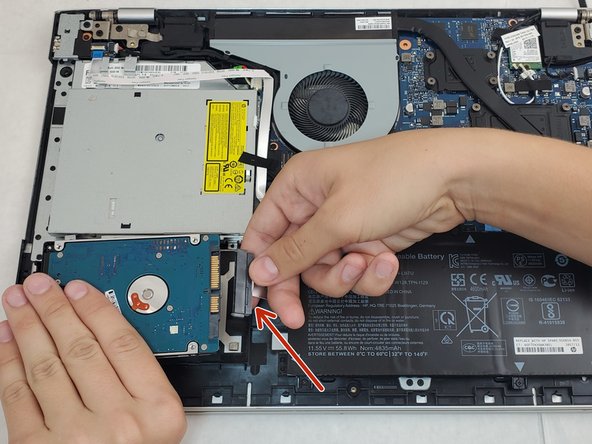
Ga door naar hoofdinhoud

HP Envy 17m-ae111dx Hard Drive Replacement

Wat je nodig hebt

  1. HP Envy 17m-ae111dx Hard Drive Replacement, Back Cover: stap 1, afbeelding 1 van 1
    • Power off your laptop before beginning disassembly.

    • Place the laptop on its back.

  2. HP Envy 17m-ae111dx Hard Drive Replacement: stap 2, afbeelding 1 van 3 HP Envy 17m-ae111dx Hard Drive Replacement: stap 2, afbeelding 2 van 3 HP Envy 17m-ae111dx Hard Drive Replacement: stap 2, afbeelding 3 van 3
    • Remove the plastic covering to the Disk Reader.

    • Locate the small hole on the side of the disk reader. Insert the T5 Torx head screwdriver (or device of similar thickness) to release the covering for the disk reader.

    • If the button on the side is jammed, pry off the covering by using the iFixit Opening Tool.

  3. HP Envy 17m-ae111dx Hard Drive Replacement: stap 3, afbeelding 1 van 3 HP Envy 17m-ae111dx Hard Drive Replacement: stap 3, afbeelding 2 van 3 HP Envy 17m-ae111dx Hard Drive Replacement: stap 3, afbeelding 3 van 3
    • Unscrew all visible screws.

    • Use the T5 Torx Screwdriver and remove the four visible 6.5mm screws on the bottom of the laptop.

    • One 2.5mm screw, is located where the disk reader was once located. Use a Phillips #00 screwdriver to remove the single screw that connects the bottom cover of the laptop to the bottom frame.

  4. HP Envy 17m-ae111dx Hard Drive Replacement: stap 4, afbeelding 1 van 2 HP Envy 17m-ae111dx Hard Drive Replacement: stap 4, afbeelding 2 van 2
    • Pry the gripper completely off to expose the two screws.

    • Remove the 2.5mm screws under the gripper nearest to the hinge using the Phillips #00 screwdriver.

  5. HP Envy 17m-ae111dx Hard Drive Replacement: stap 5, afbeelding 1 van 3 HP Envy 17m-ae111dx Hard Drive Replacement: stap 5, afbeelding 2 van 3 HP Envy 17m-ae111dx Hard Drive Replacement: stap 5, afbeelding 3 van 3
    • Use the iFixit opening tool to pry off the back cover.

    • Ensure that you go all the way around the laptop with the tool to take it off.

  6. HP Envy 17m-ae111dx Hard Drive Replacement, Hard Drive: stap 6, afbeelding 1 van 3 HP Envy 17m-ae111dx Hard Drive Replacement, Hard Drive: stap 6, afbeelding 2 van 3 HP Envy 17m-ae111dx Hard Drive Replacement, Hard Drive: stap 6, afbeelding 3 van 3
    • Unplug the cable that connects the hard drive to the motherboard.

    • Grab from the base of the cable and not from the wire.

  7. HP Envy 17m-ae111dx Hard Drive Replacement: stap 7, afbeelding 1 van 1
    • Remove the hard drive from the device.

Conclusie

To reassemble your device, follow these instructions in reverse order.

0 opmerkingen

Voeg opmerking toe

Weergavestatistieken:

Afgelopen 24 uren: 2

Afgelopen 7 dagen: 8

Afgelopen 30 dagen: 56

Altijd: 4,852