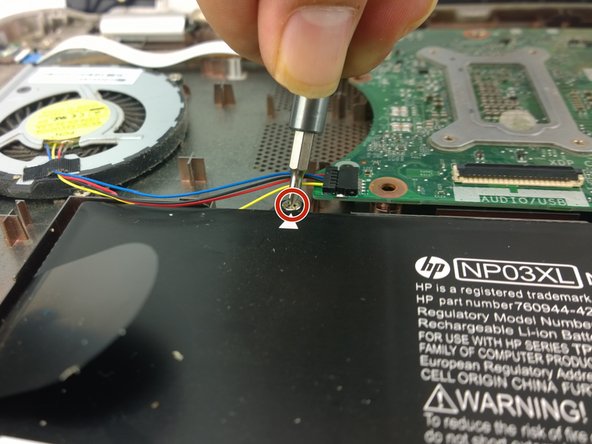
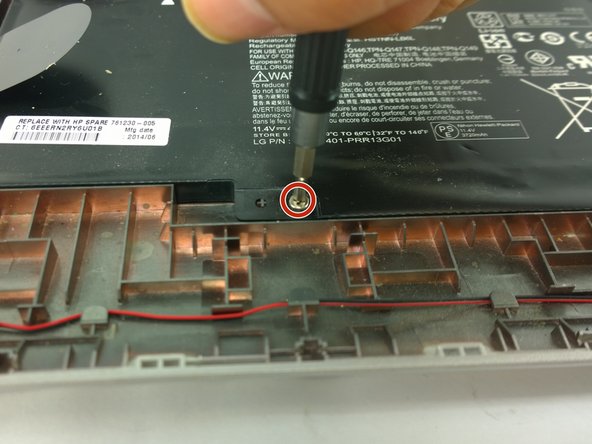
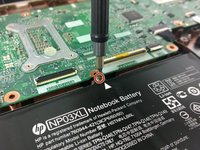
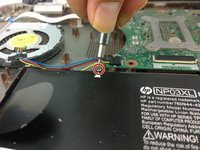
Ga door naar hoofdinhoud

HP Envy 15-u001dx Battery Replacement

Gearchiveerde handleiding
Deze handleiding wordt enkel nog bijgehouden voor historische doeleinden. Gebruik de laatste versie van deze gids om uw reparatie uit te voeren.

Wat je nodig hebt

  1. HP Envy 15-u001dx Battery Replacement, HP Envy 15-u001dx Disassembly: stap 1, afbeelding 1 van 1
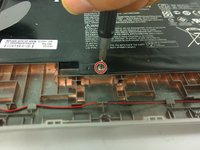
    • Remove the two no-slip covers on the rear, bottom side using spudger shown in top center of picture.

    • The two in the front do not have to be removed as there are no screws underneath them.

  2. HP Envy 15-u001dx Battery Replacement: stap 2, afbeelding 1 van 1
    • Remove the two cover tabs towards center of the bottom as there are screws underneath them.

  3. HP Envy 15-u001dx Battery Replacement: stap 3, afbeelding 1 van 1
    • Remove all fourteen 4.5 mm screws from the bottom using a Phillips #0 screwdriver. Each location is marked by a red circle in the picture.

  4. HP Envy 15-u001dx Battery Replacement: stap 4, afbeelding 1 van 1
    • Separate the top cover by using a spudger to go around the sides freeing the inside latches.

    • Once the bottom is free, carefully open to the inside as there are two ribbons that connect your keyboard and touch pad to the top cover.

  5. HP Envy 15-u001dx Battery Replacement: stap 5, afbeelding 1 van 2 HP Envy 15-u001dx Battery Replacement: stap 5, afbeelding 2 van 2
    • Use the spudger to detach the two ribbons from their connectors.

    • The regular black nylon spudger should be used whenever possible, especially around sensitive internal components.

  6. HP Envy 15-u001dx Battery Replacement, Battery: stap 6, afbeelding 1 van 3 HP Envy 15-u001dx Battery Replacement, Battery: stap 6, afbeelding 2 van 3 HP Envy 15-u001dx Battery Replacement, Battery: stap 6, afbeelding 3 van 3
    • Remove the three 3 mm screws from the battery using Phillips #0 screwdriver.

  7. HP Envy 15-u001dx Battery Replacement: stap 7, afbeelding 1 van 1
    • Use a spudger to gently detach the battery connector.

    • The regular black nylon spudger should be used whenever possible, especially around sensitive internal components.

Conclusie

To reassemble your device, follow these instructions in reverse order.

3 andere personen hebben deze handleiding voltooid.

Dakota Presley

Lid sinds: 10/05/16

885 Reputatie

6 handleidingen geschreven

Team

USF Tampa, Team 9-4, Lacy Fall 2016 Lid van USF Tampa, Team 9-4, Lacy Fall 2016

USFT-LACY-F16S9G4

4 Leden

7 handleidingen geschreven

0 opmerkingen

Voeg opmerking toe

Weergavestatistieken:

Afgelopen 24 uren: 0

Afgelopen 7 dagen: 0

Afgelopen 30 dagen: 2

Altijd: 1,032