Ga door naar hoofdinhoud

HP Deskjet F4480 Scanner Light Replacement

Wat je nodig hebt

  1. HP Deskjet F4480 Scanner Light Replacement, Open front access panel: stap 1, afbeelding 1 van 1
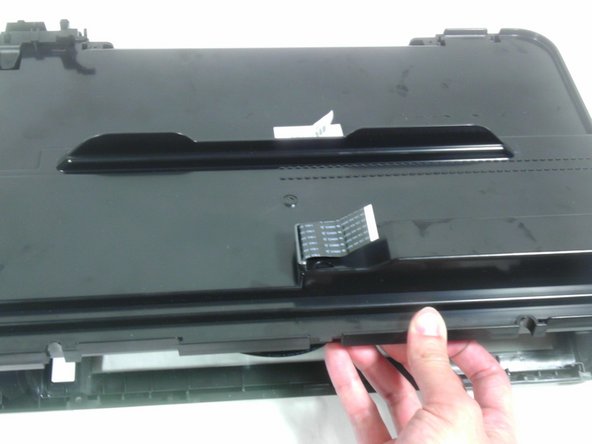
    • Open the front access panel by placing your finger in the front slot and pulling gently.

  2. HP Deskjet F4480 Scanner Light Replacement, Top Lid: stap 2, afbeelding 1 van 1
    • Open the protective lid that is covering the glass. Press gently against the base of the panel to remove the lid from the rest of the printer.

  3. HP Deskjet F4480 Scanner Light Replacement: stap 3, afbeelding 1 van 3 HP Deskjet F4480 Scanner Light Replacement: stap 3, afbeelding 2 van 3 HP Deskjet F4480 Scanner Light Replacement: stap 3, afbeelding 3 van 3
    • Remove the four 9mm T10 Torx screws on the top.

  4. HP Deskjet F4480 Scanner Light Replacement: stap 4, afbeelding 1 van 2 HP Deskjet F4480 Scanner Light Replacement: stap 4, afbeelding 2 van 2
    • Carefully lift the top panel off of the printer.

    • Do not tear or damage the two cables that connect the top lid to the motherboard.

  5. HP Deskjet F4480 Scanner Light Replacement: stap 5, afbeelding 1 van 3 HP Deskjet F4480 Scanner Light Replacement: stap 5, afbeelding 2 van 3 HP Deskjet F4480 Scanner Light Replacement: stap 5, afbeelding 3 van 3
    • Remove the two cables by gripping each one close to their connection ports on the motherboard and gently disconnecting them.

  6. HP Deskjet F4480 Scanner Light Replacement, Remove Back Panel of Lid: stap 6, afbeelding 1 van 1
    • Remove one 9mm T10 Torx screw from the back of the printer lid.

  7. HP Deskjet F4480 Scanner Light Replacement: stap 7, afbeelding 1 van 2 HP Deskjet F4480 Scanner Light Replacement: stap 7, afbeelding 2 van 2
    • Press outward on the plastic tab holding the back panel in place.

  8. HP Deskjet F4480 Scanner Light Replacement: stap 8, afbeelding 1 van 2 HP Deskjet F4480 Scanner Light Replacement: stap 8, afbeelding 2 van 2
    • Pull the back panel towards you and lift it away from the rest of the printer cover.

    • Some ribbon cables may still be inserted through the back panel. Be careful not to damage these and they should slide out easily.

  9. HP Deskjet F4480 Scanner Light Replacement, Scanner Light: stap 9, afbeelding 1 van 2 HP Deskjet F4480 Scanner Light Replacement, Scanner Light: stap 9, afbeelding 2 van 2
    • Remove scanner bar from track inside lid.

    • Do not try to detach the large ribbon cable. It is not designed to be removed from the scanner bar. Also do not try to pull ribbon cable out of the lid.

  10. HP Deskjet F4480 Scanner Light Replacement: stap 10, afbeelding 1 van 1
    • Remove two 9mm T10 Torx screws from the scanner bar to release scanner light.

  11. HP Deskjet F4480 Scanner Light Replacement: stap 11, afbeelding 1 van 1
    • Separate the scanner light from the rest of the scanner bar.

Conclusie

To reassemble your device, follow these instructions in reverse order.

Tim

Lid sinds: 01/15/13

184 Reputatie

4 handleidingen geschreven

Team

Cal Poly, Team 18-35, Regan Winter 2013 Lid van Cal Poly, Team 18-35, Regan Winter 2013

CPSU-REGAN-W13S18G35

5 Leden

15 handleidingen geschreven

0 opmerkingen

Voeg opmerking toe

Weergavestatistieken:

Afgelopen 24 uren: 0

Afgelopen 7 dagen: 5

Afgelopen 30 dagen: 26

Altijd: 3,188