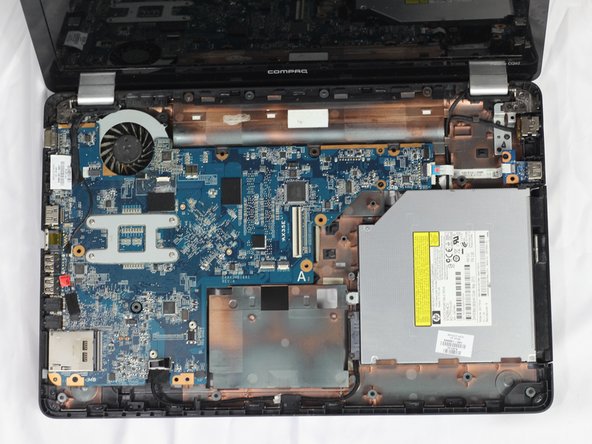
Ga door naar hoofdinhoud

HP Compaq Presario cq62-214nr Motherboard Replacement

Wat je nodig hebt

  1. HP Compaq Presario cq62-214nr Motherboard Replacement, Keyboard: stap 1, afbeelding 1 van 2 HP Compaq Presario cq62-214nr Motherboard Replacement, Keyboard: stap 1, afbeelding 2 van 2
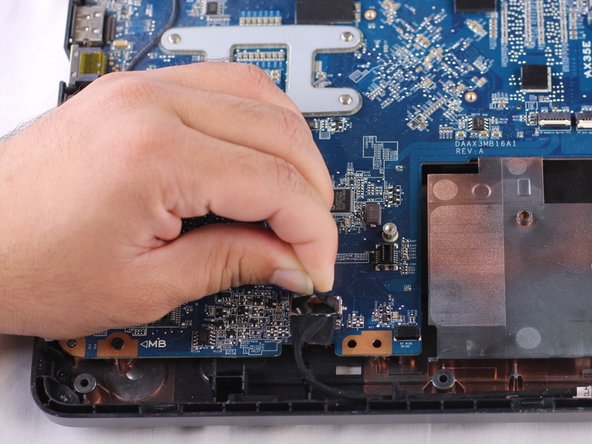
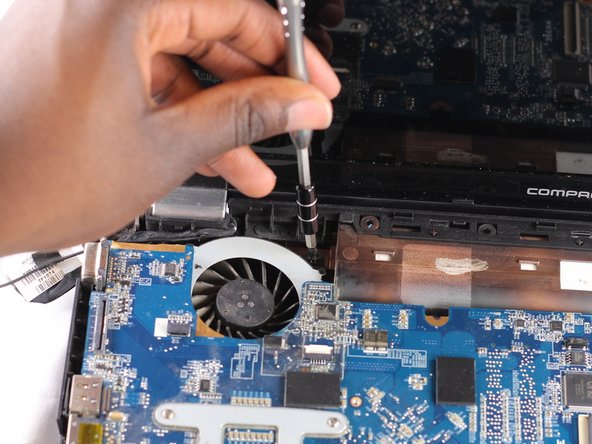
    • With all the screws removed from the previous guides. Remove the final eight M2.5X5 mm Philips screws on the back of the laptop

  2. HP Compaq Presario cq62-214nr Motherboard Replacement: stap 2, afbeelding 1 van 2 HP Compaq Presario cq62-214nr Motherboard Replacement: stap 2, afbeelding 2 van 2
    • In the battery housing, there are three screws that hold the keyboard on. These screws are located on the side near the front.

    • In the center of the bottom of the computer between the RAM and the wifi antenna is a 4th keyboard screw that also needs to be removed.

  3. HP Compaq Presario cq62-214nr Motherboard Replacement: stap 3, afbeelding 1 van 3 HP Compaq Presario cq62-214nr Motherboard Replacement: stap 3, afbeelding 2 van 3 HP Compaq Presario cq62-214nr Motherboard Replacement: stap 3, afbeelding 3 van 3
    • Open up the front of the laptop. Use a plastic opening tool to carefully pry open the keyboard from the edges.

  4. HP Compaq Presario cq62-214nr Motherboard Replacement: stap 4, afbeelding 1 van 1
    • Remove the keyboard by pulling on it with your hands.

    • There is a ribbon cable that is still connected on the back of the keyboard. Do not pull off the ribbon cable when pulling up the keyboard.

  5. HP Compaq Presario cq62-214nr Motherboard Replacement: stap 5, afbeelding 1 van 3 HP Compaq Presario cq62-214nr Motherboard Replacement: stap 5, afbeelding 2 van 3 HP Compaq Presario cq62-214nr Motherboard Replacement: stap 5, afbeelding 3 van 3
    • Locate the keyboard cable/wire that attaches the keyboard to the laptop .

    • Locate the latch of the wire connector

    • Unlatch the wire connector and gently pull out the wire with your hands

  6. HP Compaq Presario cq62-214nr Motherboard Replacement, Motherboard: stap 6, afbeelding 1 van 1
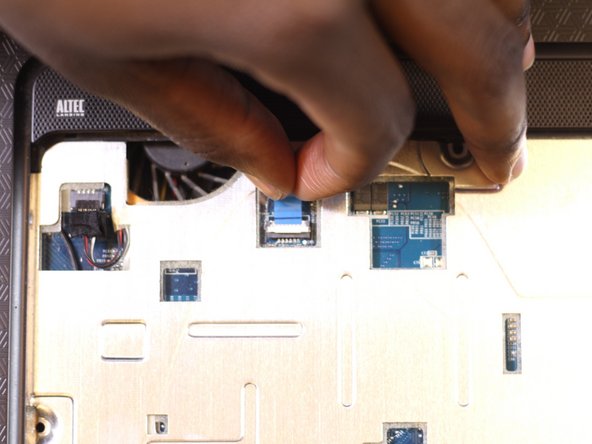
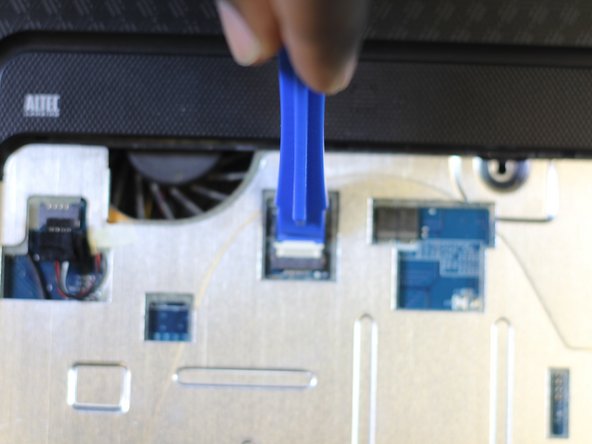
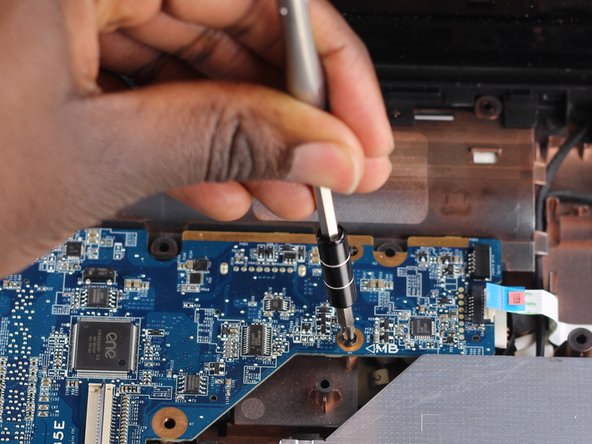
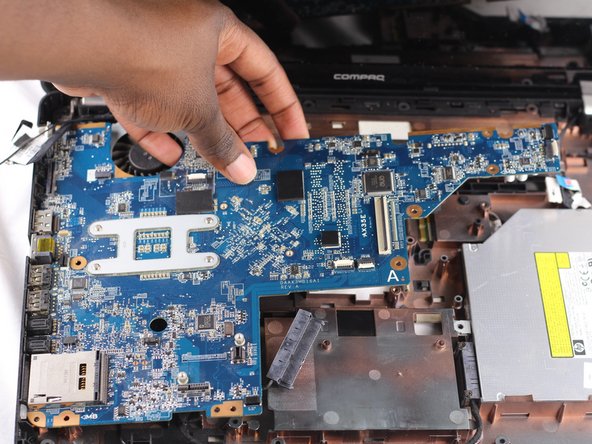
    • Remove the four M2.5x5 mm Phillips screws from the exposed keyboard cover.

  7. HP Compaq Presario cq62-214nr Motherboard Replacement: stap 7, afbeelding 1 van 3 HP Compaq Presario cq62-214nr Motherboard Replacement: stap 7, afbeelding 2 van 3 HP Compaq Presario cq62-214nr Motherboard Replacement: stap 7, afbeelding 3 van 3
    • Locate the three tab holding down the cover of the Motherboard.

    • Lift the tabs with using either a plastic opening tool or your fingers.

  8. HP Compaq Presario cq62-214nr Motherboard Replacement: stap 8, afbeelding 1 van 2 HP Compaq Presario cq62-214nr Motherboard Replacement: stap 8, afbeelding 2 van 2
    • Using a plastic opening tool to lift the sides of the cover.

  9. HP Compaq Presario cq62-214nr Motherboard Replacement: stap 9, afbeelding 1 van 3 HP Compaq Presario cq62-214nr Motherboard Replacement: stap 9, afbeelding 2 van 3 HP Compaq Presario cq62-214nr Motherboard Replacement: stap 9, afbeelding 3 van 3
    • Use your hands to gently lift the cover off.

  10. HP Compaq Presario cq62-214nr Motherboard Replacement: stap 10, afbeelding 1 van 3 HP Compaq Presario cq62-214nr Motherboard Replacement: stap 10, afbeelding 2 van 3 HP Compaq Presario cq62-214nr Motherboard Replacement: stap 10, afbeelding 3 van 3
    • Locate the four cables securing the Motherboard.

    • Gently pull cables to unsecure them.

  11. HP Compaq Presario cq62-214nr Motherboard Replacement: stap 11, afbeelding 1 van 3 HP Compaq Presario cq62-214nr Motherboard Replacement: stap 11, afbeelding 2 van 3 HP Compaq Presario cq62-214nr Motherboard Replacement: stap 11, afbeelding 3 van 3
    • Remove the three M2.25x5 mm Phillips screws.

  12. HP Compaq Presario cq62-214nr Motherboard Replacement: stap 12, afbeelding 1 van 3 HP Compaq Presario cq62-214nr Motherboard Replacement: stap 12, afbeelding 2 van 3 HP Compaq Presario cq62-214nr Motherboard Replacement: stap 12, afbeelding 3 van 3
    • Unlatch the final cable and gently remove the Motherboard.

Conclusie

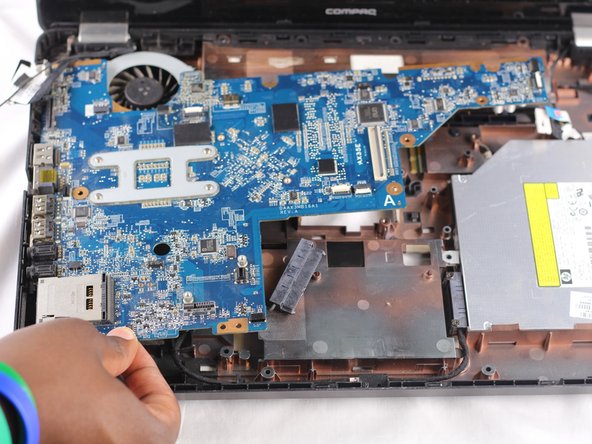
To reassemble your device, follow these instructions in reverse order.

3 andere personen hebben deze handleiding voltooid.

Roth Marcelin

Lid sinds: 10/06/16

726 Reputatie

6 handleidingen geschreven

Team

USF Tampa, Team 2-6, Sullivan Fall 2016 Lid van USF Tampa, Team 2-6, Sullivan Fall 2016

USFT-SULLIVAN-F16S2G6

3 Leden

12 handleidingen geschreven

0 opmerkingen

Voeg opmerking toe

Weergavestatistieken:

Afgelopen 24 uren: 0

Afgelopen 7 dagen: 1

Afgelopen 30 dagen: 15

Altijd: 1,052