Ga door naar hoofdinhoud

HP Chromebook 11 G3 Keyboard Replacement

Wat je nodig hebt

  1. HP Chromebook 11 G3 Keyboard Replacement, Keyboard Mount: stap 1, afbeelding 1 van 2 HP Chromebook 11 G3 Keyboard Replacement, Keyboard Mount: stap 1, afbeelding 2 van 2
    • Flip the laptop upside down so that the lid lies flat on the table.

    • Remove the nine 6mm Phillips #00 screws that line the border.

  2. HP Chromebook 11 G3 Keyboard Replacement: stap 2, afbeelding 1 van 2 HP Chromebook 11 G3 Keyboard Replacement: stap 2, afbeelding 2 van 2
    • Remove the two rubber feet closest to the hinge using tweezers.

    • Remove the two 6mm Phillips #00 screws revealed under these rubber feet.

    • The rubber feet may tear while removal; preventing this can be difficult, but it won’t harm the laptop. If desired, replace these rubber feet during reassembly.

  3. HP Chromebook 11 G3 Keyboard Replacement: stap 3, afbeelding 1 van 1
    • Flip the laptop so it is in the upright position.

    • Open the lid.

    • Unsnap the keyboard mount along the border of the laptop using a plastic opening tool.

    • This may require more force than expected. Hearing loud clicks as the plastic opening tool slides along the seam is normal.

  4. HP Chromebook 11 G3 Keyboard Replacement: stap 4, afbeelding 1 van 3 HP Chromebook 11 G3 Keyboard Replacement: stap 4, afbeelding 2 van 3 HP Chromebook 11 G3 Keyboard Replacement: stap 4, afbeelding 3 van 3
    • Tilt the keyboard mount up.

    • Use a spudger to flip up the two ZIF connector retaining flaps for the ribbon cables that connect the keyboard mount to the motherboard.

    • Gently remove both ribbon cables.

  5. HP Chromebook 11 G3 Keyboard Replacement: stap 5, afbeelding 1 van 1
    • Lift the keyboard mount out of the laptop.

  6. HP Chromebook 11 G3 Keyboard Replacement, Keyboard: stap 6, afbeelding 1 van 2 HP Chromebook 11 G3 Keyboard Replacement, Keyboard: stap 6, afbeelding 2 van 2
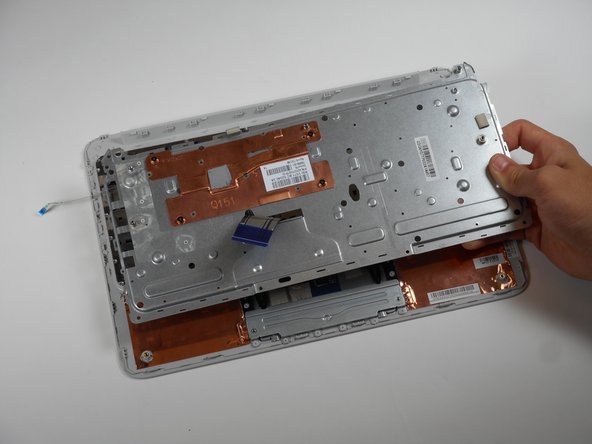
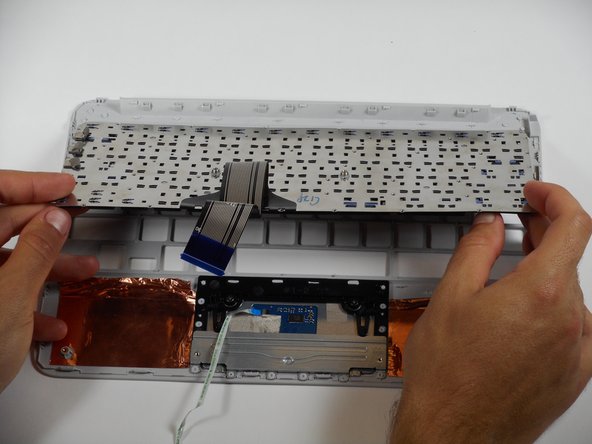
    • Flip the keyboard mount upside-down.

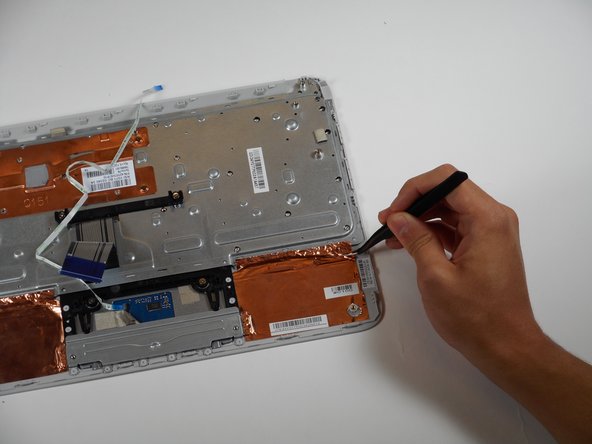
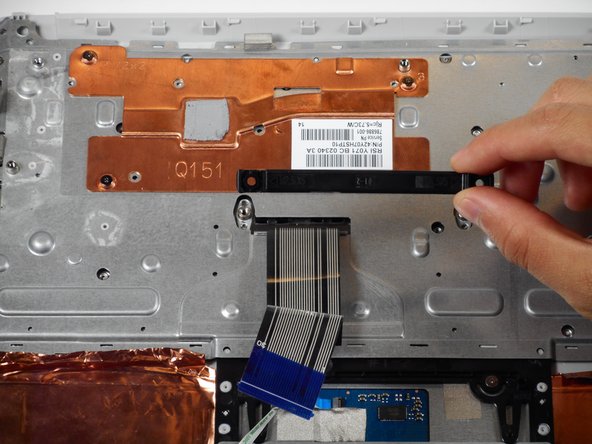
    • Using tweezers, peel off the two pieces of copper tape that keep the keyboard’s metal cover attached to the keyboard mount.

  7. HP Chromebook 11 G3 Keyboard Replacement: stap 7, afbeelding 1 van 1
    • Using tweezers, pull back the three metallic-colored pieces of tape near the top left corner of the keyboard mount.

  8. HP Chromebook 11 G3 Keyboard Replacement: stap 8, afbeelding 1 van 2 HP Chromebook 11 G3 Keyboard Replacement: stap 8, afbeelding 2 van 2
    • Remove the two 4 mm Phillips #00 screws located on either side of the horizontal black fastener located directly above the touchpad.

    • Lift the horizontal black fastener.

  9. HP Chromebook 11 G3 Keyboard Replacement: stap 9, afbeelding 1 van 3 HP Chromebook 11 G3 Keyboard Replacement: stap 9, afbeelding 2 van 3 HP Chromebook 11 G3 Keyboard Replacement: stap 9, afbeelding 3 van 3
    • Use a plastic opening tool to pry the edges of the metal cover.

    • Loosen the adhesive around the perimeter of the metal cover.

    • The adhesive can be difficult to remove. Use tweezers on any troubling sections. After removing the adhesive, take off the keyboard’s metal cover.

    • If the cover doesn’t come off, repeat prying around the edges with a plastic opening tool.

    • Lift the metal cover.

    • Apply adhesive during reassembly to fasten the metal cover onto the keyboard mount.

    • If only certain keys need replacement, stop here. Instead, use tweezers to remove individual keys by loosening their four snap-on clips from the metal backing.

  10. HP Chromebook 11 G3 Keyboard Replacement: stap 10, afbeelding 1 van 2 HP Chromebook 11 G3 Keyboard Replacement: stap 10, afbeelding 2 van 2
    • Use a plastic opening tool to disconnect the keyboard from the keyboard mount by prying along the keyboard’s perimeter.

    • Lots of adhesive attaches the keyboard to the keyboard mount. Loud snapping noises and gray, circular plastic debris are common during adhesive removal.

    • After removing enough adhesive, remove the keyboard’s backing.

    • Apply adhesive during reassembly to fasten the keyboard and its metal backing onto the keyboard mount.

Conclusie

To reassemble your device, follow these instructions in reverse order.

2 andere personen hebben deze handleiding voltooid.

Rahul Goyal

Lid sinds: 04/26/17

1.369 Reputatie

10 handleidingen geschreven

Team

Cal Poly, Team S23-G3, Livingston Spring 2017 Lid van Cal Poly, Team S23-G3, Livingston Spring 2017

CPSU-LIVINGSTON-S17S23G3

4 Leden

12 handleidingen geschreven

Één opmerking

Is it possible to get a keyboard that lights up for the HP Chromebook 11 G3? If so then how?

Vanessa Nations - Antwoord

Voeg opmerking toe

Weergavestatistieken:

Afgelopen 24 uren: 0

Afgelopen 7 dagen: 6

Afgelopen 30 dagen: 12

Altijd: 2,065