Ga door naar hoofdinhoud

HP 17-x027ds Hard Drive Replacement

Wat je nodig hebt

  1. HP 17-x027ds Hard Drive Replacement, Battery: stap 1, afbeelding 1 van 3 HP 17-x027ds Hard Drive Replacement, Battery: stap 1, afbeelding 2 van 3 HP 17-x027ds Hard Drive Replacement, Battery: stap 1, afbeelding 3 van 3
    • Flip the laptop so you can see the serial number and the four 7mm screws in all the corners.

    • Click the hinges by pushing them inward, which are located at the top of the laptop.

    • Remove the battery by pulling it out.

  2. HP 17-x027ds Hard Drive Replacement, Hard Drive: stap 2, afbeelding 1 van 3 HP 17-x027ds Hard Drive Replacement, Hard Drive: stap 2, afbeelding 2 van 3 HP 17-x027ds Hard Drive Replacement, Hard Drive: stap 2, afbeelding 3 van 3
    • Remove the two pieces of black tape that are each covering a 7mm screw at the top corners of the laptop.

    • When removing the two black pieces of tape, keep the tape so you can place it back on the laptop again when reassembling.

    • Remove the fourteen 7mm JIS #1 screws.

  3. HP 17-x027ds Hard Drive Replacement: stap 3, afbeelding 1 van 2 HP 17-x027ds Hard Drive Replacement: stap 3, afbeelding 2 van 2
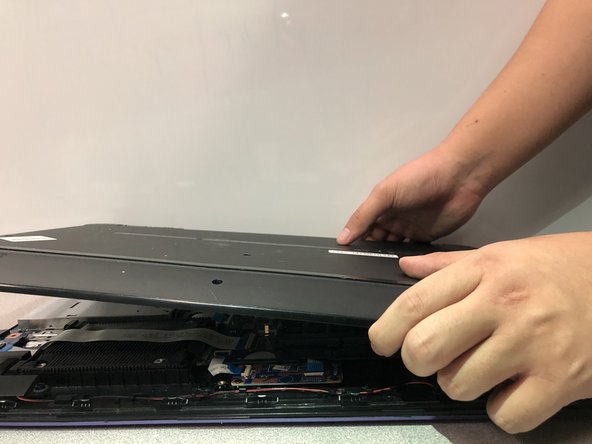
    • Lift the bottom cover of the laptop with a metal spudger by wedging the sides first and going all around.

    • The cover is difficult to lift, so use extreme force.

  4. HP 17-x027ds Hard Drive Replacement: stap 4, afbeelding 1 van 3 HP 17-x027ds Hard Drive Replacement: stap 4, afbeelding 2 van 3 HP 17-x027ds Hard Drive Replacement: stap 4, afbeelding 3 van 3
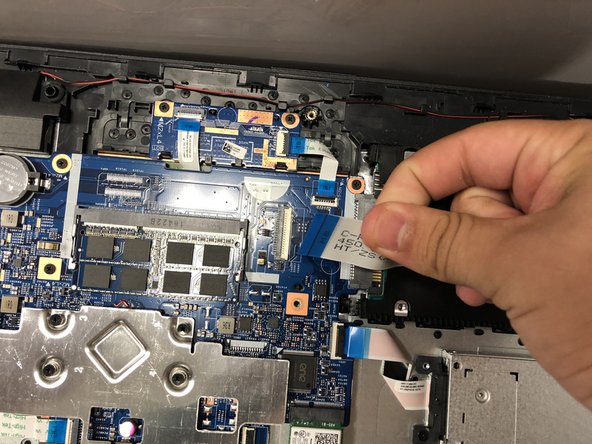
    • Disconnect the blue ends of the white ribbon cable by pulling the blue ends out of the connector.

    • The ribbon cable will still be connected to the rubber and just the ends will be disconnected.

  5. HP 17-x027ds Hard Drive Replacement: stap 5, afbeelding 1 van 2 HP 17-x027ds Hard Drive Replacement: stap 5, afbeelding 2 van 2
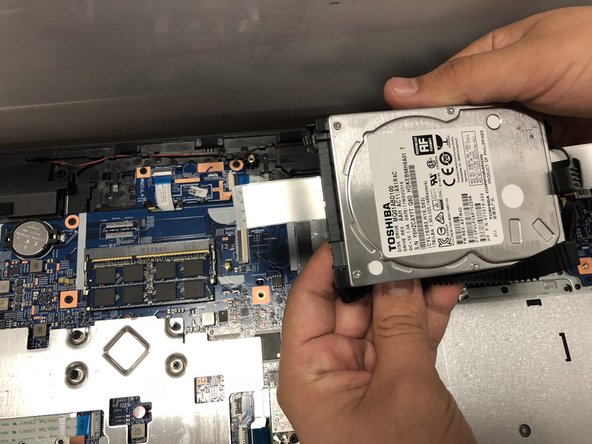
    • Lift the black rubber cover containing the hard drive by lifting the right side of the rubber cover.

    • The white ribbon cable will still be connected to the rubber cover, so remove the hard drive out from under.

Conclusie

To reassemble your device, follow these instructions in reverse order.

Één andere persoon heeft deze handleiding voltooid.

Bill Hoang

Lid sinds: 09/18/18

452 Reputatie

2 handleidingen geschreven

0 opmerkingen

Voeg opmerking toe

Weergavestatistieken:

Afgelopen 24 uren: 0

Afgelopen 7 dagen: 0

Afgelopen 30 dagen: 2

Altijd: 1,033