Ga door naar hoofdinhoud

HP 15-g010dx Button Board Replacement

Wat je nodig hebt

  1. HP 15-g010dx Button Board Replacement, Battery: stap 1, afbeelding 1 van 1
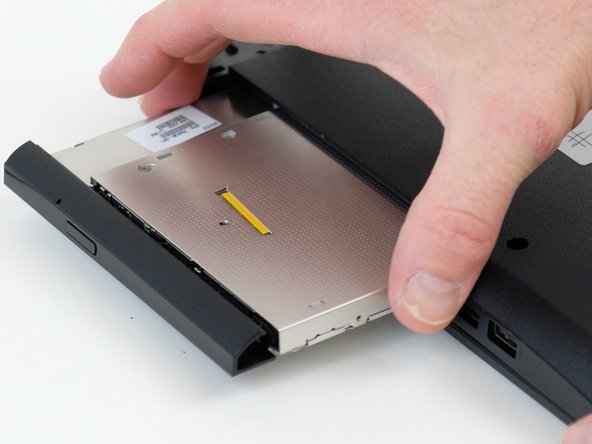
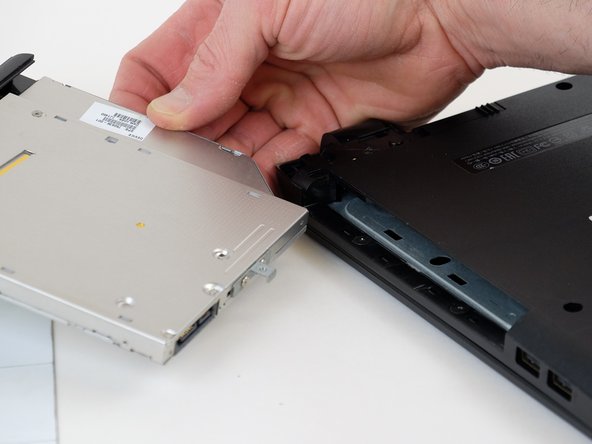
    • Slide the latch towards the center of the laptop so the unlock emblem appears.

  2. HP 15-g010dx Button Board Replacement: stap 2, afbeelding 1 van 1
    • Place your finger on the left latch and slide it towards the center of the laptop.

  3. HP 15-g010dx Button Board Replacement: stap 3, afbeelding 1 van 1
    • Pull on the battery to remove.

  4. HP 15-g010dx Button Board Replacement, Keyboard: stap 4, afbeelding 1 van 1
    • Remove the two 5 mm screws with the Phillips #00 screwdriver.

  5. HP 15-g010dx Button Board Replacement: stap 5, afbeelding 1 van 1
    • Using either a credit card or flat spudger, wedge it between the palm rest and the keyboard.

  6. HP 15-g010dx Button Board Replacement: stap 6, afbeelding 1 van 1
    • Using the tool of your choice, gently pry up on the top of the keyboard.

  7. HP 15-g010dx Button Board Replacement: stap 7, afbeelding 1 van 1
    • Release the top of the keyboard.

  8. HP 15-g010dx Button Board Replacement: stap 8, afbeelding 1 van 1
    • Remove the ZIF connector that connects the laptop to the keyboard cable.

  9. HP 15-g010dx Button Board Replacement, Button Board: stap 9, afbeelding 1 van 1
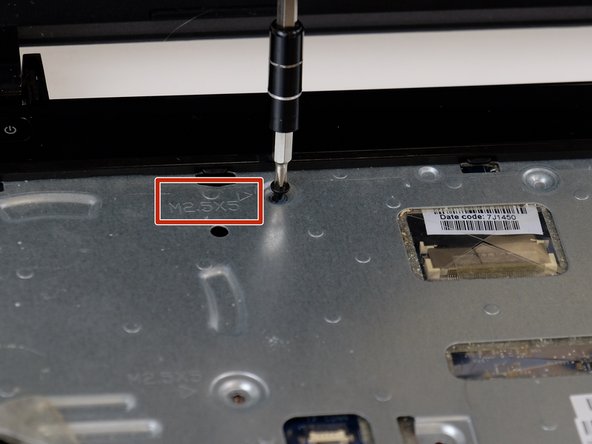
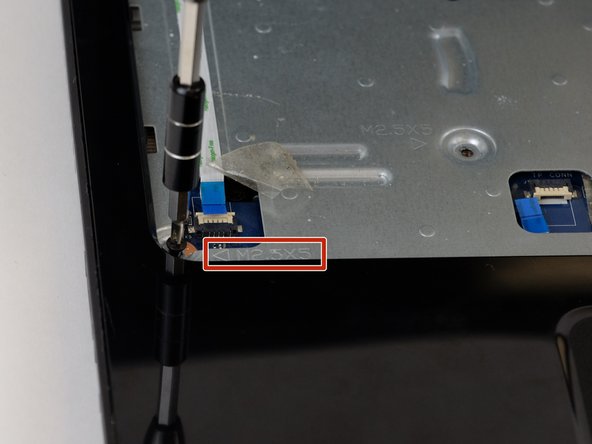
    • Using a Phillips #00 screwdriver, remove all the 5 millimeter screws located on the bottom of the laptop.

  10. HP 15-g010dx Button Board Replacement: stap 10, afbeelding 1 van 1
    • Using the spudger, remove the two rubber feet that are located near the battery.

  11. HP 15-g010dx Button Board Replacement: stap 11, afbeelding 1 van 1
    • Now remove the two Phillips screws that are located below the rubber feet.

  12. HP 15-g010dx Button Board Replacement: stap 12, afbeelding 1 van 3 HP 15-g010dx Button Board Replacement: stap 12, afbeelding 2 van 3 HP 15-g010dx Button Board Replacement: stap 12, afbeelding 3 van 3
    • Remove the optical drive by pulling it out by hand.

  13. HP 15-g010dx Button Board Replacement: stap 13, afbeelding 1 van 1
    • Remove the two Phillips screws inside the optical drive housing.

  14. HP 15-g010dx Button Board Replacement: stap 14, afbeelding 1 van 1
    • Disconnect the power button ribbon cable by lifting the connector.

  15. HP 15-g010dx Button Board Replacement: stap 15, afbeelding 1 van 1
    • Now disconnect the touch pad ribbon cable by lifting the connector.

  16. HP 15-g010dx Button Board Replacement: stap 16, afbeelding 1 van 3 HP 15-g010dx Button Board Replacement: stap 16, afbeelding 2 van 3 HP 15-g010dx Button Board Replacement: stap 16, afbeelding 3 van 3
    • Remove the screws indicated by an arrow stamped into the metal.

  17. HP 15-g010dx Button Board Replacement: stap 17, afbeelding 1 van 1
    • Insert the spudger between the palmrest and the laptop body.

  18. HP 15-g010dx Button Board Replacement: stap 18, afbeelding 1 van 1
    • Lift up on palm rest, while working the spudger around the perimeter.

  19. HP 15-g010dx Button Board Replacement: stap 19, afbeelding 1 van 2 HP 15-g010dx Button Board Replacement: stap 19, afbeelding 2 van 2
    • Remove palm rest and flip it over.

  20. HP 15-g010dx Button Board Replacement: stap 20, afbeelding 1 van 2 HP 15-g010dx Button Board Replacement: stap 20, afbeelding 2 van 2
    • Release the cable connected to the button board.

  21. HP 15-g010dx Button Board Replacement: stap 21, afbeelding 1 van 2 HP 15-g010dx Button Board Replacement: stap 21, afbeelding 2 van 2
    • Remove the two Phillips screws securing the button board.

  22. HP 15-g010dx Button Board Replacement: stap 22, afbeelding 1 van 1
    • Remove button board.

Eindstreep

Één andere persoon heeft deze handleiding voltooid.

0 opmerkingen

Voeg opmerking toe

Weergavestatistieken:

Afgelopen 24 uren: 0

Afgelopen 7 dagen: 2

Afgelopen 30 dagen: 3

Altijd: 408