Inleiding
Follow this repair guide if you believe your hard drive is not functioning properly and want to remove it.
Wat je nodig hebt
-
-
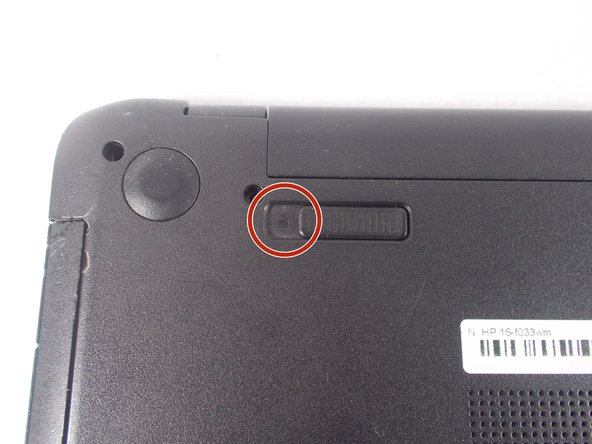
Turn power off using the power button located in the top left corner of the keyboard. Press and hold the power button for 3 seconds until it turns off.
-
-
-
-
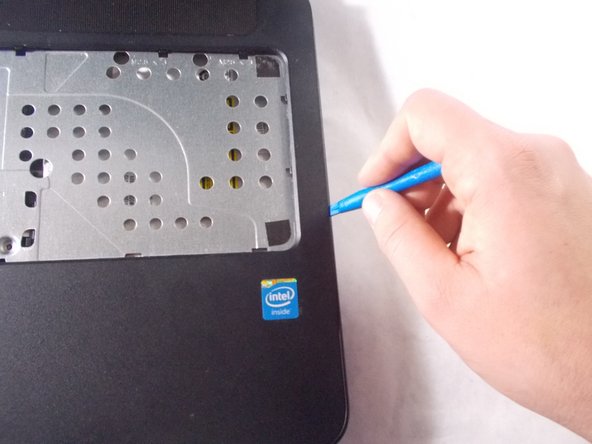
Remove the thirteen 7 mm PH1 Phillips head screws from the bottom of the laptop.
-
-
-
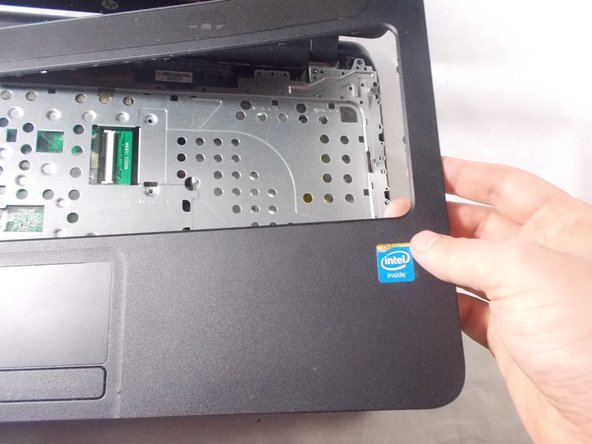
After removing the battery and palm rest, unscrew the two 3 mm PH1 Phillips head screws that hold the small tab that secures the connection of the USB port and headphone jack.
-


To reassemble your device, follow these instructions in reverse order.
To reassemble your device, follow these instructions in reverse order.
Annuleren: ik heb deze handleiding niet afgemaakt.
10 andere personen hebben deze handleiding voltooid.
Team

UMass Dartmouth, Team S1-G4, Simcock Fall 2017 Lid van UMass Dartmouth, Team S1-G4, Simcock Fall 2017
UMASSD-SIMCOCK-F17S1G4
3 Leden
6 handleidingen geschreven
6 opmerkingen
Though similar, these directions do not work for me. I had 2 additional screws on the bottom and step 9 doesn't look like mine at as my metal section under the keyboard is attached to the palmrest and something else is holding the palmrest and the back of the system together by where the DVD drive is…
Agreed. My model was the 15-f387wm. Regarding the DVD drive area. There are 3, very shallow, wide flat silver screws at the top after removing the dvd drive. You will need a very small phillips head to take them out without stripping. There were 4 silver screws and one black screw at the top left of the fan holding my keyboard tray down.
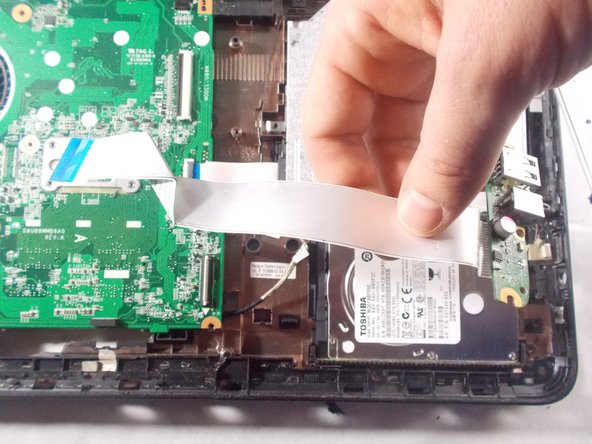
Also author skipped or did not have on his model the step to remove two ribbon cables at bottom and top left of keyboard tray before removing. Same thing as above flup up black catch before pulling ribbons out.
Thank you for the guide!
I replaced the OEM mechanical hard drive with an SSD. Used Macrium Reflect free edition to clone the drive. The laptop works 10x better now. The CPU is still limited, but it does not take forever to boot up anymore. SSDs are cheap now, this a a worthwhile upgrade.
For the f233 model - there is one difference.
After you have removed the keyboard you will not be able to remove the handguard/plastic framing without this:
1. Slide the entire CD drive out, you can see where the frame mounts to the sata/connector block.
2. Once that is completed, there are 3 silver screws holding the frame for the CD drive insert to the top plastic. Pull those screws.
3. Remove the 4 (not 5) screws from the metal frame
4. Lift black tabs from 2 ribbon cables and slide out
4. Remove the plastic handguard and metal frame underneath as one entire unit.
Same for f387