Ga door naar hoofdinhoud

HP 15-dy2024nr Trackpad Replacement

Wat je nodig hebt

  1. HP 15-dy2024nr Trackpad Replacement, Back Cover: stap 1, afbeelding 1 van 2 HP 15-dy2024nr Trackpad Replacement, Back Cover: stap 1, afbeelding 2 van 2
    • Use a spudger to peel one corner of each of the rubber feet from the bottom of the laptop.

    • Gently peel the feet from the laptop using the spudger revealing the screws underneath.

    • If the rubber foot peels away but leaves adhesive behind you must peel the adhesive away before removing the screws.

  2. HP 15-dy2024nr Trackpad Replacement: stap 2, afbeelding 1 van 3 HP 15-dy2024nr Trackpad Replacement: stap 2, afbeelding 2 van 3 HP 15-dy2024nr Trackpad Replacement: stap 2, afbeelding 3 van 3
    • Use a Phillips #1 screwdriver to remove:

    • Two 2.5mm x 6mm screws

    • Six 2mm x 6mm screws

    • Be sure to keep different screw sizes separated.

  3. HP 15-dy2024nr Trackpad Replacement: stap 3, afbeelding 1 van 3 HP 15-dy2024nr Trackpad Replacement: stap 3, afbeelding 2 van 3 HP 15-dy2024nr Trackpad Replacement: stap 3, afbeelding 3 van 3
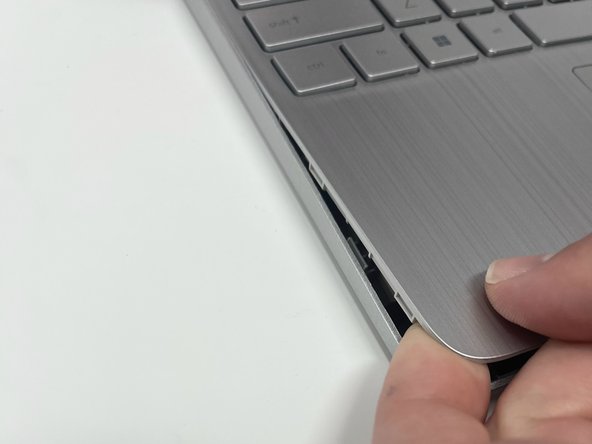
    • Insert an iFixit opening tool into the seam between the keyboard area and bottom cover.

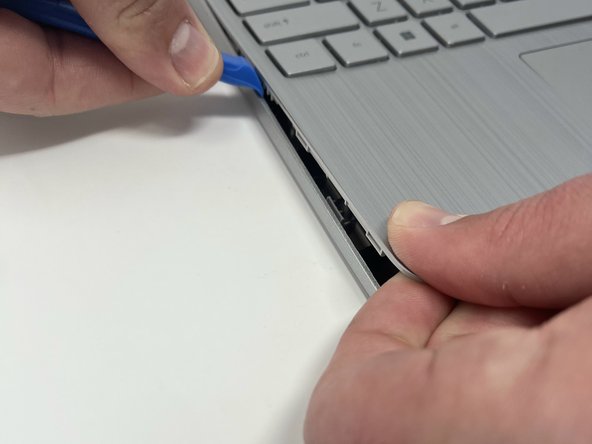
    • Using another iFixit opening tool, slide along the seam to unhook the clips.

    • There are clips all the way around the seam. You may hear a popping sound as the clips come loose. This step may require some force to separate the back cover from the laptop.

    • When the front of the laptop is open, you can use your finger to hold a corner open then slide an iFixit opening tool along the seam toward the back corner.

    • After the clips have been released, flip the laptop over and lift the cover.

  4. HP 15-dy2024nr Trackpad Replacement, Battery: stap 4, afbeelding 1 van 3 HP 15-dy2024nr Trackpad Replacement, Battery: stap 4, afbeelding 2 van 3 HP 15-dy2024nr Trackpad Replacement, Battery: stap 4, afbeelding 3 van 3
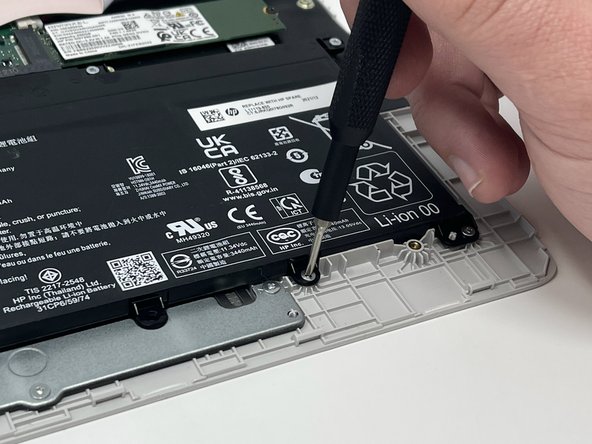
    • Remove five 2.0mm x 3.0mm screws using a Phillips #00 screwdriver.

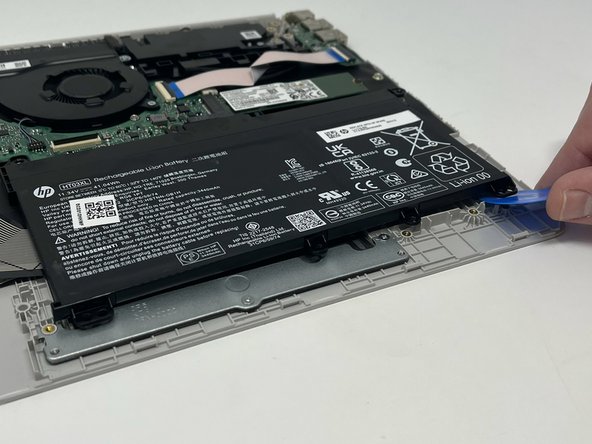
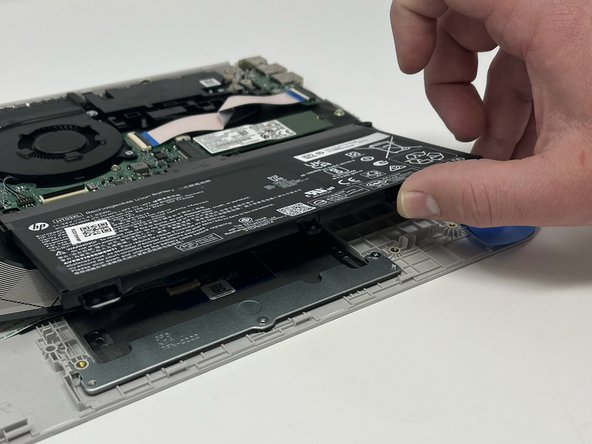
    • Use the iFixit opening picks to lift the battery away from the laptop.

  5. HP 15-dy2024nr Trackpad Replacement: stap 5, afbeelding 1 van 3 HP 15-dy2024nr Trackpad Replacement: stap 5, afbeelding 2 van 3 HP 15-dy2024nr Trackpad Replacement: stap 5, afbeelding 3 van 3
    • Be aware that the battery is plugged into the motherboard.

    • Unplug the battery from the motherboard.

    • Lift the battery away from the laptop and remove.

  6. HP 15-dy2024nr Trackpad Replacement, Trackpad: stap 6, afbeelding 1 van 2 HP 15-dy2024nr Trackpad Replacement, Trackpad: stap 6, afbeelding 2 van 2
    • Remove two 3.0 mm screws using a Phillips #1 screwdriver.

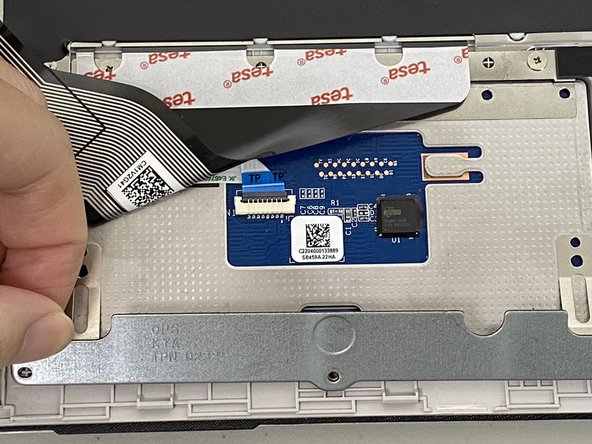
    • Lift the metal bracket away from the laptop and remove it with your hands.

  7. HP 15-dy2024nr Trackpad Replacement: stap 7, afbeelding 1 van 1
    • Remove three 2.0 mm screws using a Phillips #0 screwdriver.

  8. HP 15-dy2024nr Trackpad Replacement: stap 8, afbeelding 1 van 1
    • Lift the track pad away from the laptop and remove with your hands.

Conclusie

To reassemble your device, follow these instructions in reverse order.

Eylandra

Lid sinds: 02/08/24

97 Reputatie

1 Handleiding geschreven

0 opmerkingen

Voeg opmerking toe

Weergavestatistieken:

Afgelopen 24 uren: 0

Afgelopen 7 dagen: 1

Afgelopen 30 dagen: 11

Altijd: 52