Ga door naar hoofdinhoud

HP 15-db0004dx Motherboard Replacement

Wat je nodig hebt

  1. HP 15-db0004dx Motherboard Replacement, Bottom Case: stap 1, afbeelding 1 van 2 HP 15-db0004dx Motherboard Replacement, Bottom Case: stap 1, afbeelding 2 van 2
    • Turn the laptop off and unplug it before starting.

    • Flip your laptop over, face down.

  2. HP 15-db0004dx Motherboard Replacement: stap 2, afbeelding 1 van 1
    • Peel off the two long rubber grips running lengthwise on the laptop.

  3. HP 15-db0004dx Motherboard Replacement: stap 3, afbeelding 1 van 2 HP 15-db0004dx Motherboard Replacement: stap 3, afbeelding 2 van 2
    • Using a Phillips #000 screwdriver, remove the eleven 10 mm screws located on the underside of the laptop, that are holding the back panel in place.

  4. HP 15-db0004dx Motherboard Replacement: stap 4, afbeelding 1 van 1
    • Carefully slide the optical drive out of the laptop.

  5. HP 15-db0004dx Motherboard Replacement: stap 5, afbeelding 1 van 1
    • Use a plastic opening tool to separate the back panel from the laptop.

    • For an easier removal, start at the corner and run the tool along the edge of the cover.

    • If you do not have a plastic opening tool, open it carefully using your hands, as shown.

    • Be careful to not bend the back panel, or to not apply too much pressure and force, doing so could cause the panel to break.

  6. HP 15-db0004dx Motherboard Replacement, Fan: stap 6, afbeelding 1 van 3 HP 15-db0004dx Motherboard Replacement, Fan: stap 6, afbeelding 2 van 3 HP 15-db0004dx Motherboard Replacement, Fan: stap 6, afbeelding 3 van 3
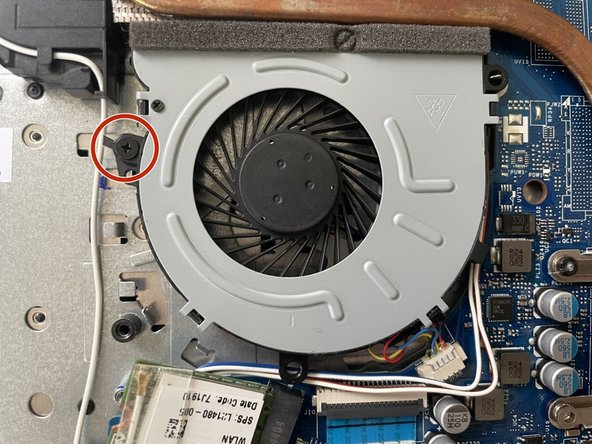
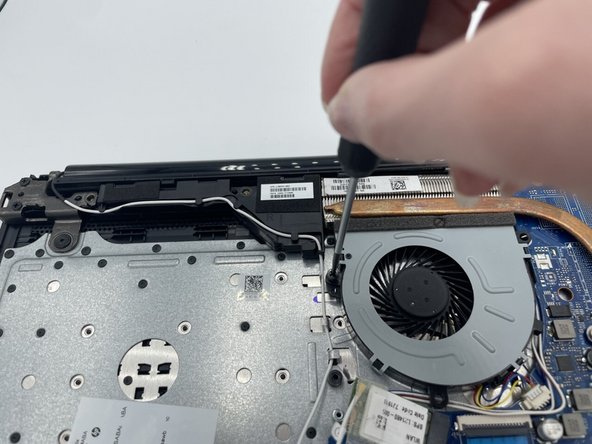
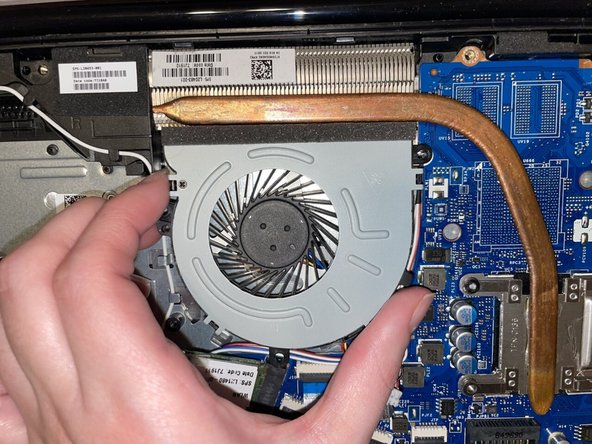
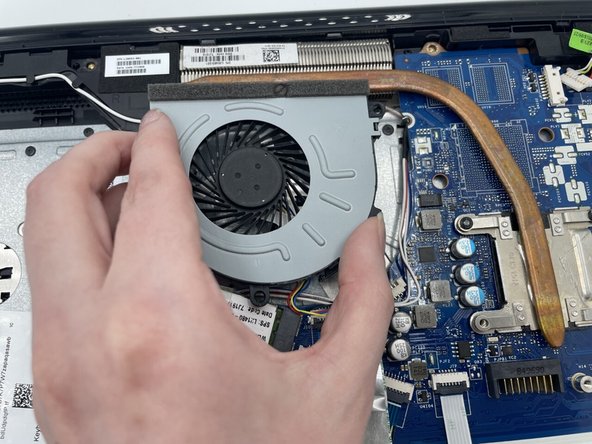
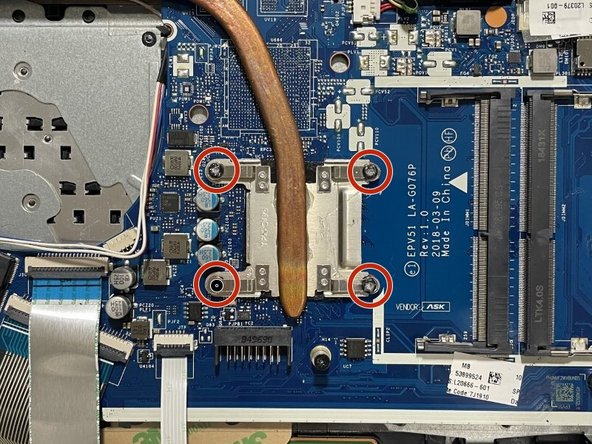
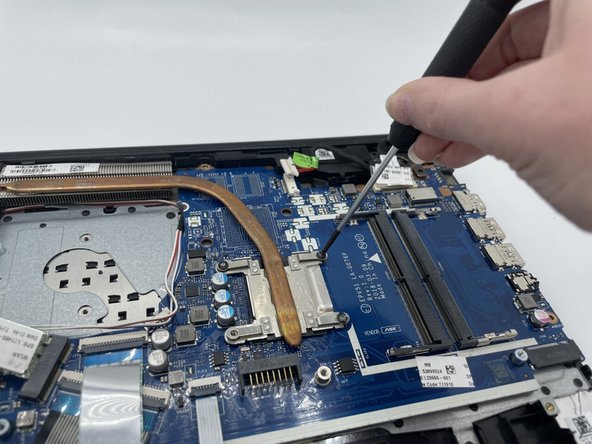
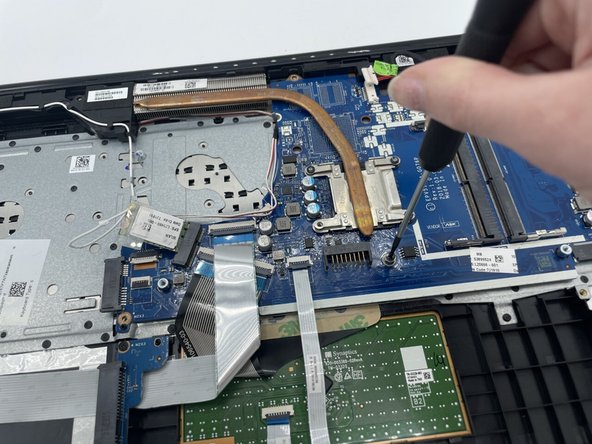
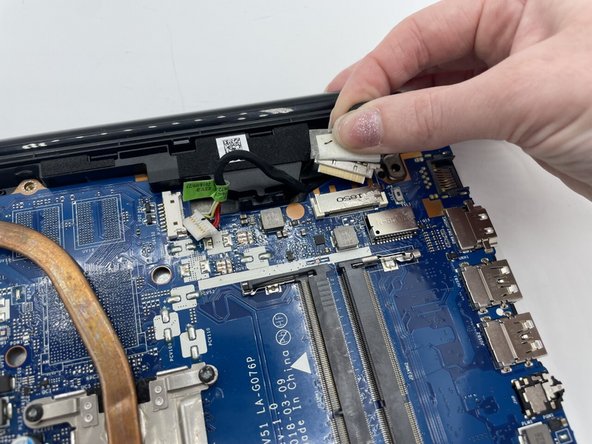
    • Using a Phillips #000 screwdriver remove the 5mm screw holding the fan in place.

  7. HP 15-db0004dx Motherboard Replacement: stap 7, afbeelding 1 van 3 HP 15-db0004dx Motherboard Replacement: stap 7, afbeelding 2 van 3 HP 15-db0004dx Motherboard Replacement: stap 7, afbeelding 3 van 3
    • After the screw is removed, carefully unplug the set of wires with one of each colored, red, black, yellow, and blue, from the white connector it is secured at.

    • To unplug it gently pull the white connector from the adapter, possibly in a back and forth motion to free it.

    • DO NOT pull on the wires, doing so could cause damage to the wires, or for them to become disconnected to the white adapter they are attached to.

  8. HP 15-db0004dx Motherboard Replacement: stap 8, afbeelding 1 van 3 HP 15-db0004dx Motherboard Replacement: stap 8, afbeelding 2 van 3 HP 15-db0004dx Motherboard Replacement: stap 8, afbeelding 3 van 3
    • Carefully remove the fan from the laptop.

    • Be careful with removal as to not bend or break anything. There is a metal peg shown in the image, that the fan is secured on that could potentially bend

  9. HP 15-db0004dx Motherboard Replacement, RAM: stap 9, afbeelding 1 van 1
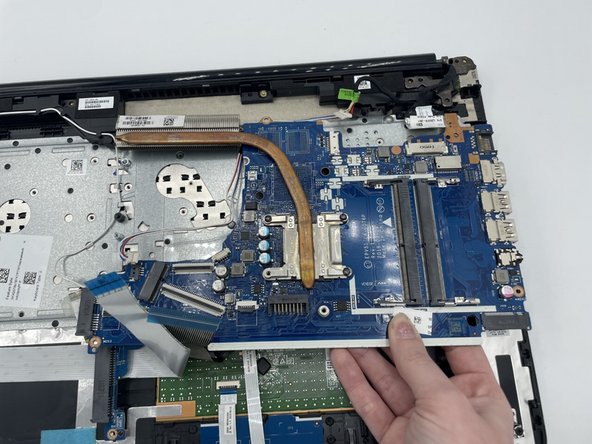
    • Gently pull apart the two silver arms securing the RAM until it slightly flips up.

    • Pull the RAM directly out of its port.

  10. HP 15-db0004dx Motherboard Replacement: stap 10, afbeelding 1 van 1
    • To put the RAM back into the device. Have the RAM facing you with the four grey boxes towards you. Then carefully slide it under the first grey bar shown circled in the picture and push slightly downwards as it will pop back into place.

  11. HP 15-db0004dx Motherboard Replacement, Battery: stap 11, afbeelding 1 van 2 HP 15-db0004dx Motherboard Replacement, Battery: stap 11, afbeelding 2 van 2
    • Using the Philips #000 screwdriver remove all of the six 5mm screws.

  12. HP 15-db0004dx Motherboard Replacement: stap 12, afbeelding 1 van 3 HP 15-db0004dx Motherboard Replacement: stap 12, afbeelding 2 van 3 HP 15-db0004dx Motherboard Replacement: stap 12, afbeelding 3 van 3
    • Disconnect the battery connector.

    • Slide the battery up and out.

  13. HP 15-db0004dx Motherboard Replacement, Motherboard: stap 13, afbeelding 1 van 3 HP 15-db0004dx Motherboard Replacement, Motherboard: stap 13, afbeelding 2 van 3 HP 15-db0004dx Motherboard Replacement, Motherboard: stap 13, afbeelding 3 van 3
    • Unscrew the four 3 mm screws using a Philips #000 screwdriver.

  14. HP 15-db0004dx Motherboard Replacement: stap 14, afbeelding 1 van 2 HP 15-db0004dx Motherboard Replacement: stap 14, afbeelding 2 van 2
    • Remove the seven screws using a Phillips #000 screwdriver.

  15. HP 15-db0004dx Motherboard Replacement: stap 15, afbeelding 1 van 2 HP 15-db0004dx Motherboard Replacement: stap 15, afbeelding 2 van 2
    • Remove the three ribbons that are attached to the motherboard by flipping up the black lock bar, then sliding the ribbon cables out.

  16. HP 15-db0004dx Motherboard Replacement: stap 16, afbeelding 1 van 2 HP 15-db0004dx Motherboard Replacement: stap 16, afbeelding 2 van 2
    • Remove the following ribbons that are attached to the motherboard.

    • Flip up the white lock bar, then gently disconnect the ribbon cable.

  17. HP 15-db0004dx Motherboard Replacement: stap 17, afbeelding 1 van 3 HP 15-db0004dx Motherboard Replacement: stap 17, afbeelding 2 van 3 HP 15-db0004dx Motherboard Replacement: stap 17, afbeelding 3 van 3
    • Remove the Wi-Fi card, attached to a white wire, by carefully sliding it out of its port.

  18. HP 15-db0004dx Motherboard Replacement: stap 18, afbeelding 1 van 3 HP 15-db0004dx Motherboard Replacement: stap 18, afbeelding 2 van 3 HP 15-db0004dx Motherboard Replacement: stap 18, afbeelding 3 van 3
    • Next is to remove a small white connector, with two white, one red, and one blue wire, shown in the image. It was located underneath the WLAN.

    • To remove it, holding on to the white plastic piece, carefully pull it from the blue connector. You may have to move it in a shimmying motion to carefully free it from the connector.

  19. HP 15-db0004dx Motherboard Replacement: stap 19, afbeelding 1 van 3 HP 15-db0004dx Motherboard Replacement: stap 19, afbeelding 2 van 3 HP 15-db0004dx Motherboard Replacement: stap 19, afbeelding 3 van 3
    • The next piece is to detach a piece with one white, yellow, and copper wire, as well as two red, and two black wires. all wrapped in a nylon casing, attached to a white plastic connector. It is connected to a white attachment. This is located at the top right hand corner.

    • To remove it, repeat the same motion in the previous step.

  20. HP 15-db0004dx Motherboard Replacement: stap 20, afbeelding 1 van 3 HP 15-db0004dx Motherboard Replacement: stap 20, afbeelding 2 van 3 HP 15-db0004dx Motherboard Replacement: stap 20, afbeelding 3 van 3
    • Next is to remove the other piece wrapped in nylon, shown in the image. It is located to the right of the previous piece.

    • This one has a metal connector, and it is a bit more difficult to remove. To remove, firmly pull it from the connector, holding on the attachment piece opposed to the wire.

    • Use the same motion used in the previous two steps, to help free it from its attachment point.

  21. HP 15-db0004dx Motherboard Replacement: stap 21, afbeelding 1 van 2 HP 15-db0004dx Motherboard Replacement: stap 21, afbeelding 2 van 2
    • The last step is to remove the motherboard from the laptop. To do so, working from the bottom, gently ease the motherboard from its connector point at the top right corner.

    • To remove, pull straight out towards you. Do not lift up as you are removing, doing so could cause the motherboard or other components to break.

Conclusie

To reassemble your device, follow these instructions in reverse order.

Één andere persoon heeft deze handleiding voltooid.

Britanni Arizola

Lid sinds: 09/22/22

562 Reputatie

3 handleidingen geschreven

0 opmerkingen

Voeg opmerking toe

Weergavestatistieken:

Afgelopen 24 uren: 0

Afgelopen 7 dagen: 0

Afgelopen 30 dagen: 8

Altijd: 243