Inleiding
This guide will aid users in removing and replacing the fan of their HP 15-ay091ms Device. A malfunctioning fan can damage the device over time; a working fan helps to avoid overheating. Removal and replacement of the fan is an easy fix users can do to protect the longevity of their device.
Wat je nodig hebt
-
-
Push the latches on either side of the battery down and outward.
-
Remove the battery.
-
-
-
-
Remove the screws from the bottom panel using a JIS #0 screwdriver.
-
Use the iFixit opening pick to lift the back cover from the device.
-
-
Gereedschap gebruikt in deze stap:Tweezers$4.99
-
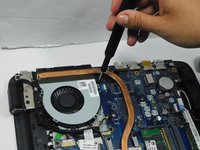
Remove the screws holding the fan in place using a JIS #0 screwdriver.
-
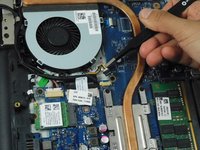
Use a pair of tweezers to disconnect the wiring that powers the fan.
-
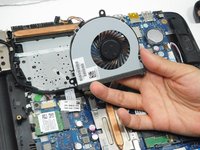
Remove the fan.
-


To reassemble your device, follow these instructions in reverse order.
To reassemble your device, follow these instructions in reverse order.
Team

Gateway, Team A-1, Gonzalez Fall 2023 Lid van Gateway, Team A-1, Gonzalez Fall 2023
GCC-GONZALEZ-F23SAG1
4 Leden
3 handleidingen geschreven