Ga door naar hoofdinhoud

HP 15-ay011nr Fan Replacement

Wat je nodig hebt

  1. HP 15-ay011nr Fan Replacement, Battery: stap 1, afbeelding 1 van 1
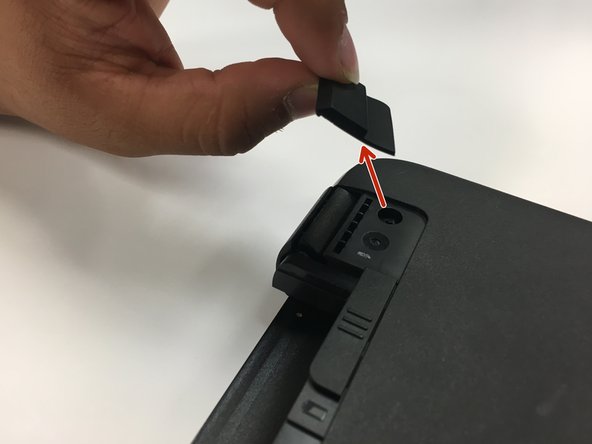
    • Slide the two battery lock latches on the back of the device to the “unlock” position.

  2. HP 15-ay011nr Fan Replacement: stap 2, afbeelding 1 van 1
    • Lift the battery upward to remove it from the device.

  3. HP 15-ay011nr Fan Replacement, Back Panel: stap 3, afbeelding 1 van 1
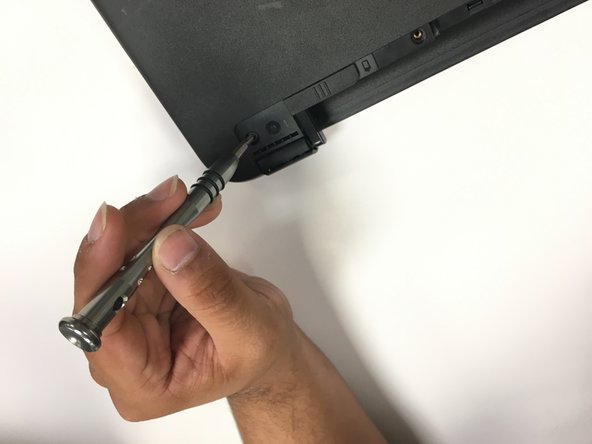
    • Using the PH1 phillips-head screwdriver, remove all the 5/16 in. screws from the back of the device.

    • There should be 10 in total, be sure to keep them together!

  4. HP 15-ay011nr Fan Replacement: stap 4, afbeelding 1 van 1
    • Locate the optical disc drive and remove it from the device by sliding it straight of the device.

  5. HP 15-ay011nr Fan Replacement: stap 5, afbeelding 1 van 2 HP 15-ay011nr Fan Replacement: stap 5, afbeelding 2 van 2
    • Covering the hinges of the device are rubber bumpers secured to the device using adhesive. Remove them carefully.

    • Place the adhesive side up as you will need to place them back after your replacement is complete.

  6. HP 15-ay011nr Fan Replacement: stap 6, afbeelding 1 van 2 HP 15-ay011nr Fan Replacement: stap 6, afbeelding 2 van 2
    • In the same spot you’ve just removed the bumpers from, you will find two 5/16 in. screws. Using the same Phillips-head screwdriver used in step 2, remove the screws

    • Be sure to keep the screws together!

  7. HP 15-ay011nr Fan Replacement: stap 7, afbeelding 1 van 1
    • Carefully remove the back panel from the device.

    • If you are unable to do this with your hands, you can use a thin prying tool of your choice to make it easier!

  8. HP 15-ay011nr Fan Replacement, Fan: stap 8, afbeelding 1 van 2 HP 15-ay011nr Fan Replacement, Fan: stap 8, afbeelding 2 van 2
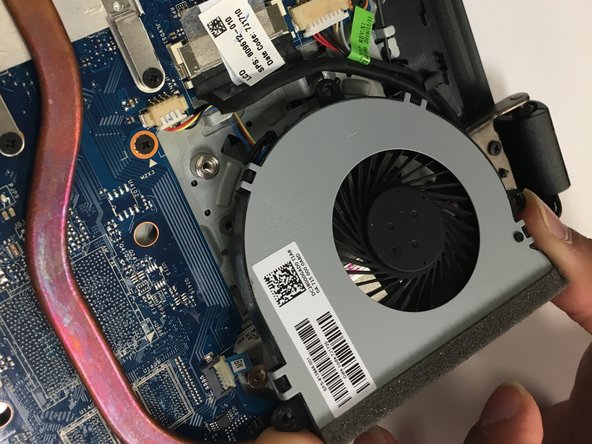
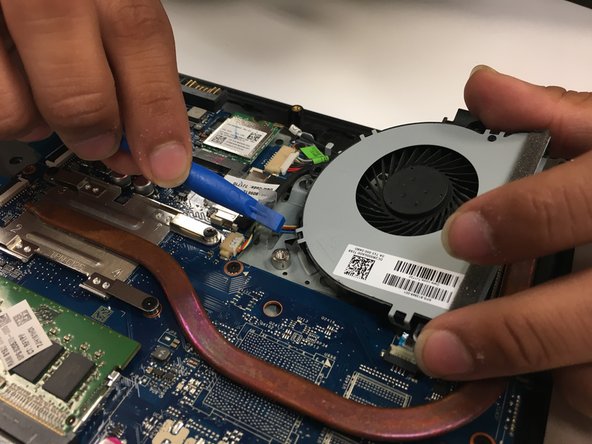
    • There are two 5/16 in. screws adjacent from each other that secure the fan to the device. Use the PH1 phillips-head screwdriver to remove them.

    • Be sure to keep them together!

  9. HP 15-ay011nr Fan Replacement: stap 9, afbeelding 1 van 2 HP 15-ay011nr Fan Replacement: stap 9, afbeelding 2 van 2
    • Lift the clear plastic strip holding down the fan and lift the fan out of place.

  10. HP 15-ay011nr Fan Replacement: stap 10, afbeelding 1 van 2 HP 15-ay011nr Fan Replacement: stap 10, afbeelding 2 van 2
    • Use your fingers or tweezers to pinch both sides of the connector and remove the fan from the device.

Conclusie

To reassemble your device, follow these instructions in reverse order.

Één andere persoon heeft deze handleiding voltooid.

Daymon Brisco

Lid sinds: 09/25/17

288 Reputatie

2 handleidingen geschreven

0 opmerkingen

Voeg opmerking toe

Weergavestatistieken:

Afgelopen 24 uren: 0

Afgelopen 7 dagen: 2

Afgelopen 30 dagen: 13

Altijd: 1,412