Inleiding
If your GoPro seems to have trouble saving videos and pictures, chances are that it is time for a new microSD and expansion port assembly to be installed in your GoPro.
Wat je nodig hebt
-
-
Push the tab on the back of the device left to remove the plate covering the battery.
-
-
-
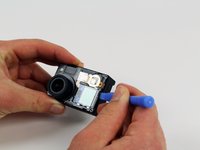
Insert a plastic opening tool in between the front face plate and the black housing.
-
-
-
-
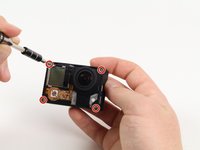
Locate the four 8.1mm PH00 screws on the corners of the GoPro and unscrew them using the phillips screwdriver.
-
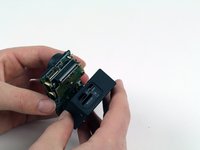
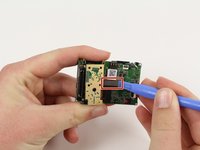
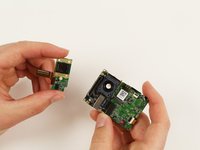
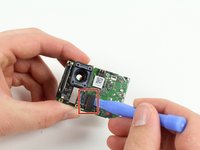
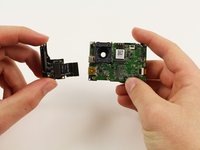
Gently remove the motherboard by using a plastic opening tool to pry it out of the housing.
-
-
-
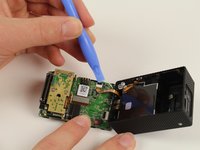
Using your screwdriver, unscrew three 4mm PH00 screws that will free the metal plate.
-


To reassemble your device, follow these instructions in reverse order.
Annuleren: ik heb deze handleiding niet afgemaakt.
5 andere personen hebben deze handleiding voltooid.
Team

Cal Poly, Team 5-8, Maness Fall 2015 Lid van Cal Poly, Team 5-8, Maness Fall 2015
CPSU-MANESS-F15S5G8
4 Leden
12 handleidingen geschreven
4Gids Commentaar
Blake: Thanks for this guide. Before I start, I was curious if after doing this you think I will be able to extract a broken Micro SD card from this location? I am not sure how it happened but as I was removing my waterproof case from my GoPro, my MicroSD snapped in half and half of it is stuck in the memory card location you so clearly have showed to remove. Just asking because before I go on this adventure, I wanted your advice if this will even solve my problem. Thanks for the help.
-DJ
DJ: I would highly recommend taking apart your go pro with ifixit tools. Little holes are on the micro sd card slot holder which may allow you to remove your broken sd card without damaging your camera. I would not worry about damaging your camera from taking it apart as it is very easy to dismember and handle for an electronic device and reassembly was pretty easy as well. Worst case it is worth the shot to try and save yourself a few bucks and not have to buy a new camera.
DJ: I just removed a half-broken SD Card from the slot using this guide. It requires a pin or some fine pitch tweezers. You will have to get to the last step of this guide to get the micro SD assembly removed from your camera. Then, there is a metal tab (hook shaped) protruding from the side of the micro SD connector you have to gently pull it out of the way (from outside the micro SD connector). Then, you can insert a safety-pin or tweezers from the outside (right side of the connector) and pull out the broken card. Sounds confusing but cannot upload images here.
Also, note that if your card is locked inside the connector and you cannot remove it, you will have to eject it first from the slot to get it out a few mm.
[WARNING!!! - Follow at your own risk] Insert a new SD card and try to gently push the broken SD card inside. What it will do is unlock the broken card and eject it out a few mm.
Thanx Blake for putting this guide together. I was kinda nervous about doing this as I’ve had the new expansion port for over a week. So today after getting some things done.. I said I want my camera back. So within 15 minutes I was reinstalling the parts and it works.