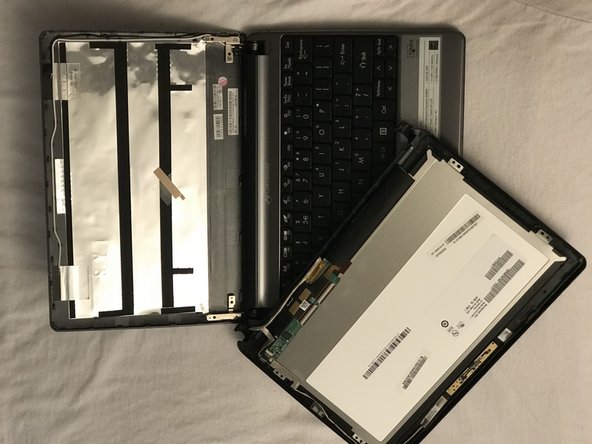
Ga door naar hoofdinhoud

Gateway LT41P10u Monitor Replacement

Wat je nodig hebt

  1. Gateway LT41P10u Monitor Replacement, Battery: stap 1, afbeelding 1 van 1
    • Place the laptop upside down on a flat surface so you can see the battery.

  2. Gateway LT41P10u Monitor Replacement: stap 2, afbeelding 1 van 1
    • Pull the two marked tabs towards the outside of the computer to unlock them.

  3. Gateway LT41P10u Monitor Replacement: stap 3, afbeelding 1 van 1
    • While keeping both of the tabs in the unlocked position, grab the battery and pull outwards, until the battery slides out from the rest of the computer.

  4. Gateway LT41P10u Monitor Replacement, Monitor: stap 4, afbeelding 1 van 2 Gateway LT41P10u Monitor Replacement, Monitor: stap 4, afbeelding 2 van 2
    • Carefully use a spudger to separate the monitor from top panel.

    • Gently remove lower hooks from the hinges. (see second image)

  5. Gateway LT41P10u Monitor Replacement: stap 5, afbeelding 1 van 2 Gateway LT41P10u Monitor Replacement: stap 5, afbeelding 2 van 2
    • Once you completed separating the monitor from the top panel disconnect the cable shown here in red by raising the cable lock and pulling the wires away.

    • The second image is how it should look once completely disconnected.

Conclusie

To reinstall your device, follow these instructions in reverse order.

Michael Smith

Lid sinds: 10/19/17

401 Reputatie

4 handleidingen geschreven

Team

UMass Dartmouth, Team S66-G8, Rockett Fall 2017 Lid van UMass Dartmouth, Team S66-G8, Rockett Fall 2017

UMASSD-ROCKETT-F17S66G8

3 Leden

12 handleidingen geschreven

0 opmerkingen

Voeg opmerking toe

Weergavestatistieken:

Afgelopen 24 uren: 0

Afgelopen 7 dagen: 7

Afgelopen 30 dagen: 11

Altijd: 217