Ga door naar hoofdinhoud

Gateway KAV60 LT2016U Netbook Hard Drive Replacement

Gearchiveerde handleiding
Deze handleiding wordt enkel nog bijgehouden voor historische doeleinden. Gebruik de laatste versie van deze gids om uw reparatie uit te voeren.

Wat je nodig hebt

  1. Gateway KAV60 LT2016U Netbook Hard Drive Replacement, Hard Drive: stap 1, afbeelding 1 van 1
    • The hard drive is located on the bottom of the laptop on the left hand side.

  2. Gateway KAV60 LT2016U Netbook Hard Drive Replacement: stap 2, afbeelding 1 van 1
    • Remove the two screws on the cover with the specified screwdriver.

  3. Gateway KAV60 LT2016U Netbook Hard Drive Replacement: stap 3, afbeelding 1 van 1
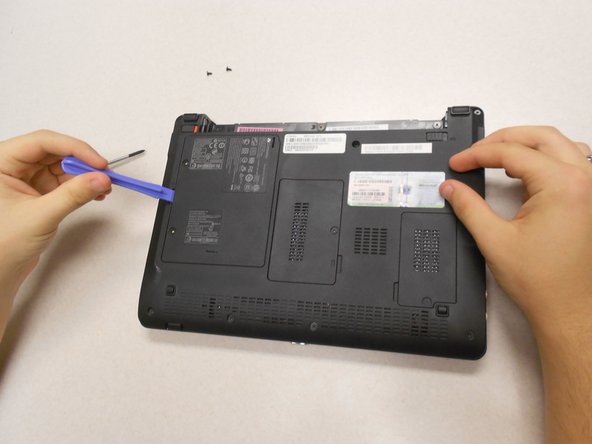
    • Lift off the cover with the plastic opener.

  4. Gateway KAV60 LT2016U Netbook Hard Drive Replacement: stap 4, afbeelding 1 van 1
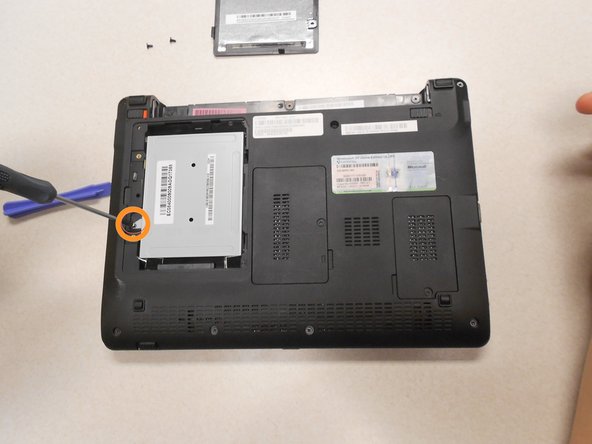
    • Remove the one screw holding the hard drive in place with the same screw driver.

  5. Gateway KAV60 LT2016U Netbook Hard Drive Replacement: stap 5, afbeelding 1 van 1
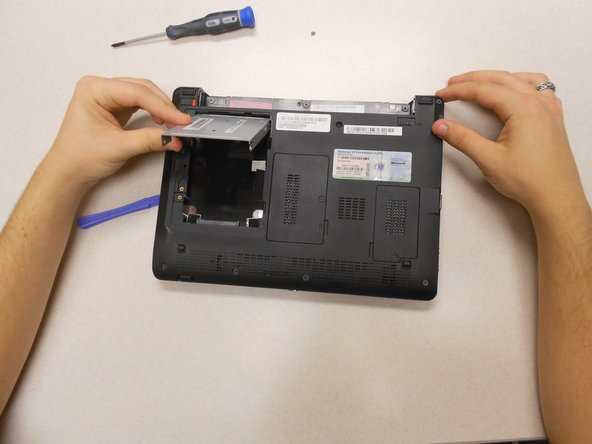
    • Slide the hard drive up and remove it from the laptop.

Conclusie

To reassemble your device, follow these instructions in reverse order.

Één andere persoon heeft deze handleiding voltooid.

Kyle

Lid sinds: 03/11/14

622 Reputatie

3 handleidingen geschreven

Team

UMass Dartmouth, Team 3-2, Calaway Spring 2014 Lid van UMass Dartmouth, Team 3-2, Calaway Spring 2014

UMASSD-CALAWAY-S14S3G2

4 Leden

6 handleidingen geschreven

0 opmerkingen

Voeg opmerking toe

Weergavestatistieken:

Afgelopen 24 uren: 0

Afgelopen 7 dagen: 2

Afgelopen 30 dagen: 5

Altijd: 180