Ga door naar hoofdinhoud

Garmin Nuvi 50LM Speaker Replacement

Wat je nodig hebt

  1. Garmin Nuvi 50LM Speaker Replacement, Speaker Replacement: stap 1, afbeelding 1 van 1
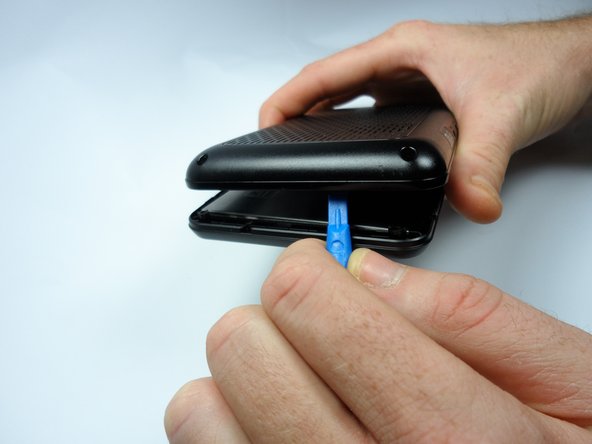
    • Place the LCD screen is face down on a flat surface.

    • Make sure the side containing the speaker and the charging port is facing up.

  2. Garmin Nuvi 50LM Speaker Replacement: stap 2, afbeelding 1 van 3 Garmin Nuvi 50LM Speaker Replacement: stap 2, afbeelding 2 van 3 Garmin Nuvi 50LM Speaker Replacement: stap 2, afbeelding 3 van 3
    • Remove the four 9 mm screws on the back of the GPS unit using the Torx T-4 screwdriver found in the iFixit Pro Tech Tool Kit.

  3. Garmin Nuvi 50LM Speaker Replacement: stap 3, afbeelding 1 van 3 Garmin Nuvi 50LM Speaker Replacement: stap 3, afbeelding 2 van 3 Garmin Nuvi 50LM Speaker Replacement: stap 3, afbeelding 3 van 3
    • Gently pry open the device with the iFixit Plastic Opening Tool found in the iFixit Pro Tech Tool Kit.

    • Be careful not to damage the orange ribbon cable and the motherboard.

  4. Garmin Nuvi 50LM Speaker Replacement: stap 4, afbeelding 1 van 3 Garmin Nuvi 50LM Speaker Replacement: stap 4, afbeelding 2 van 3 Garmin Nuvi 50LM Speaker Replacement: stap 4, afbeelding 3 van 3
    • Once the GPS is open, identify the black and blue wires connecting the black speaker to the green motherboard.

    • The black wire is located closest to the speaker.

    • The blue wire is located farthest from the speaker.

  5. Garmin Nuvi 50LM Speaker Replacement: stap 5, afbeelding 1 van 3 Garmin Nuvi 50LM Speaker Replacement: stap 5, afbeelding 2 van 3 Garmin Nuvi 50LM Speaker Replacement: stap 5, afbeelding 3 van 3
    • Cut both wires using a pair of wire cutters.

  6. Garmin Nuvi 50LM Speaker Replacement: stap 6, afbeelding 1 van 2 Garmin Nuvi 50LM Speaker Replacement: stap 6, afbeelding 2 van 2
    • Solder the wires of the replacement speaker back onto the small silver squares located on the motherboard using the iFixit Soldering Station.

    • Be careful when using the soldering iron, the temperature can reach 600F.

    • Solder the black wire onto the motherboard on the port closest to the speaker and solder the blue wire onto the motherboard on the port farthest from the speaker.

Conclusie

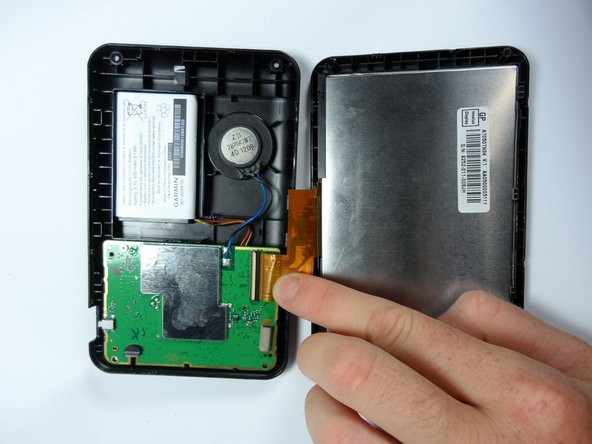
To reassemble your device, follow these instructions in reverse order.

Één andere persoon heeft deze handleiding voltooid.

Maurice Thomas

Lid sinds: 10/13/15

661 Reputatie

5 handleidingen geschreven

Team

Één opmerking

Where would you get the replacement speakers??

abby dog - Antwoord

Voeg opmerking toe

Weergavestatistieken:

Afgelopen 24 uren: 0

Afgelopen 7 dagen: 1

Afgelopen 30 dagen: 10

Altijd: 2,574