Inleiding
This walkthrough will instruct you on how to disassemble the device, remove the battery, and replace it.
Wat je nodig hebt
-
-
Place the device face-down, with the screen facing the surface. There are 8.7mm screws located in each of the back 4 corners of the device. Using a T5 Torx screw bit, unscrew all four screws and leave them aside.
-
-
-
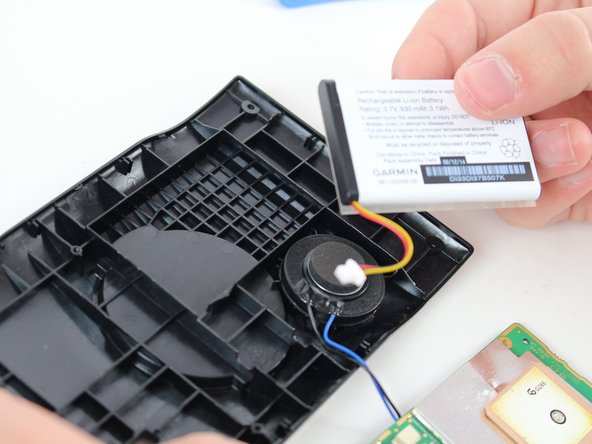
Place a plastic opening tool in the seam between the back and front plates of the device. Using constant pressure, slowly and continuously slide the tool along the seam. The tool should disable each of the hooks holding the two plates together. If unsuccessful, apply slightly more pressure and try again.
-
Once all hooks are disabled, slowly separate the two plates, being careful not to damage the ribbon wire still connecting the two.
-
-
-
-
Using the T5 Torx screwdriver, unscrew the two 5.6mm screws at the top right and bottom right corners of the motherboard.
-


To reassemble your device, follow these instructions in reverse order.
To reassemble your device, follow these instructions in reverse order.
Annuleren: ik heb deze handleiding niet afgemaakt.
Één andere persoon heeft deze handleiding voltooid.

Team

Cal Poly, Team 10-1, Banghart Winter 2017 Lid van Cal Poly, Team 10-1, Banghart Winter 2017
CPSU-BANGHART-W17S10G1
4 Leden
5 handleidingen geschreven
Één opmerking
I was told the small connector at the back of my device is the problem. I am thinking it may be the battery. I don’t really want to throw my gps away if I can fix it! Thanks!