Deze versie kan foutieve bewerkingen bevatten. Schakel over naar de recentste gecontroleerde momentopname.
Wat je nodig hebt
-
Deze stap is niet vertaald. Help het te vertalen
-
Rotate the Dash Cam to where the socket faces you.
-
Remove the 9 mm screw using the Torx T6 screwdriver.
-
-
-
Deze stap is niet vertaald. Help het te vertalen
-
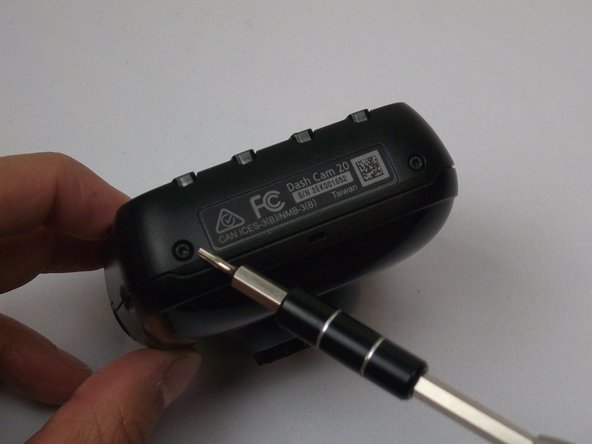
Rotate the Dash Cam to where the product information faces you.
-
Remove the two 5 mm screws using the Torx T5 screwdriver.
-
-
Deze stap is niet vertaald. Help het te vertalen
-
Remove the two 5mm screws using the Torx T5 screwdriver
-
-
Deze stap is niet vertaald. Help het te vertalen
-
Remove the green tape overlying the pin connector with tweezers.
-
Remove the pin connector using tweezers.
-
-
Deze stap is niet vertaald. Help het te vertalen
-
With the the nylon spudger, lift the battery to expose and stretch the glue. Cut the glue residue by gliding the tool from left to right.
-


Annuleren: ik heb deze handleiding niet afgemaakt.
3 andere personen hebben deze handleiding voltooid.
Team

USF Tampa, Team 2-1, Cagle Fall 2016 Lid van USF Tampa, Team 2-1, Cagle Fall 2016
USFT-CAGLE-F16S2G1
4 Leden
5 handleidingen geschreven
3 opmerkingen
An excellent article except for one major problem but, why does iFixIt not sell theses batteries or direct you on where a person could actually buy one? This knowledge is pretty much useless with out a replacement battery to actually use.
Yeah I agree
Thanks for this guide. This gave my Garmin 20 another couple of years! :)
BTW, I was able to buy the battery replacement from Amazon: https://www.amazon.com/gp/product/B07KSR...