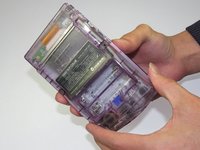
Ga door naar hoofdinhoud
Word lid van de reparatiegemeenschap - Account aanmaken

Game Boy Color Buttons Replacement

Wat je nodig hebt

  1. Game Boy Color Buttons Replacement, Battery: stap 1, afbeelding 1 van 2 Game Boy Color Buttons Replacement, Battery: stap 1, afbeelding 2 van 2
    • Locate the battery compartment on the back of the Game Boy Color.

    • Push down on the tab and hinge the cover downwards and outwards to remove the battery cover.

    Vraag FixBot

    Voeg opmerking toe

  2. Game Boy Color Buttons Replacement: stap 2, afbeelding 1 van 1
    • Remove the batteries from the battery compartment.

    Vraag FixBot

    Voeg opmerking toe

  3. Game Boy Color Buttons Replacement, Back Housing: stap 3, afbeelding 1 van 1
    • Using a Y1 screwdriver, remove the six screws on the back of the device as pictured. The bottom two screws are located inside of the battery compartment.

    Vraag FixBot

    Voeg opmerking toe

  4. Game Boy Color Buttons Replacement: stap 4, afbeelding 1 van 2 Game Boy Color Buttons Replacement: stap 4, afbeelding 2 van 2
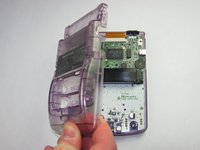
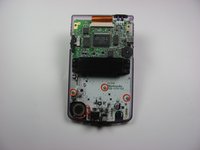
    • Gently lift and separate the back housing from the rest of the device. Now you've got the back housing out!

    Vraag FixBot

    Voeg opmerking toe

  5. Game Boy Color Buttons Replacement, LCD Ribbon Cable: stap 5, afbeelding 1 van 3 Game Boy Color Buttons Replacement, LCD Ribbon Cable: stap 5, afbeelding 2 van 3 Game Boy Color Buttons Replacement, LCD Ribbon Cable: stap 5, afbeelding 3 van 3
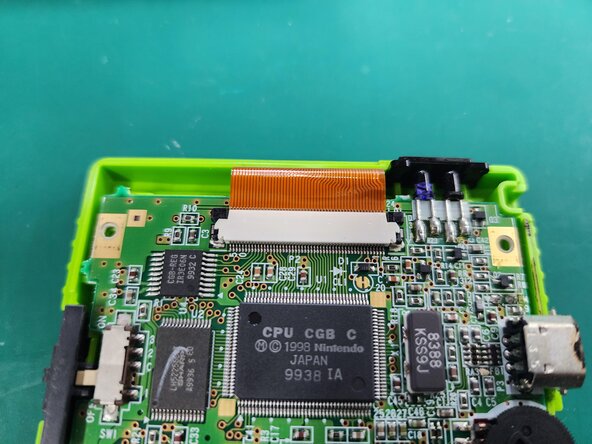
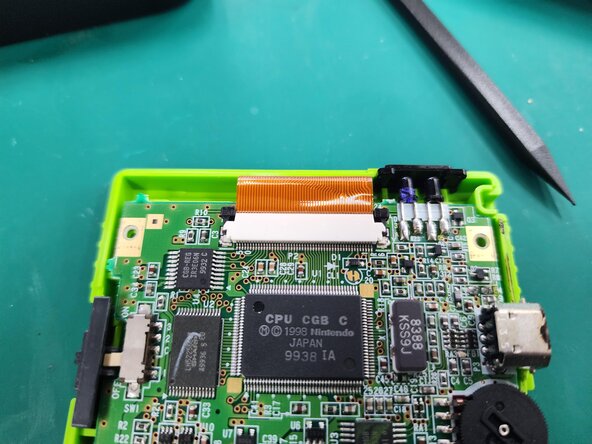
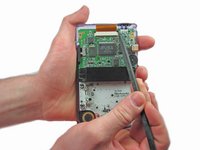
    • Push up on the tabs on either side of the ribbon with a spudger.

    Vraag FixBot

    Voeg opmerking toe

  6. Game Boy Color Buttons Replacement: stap 6, afbeelding 1 van 2 Game Boy Color Buttons Replacement: stap 6, afbeelding 2 van 2
    • Gently remove the ribbon cable from the port

    Vraag FixBot

    Voeg opmerking toe

  7. Game Boy Color Buttons Replacement, Motherboard: stap 7, afbeelding 1 van 2 Game Boy Color Buttons Replacement, Motherboard: stap 7, afbeelding 2 van 2
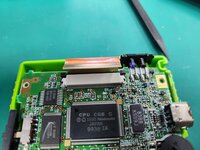
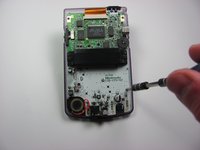
    • Using the Phillips #1 screwdriver, remove the 3 screws shown in the picture.

    Vraag FixBot

    Voeg opmerking toe

  8. Game Boy Color Buttons Replacement: stap 8, afbeelding 1 van 1
    • Gently lift the motherboard from the front housing.

    Vraag FixBot

    Voeg opmerking toe

  9. Game Boy Color Buttons Replacement, Buttons: stap 9, afbeelding 1 van 1
    • Remove the rubber backing on each button grouping.

    Vraag FixBot

    Voeg opmerking toe

  10. Game Boy Color Buttons Replacement: stap 10, afbeelding 1 van 1
    • Remove the original buttons from the housing.

    Vraag FixBot

    Voeg opmerking toe

Conclusie

To reassemble your device, follow these instructions in reverse order.

Annuleren: ik heb deze handleiding niet afgemaakt.

28 andere personen hebben deze handleiding voltooid.

Nick Katsantones

Lid sinds: 01/18/13

1.139 Reputatie

4 handleidingen geschreven

Team

Cal Poly, Team 19-47, Regan Winter 2013 Lid van Cal Poly, Team 19-47, Regan Winter 2013

CPSU-REGAN-W13S19G47

4 Leden

61 handleidingen geschreven

3Gids Commentaar

Thank you for your information on repair of my color game boy.

just two things.

1. I had a hard time with the removal of the screws. Any tip on that would be helpful.

2. Where can I purchase replacement parts?

Thanks again for all of your help.

Ray Blasko

raymondblasko - Antwoord Deel

In the tools needed it states Y0 screwdriver, but in step 3 it says Y1 which is not the same. Which one is the correct size?

blogcraft - Antwoord Deel

I found either Y0 or Y1 works. The important thing is it's a small tri-wing.

Michael Schwern - Antwoord Deel

Voeg opmerking toe

Weergavestatistieken:

Afgelopen 24 uren: 5

Afgelopen 7 dagen: 42

Afgelopen 30 dagen: 253

Altijd: 34,774