Deze versie kan foutieve bewerkingen bevatten. Schakel over naar de recentste gecontroleerde momentopname.
Wat je nodig hebt
-
Deze stap is niet vertaald. Help het te vertalen
-
Use the Phillips #00 screwdriver to remove the 7 screws on the sides of the camera:
-
Four 3.95mm Phillips screws located on the bottom of the camera
-
Two 3.95mm Phillips screws located on the right side of the camera
-
One 3.95mm Phillips screw located on the left side of the camera
-
-
Deze stap is niet vertaald. Help het te vertalen
-
Slide open the battery compartment cover with your thumb.
-
-
Deze stap is niet vertaald. Help het te vertalen
-
Wedge the edge of the spudger between the front and back case, near the corner of the flash.
-
Carefully run the spudger along the right edge of the camera, creating an opening.
-
Insert the spudger into the left side of the camera, above the screwhole. Then carefully run it along this edge.
-
-
Deze stap is niet vertaald. Help het te vertalen
-
Slowly lift the back cover straight up, lightly jiggling it if necessary.
-
Remove the battery compartment cover.
-
-
Deze stap is niet vertaald. Help het te vertalen
-
Gently insert the spudger under the clip holding the orange ribbon. The clip should lift up and the ribbon will slide out.
-
This step will free the back cover from the rest of the camera.
-
-
-
Deze stap is niet vertaald. Help het te vertalen
-
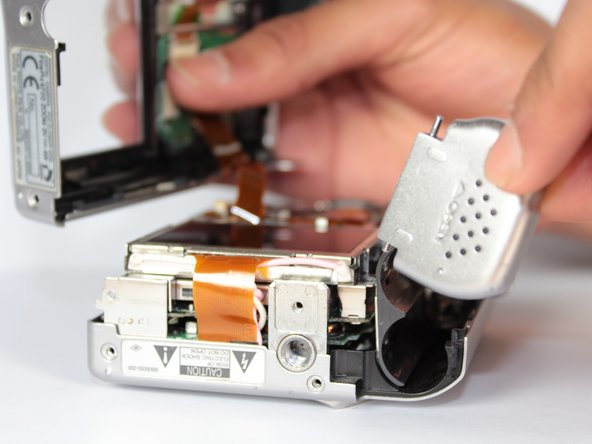
Use the tweezers to grab the speaker (located on left side of the camera) and pull straight up.
-
-
Deze stap is niet vertaald. Help het te vertalen
-
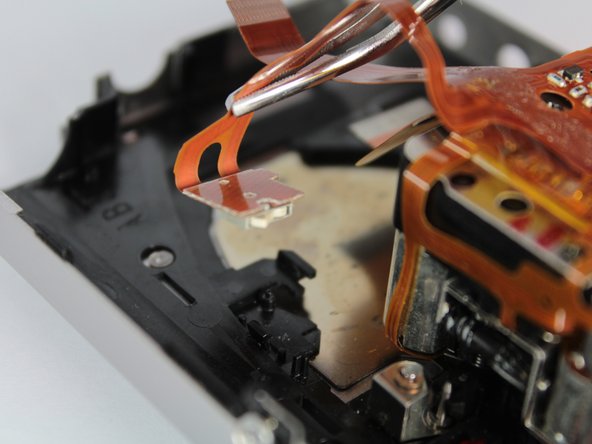
Use the tweezers to pull gently on the small orange ribbon, located in upper left hand corner near the flash, to remove the square insert.
-
-
Deze stap is niet vertaald. Help het te vertalen
-
Use your fingers to slowly pull the flash straight up.
-
-
Deze stap is niet vertaald. Help het te vertalen
-
Slightly separate the front cover from the motherboard unit (which consists of the motherboard, speaker, screen, and battery compartment).
-
Rotate the bottom portion of the motherboard unit (the screen and battery compartment) over the lens unit.
-
-
Deze stap is niet vertaald. Help het te vertalen
-
Gently stick the spudger under the ribbon clips and lift them up.
-
Use the tweezers to pull both ribbons out of the ribbon clips.
-
-
Deze stap is niet vertaald. Help het te vertalen
-
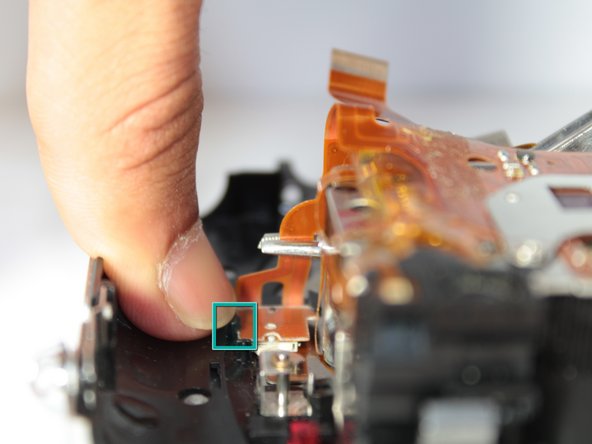
Use the spudger to push in the white tab on the square circuit board attached to the front case.
-
Use your finger to pull back the black plastic mount on the right side of the circuit board.
-
While holding back the black plastic mount, use the tweezers to gently lift the ribbon attached to the circuit board.
-
-
Deze stap is niet vertaald. Help het te vertalen
-
Use your fingers to pull the lens unit straight up from the front case.
-
-
Deze stap is niet vertaald. Help het te vertalen
-
Use the Phillips #00 screwdriver to remove the two 4.4mm screws holding the metal bracket on the lens.
-
Use your fingers to remove the bracket.
-
-
Deze stap is niet vertaald. Help het te vertalen
-
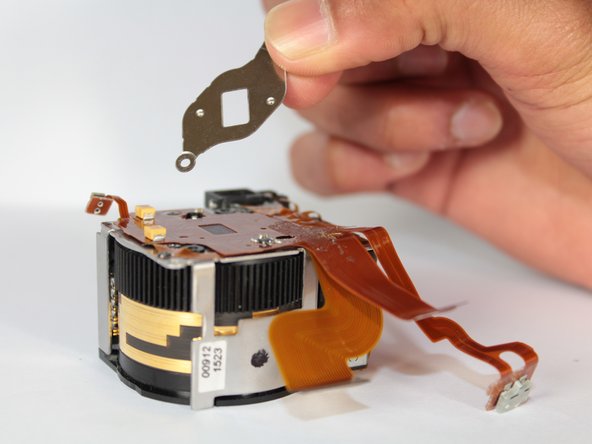
Use the tweezers to lift the orange plastic plate from the upper left hand corner.
-


Annuleren: ik heb deze handleiding niet afgemaakt.
Één andere persoon heeft deze handleiding voltooid.
Team

Cal Poly, Team 14-8, Forte Spring 2012 Lid van Cal Poly, Team 14-8, Forte Spring 2012
CPSU-FORTE-S12S14G8
5 Leden
17 handleidingen geschreven
Één opmerking
Hello! Great guide, congratulations indeed! Could you tell me where to find the orange ribbons to replace them? Thanks!