Ga door naar hoofdinhoud

Flip Video Ultra Circuit Board Replacement

Wat je nodig hebt

  1. Flip Video Ultra Circuit Board Replacement, Circuit Board: stap 1, afbeelding 1 van 1
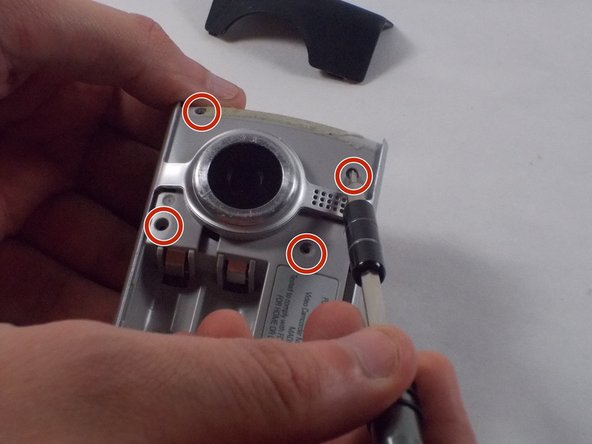
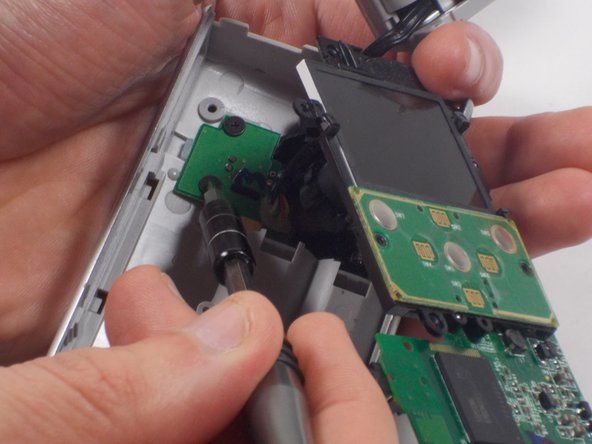
    • Unlock the battery cover by sliding the switch to the unlock position.

  2. Flip Video Ultra Circuit Board Replacement: stap 2, afbeelding 1 van 1
    • Remove the battery cover by sliding it down the camera.

  3. Flip Video Ultra Circuit Board Replacement: stap 3, afbeelding 1 van 1
    • Remove the batteries

  4. Flip Video Ultra Circuit Board Replacement: stap 4, afbeelding 1 van 1
    • Slide the black upper casing off from the device.

  5. Flip Video Ultra Circuit Board Replacement: stap 5, afbeelding 1 van 2 Flip Video Ultra Circuit Board Replacement: stap 5, afbeelding 2 van 2
    • Remove the six 1mm screws from the back and upper casing with the Phillips Head screwdriver.

  6. Flip Video Ultra Circuit Board Replacement: stap 6, afbeelding 1 van 1
    • Remove the top casing from the bottom to reveal the inner circuit board.

  7. Flip Video Ultra Circuit Board Replacement: stap 7, afbeelding 1 van 2 Flip Video Ultra Circuit Board Replacement: stap 7, afbeelding 2 van 2
    • When removing the back panel, the rubber buttons will become loose and likely fall off the board. This is normal and can easily placed back on the board once finished.

    • Remove the six 1mm screws with the 1 Phillips head screwdriver.

  8. Flip Video Ultra Circuit Board Replacement: stap 8, afbeelding 1 van 1
    • Gently separate the circuit board from the casing.

  9. Flip Video Ultra Circuit Board Replacement: stap 9, afbeelding 1 van 2 Flip Video Ultra Circuit Board Replacement: stap 9, afbeelding 2 van 2
    • Unscrew the single 1mm screw from USB housing unit.

  10. Flip Video Ultra Circuit Board Replacement: stap 10, afbeelding 1 van 2 Flip Video Ultra Circuit Board Replacement: stap 10, afbeelding 2 van 2
    • Unscrew the 2 1mm screws and gently separate camera wires from plastic casing.

  11. Flip Video Ultra Circuit Board Replacement: stap 11, afbeelding 1 van 1
    • Gently pry out the USB housing unit with the Ifxit Opening Tool.

  12. Flip Video Ultra Circuit Board Replacement: stap 12, afbeelding 1 van 3 Flip Video Ultra Circuit Board Replacement: stap 12, afbeelding 2 van 3 Flip Video Ultra Circuit Board Replacement: stap 12, afbeelding 3 van 3
    • Remove the two 1mm screws and separate the circuit board and camera from the plastic casing.

  13. Flip Video Ultra Circuit Board Replacement: stap 13, afbeelding 1 van 1
    • Unscrew the camera housing unit from the plastic case.

  14. Flip Video Ultra Circuit Board Replacement: stap 14, afbeelding 1 van 3 Flip Video Ultra Circuit Board Replacement: stap 14, afbeelding 2 van 3 Flip Video Ultra Circuit Board Replacement: stap 14, afbeelding 3 van 3
    Gereedschap gebruikt in deze stap:
    Tweezers
    $4.99
    Koop
    • With tweezers, remove the microphone and USB connections.

  15. Flip Video Ultra Circuit Board Replacement: stap 15, afbeelding 1 van 2 Flip Video Ultra Circuit Board Replacement: stap 15, afbeelding 2 van 2
    • Unscrew the two 1mm screws from the board shown. Remove screen from circuit board.

  16. Flip Video Ultra Circuit Board Replacement: stap 16, afbeelding 1 van 2 Flip Video Ultra Circuit Board Replacement: stap 16, afbeelding 2 van 2
    • Remove the single 2.1 mm screw and separate camera from the circuit board.

Conclusie

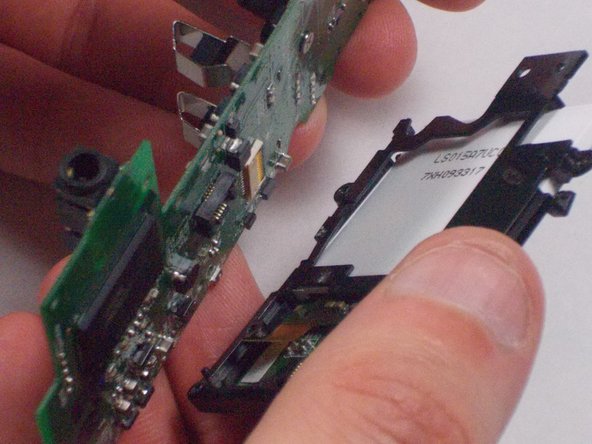
To reassemble your device, follow these instructions in reverse order.

Één andere persoon heeft deze handleiding voltooid.

Nathaniel Ruf

Lid sinds: 10/18/16

514 Reputatie

5 handleidingen geschreven

Team

UMass Dartmouth, Team 5-7, Martin Fall 2016 Lid van UMass Dartmouth, Team 5-7, Martin Fall 2016

UMASSD-MARTIN-F16S5G7

3 Leden

10 handleidingen geschreven

0 opmerkingen

Voeg opmerking toe

Weergavestatistieken:

Afgelopen 24 uren: 0

Afgelopen 7 dagen: 5

Afgelopen 30 dagen: 13

Altijd: 688