Ga door naar hoofdinhoud

Deze versie kan foutieve bewerkingen bevatten. Schakel over naar de recentste gecontroleerde momentopname.

Alleen vereisten
Deze handleiding is alleen bedoeld als vereiste voor andere handleidingen. Het staat niet op zichzelf.

Wat je nodig hebt

  1. Deze stap is niet vertaald. Help het te vertalen

    : stap 1, afbeelding 1 van 3 : stap 1, afbeelding 2 van 3 : stap 1, afbeelding 3 van 3
    • Use tweezers to remove the volume rocker and power buttons from the display assembly.

    • During reassembly make sure the orientation of the buttons is correct. The rubber backings must fit into the channels in the assembly.

  2. Deze stap is niet vertaald. Help het te vertalen

    : stap 2, afbeelding 1 van 1
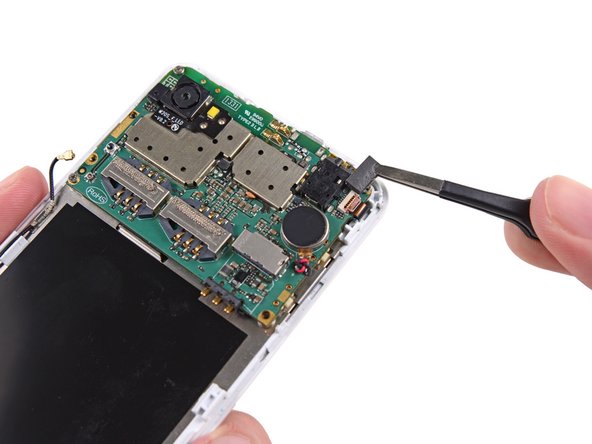
    • Use the flat end of a spudger to disconnect the antenna cable connector.

    • Make sure to only disconnect the connector from its socket, and not the entire socket from the board.

  3. Deze stap is niet vertaald. Help het te vertalen

    : stap 3, afbeelding 1 van 2 : stap 3, afbeelding 2 van 2
    • Use tweezers to remove the adhesive foam tape from the top of the digitizer cable ZIF socket.

  4. Deze stap is niet vertaald. Help het te vertalen

    : stap 4, afbeelding 1 van 3 : stap 4, afbeelding 2 van 3 : stap 4, afbeelding 3 van 3
    • Use the tip of a spudger to flip open the tab on the digitizer ZIF connector.

    • Use tweezers to pull the digitizer cable away from its socket on the motherboard.

  5. Deze stap is niet vertaald. Help het te vertalen

    : stap 5, afbeelding 1 van 1
    • Remove the three 2.5 mm Phillips #000 screws securing the motherboard to the display assembly.

  6. Deze stap is niet vertaald. Help het te vertalen

    : stap 6, afbeelding 1 van 2 : stap 6, afbeelding 2 van 2
    • Do not try to remove the motherboard just yet, as it is still connected to the display assembly by the display data cable.

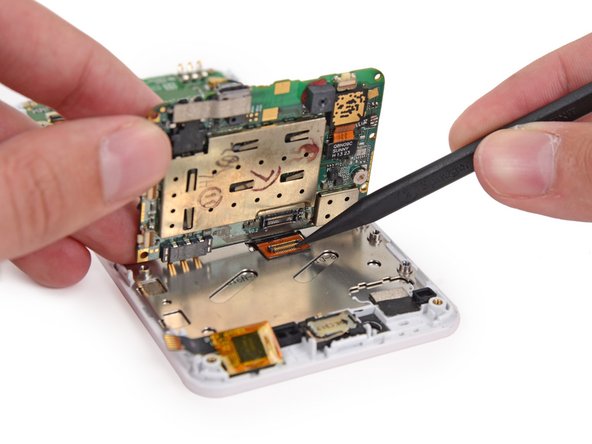
    • Gently lift the top end of the motherboard up to expose the display data cable.

    • The rear-facing camera may be adhered to the display assembly. Try to pry it and the motherboard up together.

  7. Deze stap is niet vertaald. Help het te vertalen

    : stap 7, afbeelding 1 van 2 : stap 7, afbeelding 2 van 2
    • Use the tip of a spudger to disconnect the display data cable from the back of the motherboard.

  8. Deze stap is niet vertaald. Help het te vertalen

    : stap 8, afbeelding 1 van 1
    • Remove the motherboard from the display assembly.

Eindstreep

3 andere personen hebben deze handleiding voltooid.

Andrew Optimus Goldheart

Lid sinds: 10/17/09

503.000 Reputatie

407 handleidingen geschreven

Team

iFixit Lid van iFixit

Staff

135 Leden

17.198 handleidingen geschreven

0 opmerkingen

Voeg opmerking toe

Weergavestatistieken:

Afgelopen 24 uren: 0

Afgelopen 7 dagen: 7

Afgelopen 30 dagen: 10

Altijd: 2,376