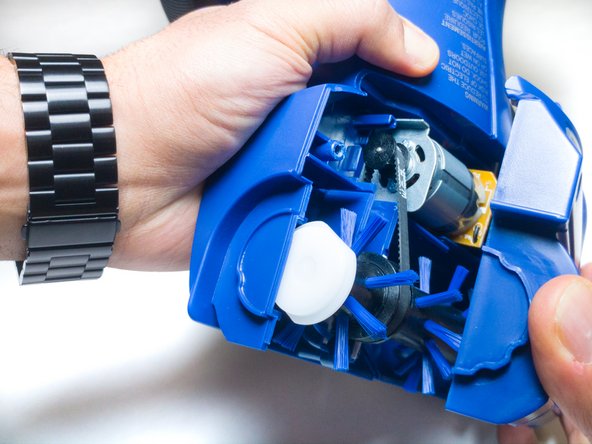
Ga door naar hoofdinhoud

Eureka EasyClean 71C Casing Replacement

Wat je nodig hebt

  1. Eureka EasyClean 71C Casing Replacement, Bottom Cover: stap 1, afbeelding 1 van 1
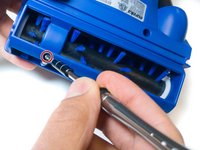
    • Unscrew the two 18.1 mm PH2 Phillips head screws on the bottom of the vacuum.

  2. Eureka EasyClean 71C Casing Replacement: stap 2, afbeelding 1 van 1
    • Pry off the Riser Visor using the plastic opening tool.

  3. Eureka EasyClean 71C Casing Replacement: stap 3, afbeelding 1 van 1
    • Remove the screw cap using the metal spudger.

    • First-time removal of the screw cap can be difficult. The screw cap isn’t vital, so don’t worry about damaging the screw cap and just keep trying until it comes out.

  4. Eureka EasyClean 71C Casing Replacement: stap 4, afbeelding 1 van 2 Eureka EasyClean 71C Casing Replacement: stap 4, afbeelding 2 van 2
    • Unscrew the 14mm PH2 Phillips head screw.

    • Pull the bottom cover off of the rest of the casing.

  5. Eureka EasyClean 71C Casing Replacement, Casing: stap 5, afbeelding 1 van 1
    • Pull the power switch all the way up and remove the dust cup.

  6. Eureka EasyClean 71C Casing Replacement: stap 6, afbeelding 1 van 2 Eureka EasyClean 71C Casing Replacement: stap 6, afbeelding 2 van 2
    • Unscrew the six 18.1mm PH2 Phillips head screws on the side of the vacuum.

    • Pull the casing apart.

Conclusie

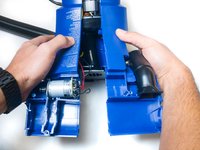
To reassemble your device, follow these instructions in reverse order.

Één andere persoon heeft deze handleiding voltooid.

Tanner Durnil

Lid sinds: 11/06/17

631 Reputatie

6 handleidingen geschreven

Team

IUPUI, Team S6-G4, Baechle Fall 2017 Lid van IUPUI, Team S6-G4, Baechle Fall 2017

IUPUI-BAECHLE-F17S6G4

3 Leden

12 handleidingen geschreven

0 opmerkingen

Voeg opmerking toe

Weergavestatistieken:

Afgelopen 24 uren: 0

Afgelopen 7 dagen: 4

Afgelopen 30 dagen: 8

Altijd: 371