Ga door naar hoofdinhoud

Ematic eGlide 4 Side Button Array Replacement

Wat je nodig hebt

  1. Ematic eGlide 4 Side Button Array Replacement, Rear Panel: stap 1, afbeelding 1 van 1
    • Remove the 4.6mm Phillips #00 screw at the base of the device.

  2. Ematic eGlide 4 Side Button Array Replacement: stap 2, afbeelding 1 van 1
    • Slide the rear panel away from the base parallel to the screen.

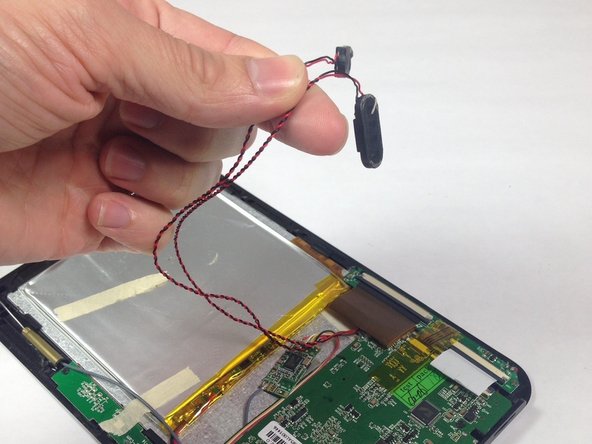
  3. Ematic eGlide 4 Side Button Array Replacement: stap 3, afbeelding 1 van 2 Ematic eGlide 4 Side Button Array Replacement: stap 3, afbeelding 2 van 2
    • Carefully remove the speakers from the rear panel.

    • Pull the speakers off of the rear panel.

  4. Ematic eGlide 4 Side Button Array Replacement, Side Button Array: stap 4, afbeelding 1 van 1
    • Remove the 3 Phillips #00 4.5 mm screws from the side button array.

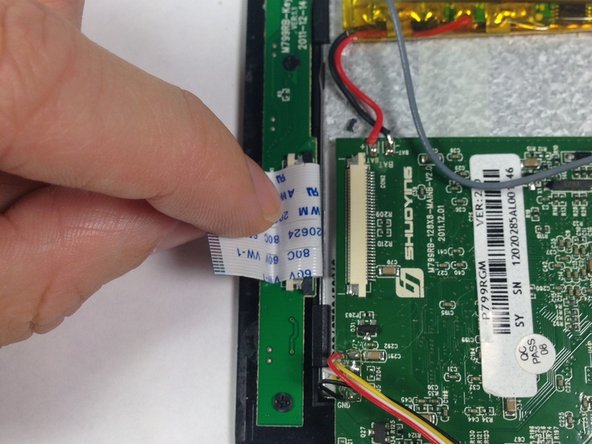
  5. Ematic eGlide 4 Side Button Array Replacement: stap 5, afbeelding 1 van 2 Ematic eGlide 4 Side Button Array Replacement: stap 5, afbeelding 2 van 2
    • Slide the grey ribbon wire connector clip away from the ribbon wire port on the motherboard using the pointed tip of a spudger. This process will unclip the wire from the motherboard to release connection.

    • You do not need to fully disconnect the ribbon wire clip from the ribbon wire port: the clip will stay attached in a loose fit.

    • Remove the ribbon wire from the ribbon wire port on the motherboard.

  6. Ematic eGlide 4 Side Button Array Replacement: stap 6, afbeelding 1 van 1
    • Remove the side button array from the device.

Conclusie

To reassemble your device, follow these instructions in reverse order.

Één andere persoon heeft deze handleiding voltooid.

Bailey Hughes

Lid sinds: 03/22/15

617 Reputatie

6 handleidingen geschreven

Team

Baylor, Team 5-8, Williams Spring 2015 Lid van Baylor, Team 5-8, Williams Spring 2015

BU-WILLIAMS-S15S5G8

3 Leden

6 handleidingen geschreven

0 opmerkingen

Voeg opmerking toe

Weergavestatistieken:

Afgelopen 24 uren: 0

Afgelopen 7 dagen: 5

Afgelopen 30 dagen: 5

Altijd: 98