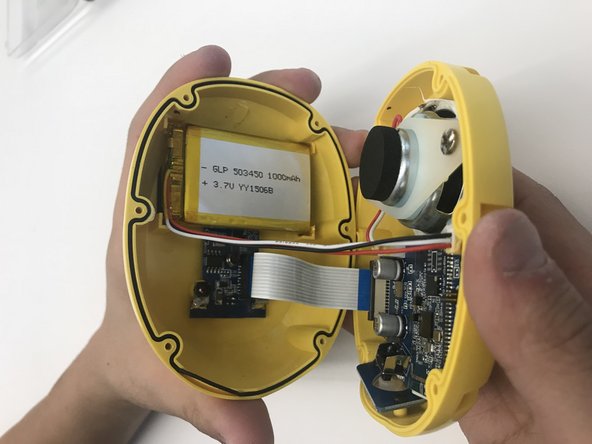
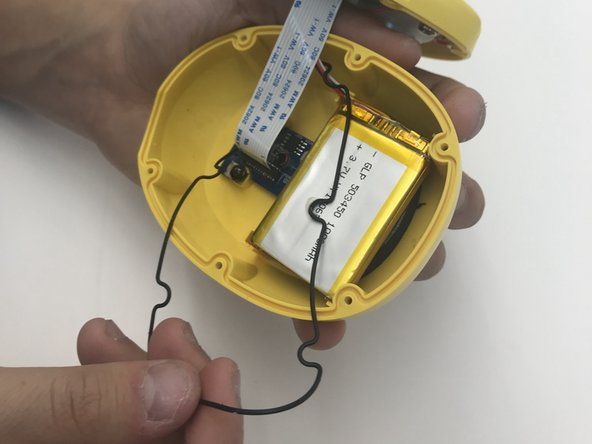
Ga door naar hoofdinhoud

Edwin the Duck Rubber Gasket Seal Replacement

Wat je nodig hebt

  1. Edwin the Duck Rubber Gasket Seal Replacement, Rubber Gasket Seal: stap 1, afbeelding 1 van 2 Edwin the Duck Rubber Gasket Seal Replacement, Rubber Gasket Seal: stap 1, afbeelding 2 van 2
    • Unscrew the four 9mm screws with aT8 bit

    • Take the back plate off

  2. Edwin the Duck Rubber Gasket Seal Replacement: stap 2, afbeelding 1 van 2 Edwin the Duck Rubber Gasket Seal Replacement: stap 2, afbeelding 2 van 2
    • Carefully take off the rubber skin.

    • Be patient and don't rush. You don't want to rip or damage the rubber skin otherwise you will lose the waterproof cover.

  3. Edwin the Duck Rubber Gasket Seal Replacement: stap 3, afbeelding 1 van 1
    • Using the J1 bit, unscrew all six 9 mm screws around the border.

  4. Edwin the Duck Rubber Gasket Seal Replacement: stap 4, afbeelding 1 van 2 Edwin the Duck Rubber Gasket Seal Replacement: stap 4, afbeelding 2 van 2
    • Use the plastic opening tool to open the inside of the duck.

    • Be very careful when splitting the two halves apart. There are wires connecting to both sides. So open it very slowly.

  5. Edwin the Duck Rubber Gasket Seal Replacement: stap 5, afbeelding 1 van 2 Edwin the Duck Rubber Gasket Seal Replacement: stap 5, afbeelding 2 van 2
    • Remove the rubber gasket

  6. Edwin the Duck Rubber Gasket Seal Replacement: stap 6, afbeelding 1 van 1
    • Insert your new rubber gasket in and use the plastic opening tool to push the rubber gasket into it's slot

Conclusie

To reassemble your device, follow these instructions in reverse order.

Nadia Dobrogorskaya

Lid sinds: 10/18/17

131 Reputatie

1 Handleiding geschreven

Team

UW Tacoma, Team S1-G4, Rose Fall 2017 Lid van UW Tacoma, Team S1-G4, Rose Fall 2017

UWT-ROSE-F17S1G4

4 Leden

8 handleidingen geschreven

0 opmerkingen

Voeg opmerking toe

Weergavestatistieken:

Afgelopen 24 uren: 0

Afgelopen 7 dagen: 8

Afgelopen 30 dagen: 15

Altijd: 334