Ga door naar hoofdinhoud

Droid Ultra XT1080 Front assembly with frame Replacement

Wat je nodig hebt

  1. Droid Ultra XT1080 Front assembly with frame Replacement, Front assembly with frame: stap 1, afbeelding 1 van 1
    • Start by removing the Sim card tray, which also happens to be your volume button

  2. Droid Ultra XT1080 Front assembly with frame Replacement: stap 2, afbeelding 1 van 1
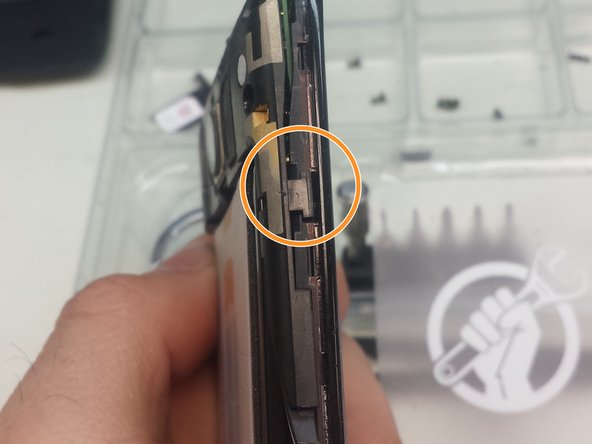
    • I personally used an iSesamo tool to unclip the tabs off the back housing, You can also use the Jimmy or some plastic prying tools.

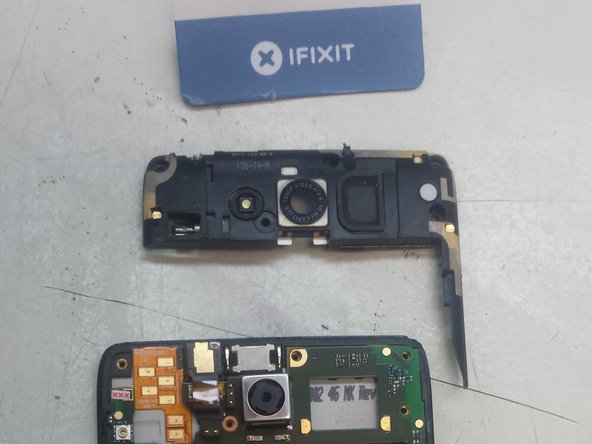
    • Do Not pry the back housing around the bottom of the screen. Pry on the left, right, and top. After that the back housing should slide off on the bottom.

  3. Droid Ultra XT1080 Front assembly with frame Replacement: stap 3, afbeelding 1 van 3 Droid Ultra XT1080 Front assembly with frame Replacement: stap 3, afbeelding 2 van 3 Droid Ultra XT1080 Front assembly with frame Replacement: stap 3, afbeelding 3 van 3
    • T5 Torx screws

    • T3 Torx screw

    • T5 Torx screws

    • T5 Torx screws

    • When putting back together, do not tighten the screws too tight.

  4. Droid Ultra XT1080 Front assembly with frame Replacement: stap 4, afbeelding 1 van 1
    • T5 Torx screws

  5. Droid Ultra XT1080 Front assembly with frame Replacement: stap 5, afbeelding 1 van 2 Droid Ultra XT1080 Front assembly with frame Replacement: stap 5, afbeelding 2 van 2
    • T5 Torx screws

  6. Droid Ultra XT1080 Front assembly with frame Replacement: stap 6, afbeelding 1 van 3 Droid Ultra XT1080 Front assembly with frame Replacement: stap 6, afbeelding 2 van 3 Droid Ultra XT1080 Front assembly with frame Replacement: stap 6, afbeelding 3 van 3
    • With the iSesamo tool, or a prying tool, unclip the tabs on the left and right side of the phone.

  7. Droid Ultra XT1080 Front assembly with frame Replacement: stap 7, afbeelding 1 van 3 Droid Ultra XT1080 Front assembly with frame Replacement: stap 7, afbeelding 2 van 3 Droid Ultra XT1080 Front assembly with frame Replacement: stap 7, afbeelding 3 van 3
    • Using a Spudger lift the motherboard from right to left.

    • After lifting the motherboard from the frame remove the tape, and lift the black tab with your Spudger to remove the flex cable.

    • When you place the new screen remember to replace the tape over the flex cable.

    • Before putting the mother board on remember to transfer your ear speaker from the old frame to the new one.

  8. Droid Ultra XT1080 Front assembly with frame Replacement, And you are done...: stap 8, afbeelding 1 van 1
    • .... as long as you work your way backwards to put it back together.

Conclusie

To reassemble your device, follow these instructions in reverse order.

17 andere personen hebben deze handleiding voltooid.

Ricardo Martinez

Lid sinds: 10/19/14

751 Reputatie

1 Handleiding geschreven

8 opmerkingen

I want to repair the scencor

Atihussan82 Hussain - Antwoord

I want to repair the XT1080 sciencer

Atihussan82 Hussain - Antwoord

Repair screen on droid ultra XT 1080

churchy dezign - Antwoord

I want to repair the camera on Droid turbo XT1080

King Bash - Antwoord

My Android 1080 screen is frozen. How can I get my photos?

Madeline Rutledge - Antwoord

Voeg opmerking toe

Weergavestatistieken:

Afgelopen 24 uren: 0

Afgelopen 7 dagen: 0

Afgelopen 30 dagen: 0

Altijd: 4,843