Ga door naar hoofdinhoud

Dragon Touch Y88X Plus Camera Replacement

  1. Dragon Touch Y88X Plus Camera Replacement, Camera: stap 1, afbeelding 1 van 2 Dragon Touch Y88X Plus Camera Replacement, Camera: stap 1, afbeelding 2 van 2
    • First, start by removing the backplate from the device using your IFixit opening tool.

  2. Dragon Touch Y88X Plus Camera Replacement: stap 2, afbeelding 1 van 1
    • Next, remove any adhesives that are keeping internal components of the device in place.

  3. Dragon Touch Y88X Plus Camera Replacement: stap 3, afbeelding 1 van 1
    • Carefully peel the old battery from the adhesive using your iFixit pry tool.

  4. Dragon Touch Y88X Plus Camera Replacement: stap 4, afbeelding 1 van 2 Dragon Touch Y88X Plus Camera Replacement: stap 4, afbeelding 2 van 2
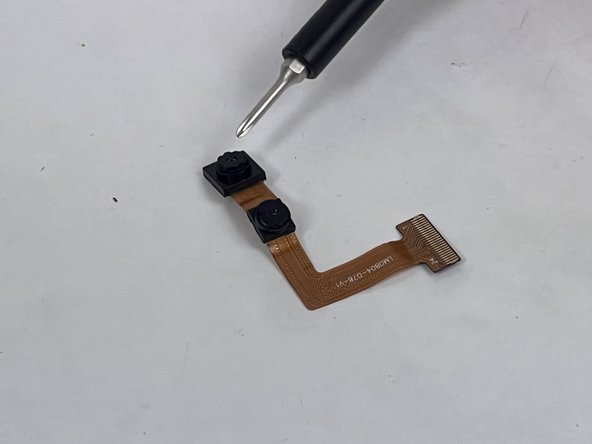
    • In order to remove the old camera, you must disconnect the ribbon that connects to the camera.

    • To remove the ribbon, flip the black switch where it is connected to the motherboard and gently pull the ribbon out and replace it with your replacement Dragon Touch Y88X Plus camera.

Conclusie

To reassemble your device, follow these instructions in reverse order.

Één andere persoon heeft deze handleiding voltooid.

Craig B

Lid sinds: 10/30/23

247 Reputatie

2 handleidingen geschreven

Team

UMass Dartmouth, Team 1-4, Petersen Fall 2023 Lid van UMass Dartmouth, Team 1-4, Petersen Fall 2023

UMASSD-PETERSEN-F23S1G4

4 Leden

4 handleidingen geschreven

0 opmerkingen

Voeg opmerking toe

Weergavestatistieken:

Afgelopen 24 uren: 2

Afgelopen 7 dagen: 3

Afgelopen 30 dagen: 6

Altijd: 43