Ga door naar hoofdinhoud

Snapfōn ezONE LCD Screen Replacement

Wat je nodig hebt

  1. Snapfōn ezONE LCD Screen Replacement, Remove the battery cover: stap 1, afbeelding 1 van 1
    • Turn off the phone to prevent data loss.

    • Press and slide the battery out to remove it.

    • Picture rights belong to Snapfon®. Picture is used for educational purposes only. No copyright infringement intended.

  2. Snapfōn ezONE LCD Screen Replacement, Remove the battery: stap 2, afbeelding 1 van 1
    • Pry the battery out with your thumb or the iFixit opening tool.

    • Make sure to properly dispose of the old battery at a recycling center.

    • Picture rights belong to Snapfon®. Picture is used for educational purposes only. No copyright infringement intended.

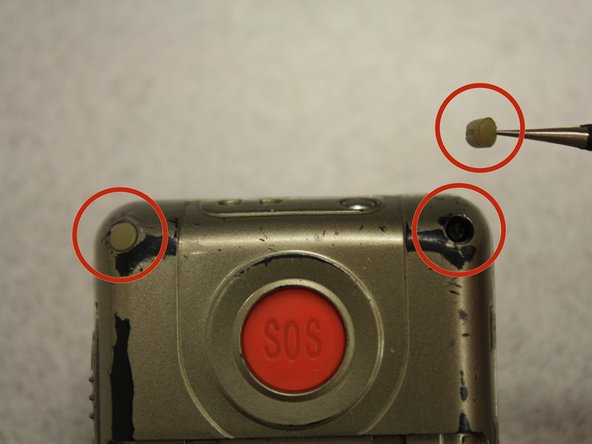
  3. Snapfōn ezONE LCD Screen Replacement, Removing the plastic inserts: stap 3, afbeelding 1 van 2 Snapfōn ezONE LCD Screen Replacement, Removing the plastic inserts: stap 3, afbeelding 2 van 2
    • Remove the four rubber inserts from the screw holes using a pair of tweezers.

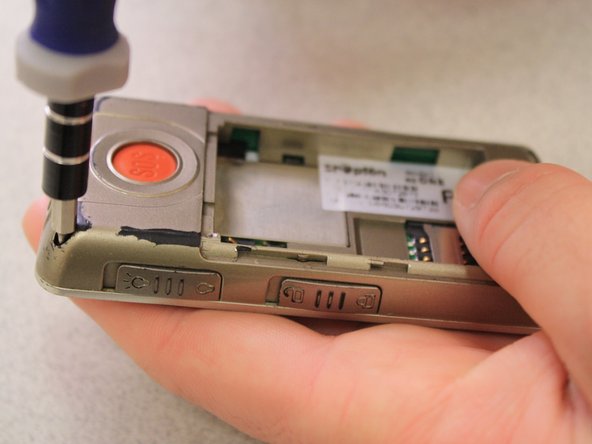
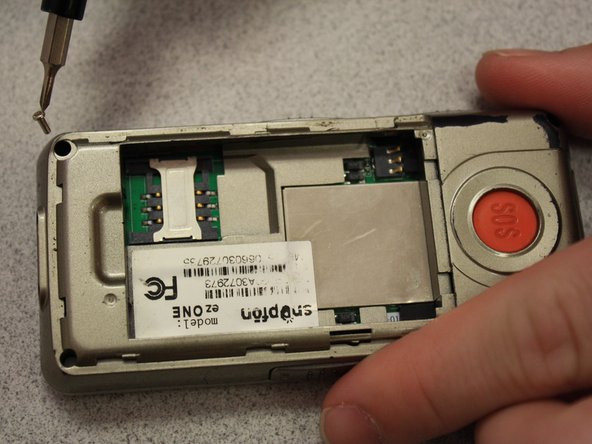
  4. Snapfōn ezONE LCD Screen Replacement, Remove the shield screws: stap 4, afbeelding 1 van 3 Snapfōn ezONE LCD Screen Replacement, Remove the shield screws: stap 4, afbeelding 2 van 3 Snapfōn ezONE LCD Screen Replacement, Remove the shield screws: stap 4, afbeelding 3 van 3
    • Remove the four 3.1mm screws in the corners with a Phillips #00 screwdriver.

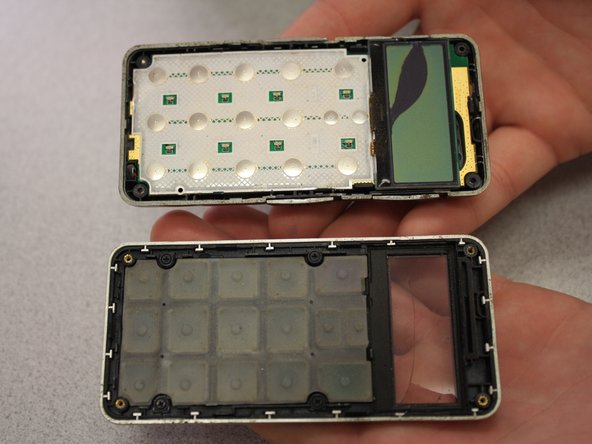
  5. Snapfōn ezONE LCD Screen Replacement, Separate the case: stap 5, afbeelding 1 van 3 Snapfōn ezONE LCD Screen Replacement, Separate the case: stap 5, afbeelding 2 van 3 Snapfōn ezONE LCD Screen Replacement, Separate the case: stap 5, afbeelding 3 van 3
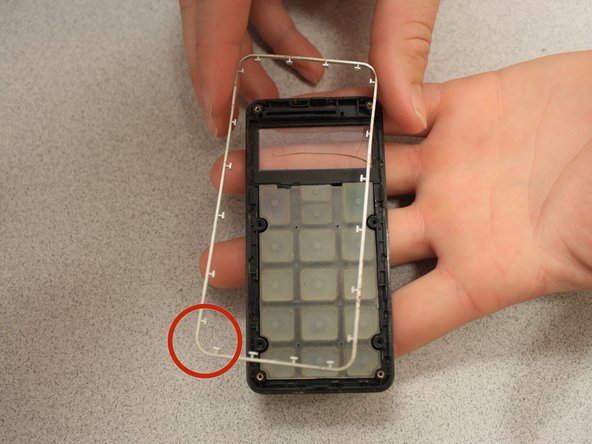
    • Separate the front case from the back case.

    • Remove the metal bumper from the front case’s perimeter.

  6. Snapfōn ezONE LCD Screen Replacement, Remove the volume slider: stap 6, afbeelding 1 van 1
    • Pry the volume slider button out with tweezers.

    • The volume slider button may fall out during the separation of the front and back cases. This is OK.

  7. Snapfōn ezONE LCD Screen Replacement, Remove the motherboard: stap 7, afbeelding 1 van 3 Snapfōn ezONE LCD Screen Replacement, Remove the motherboard: stap 7, afbeelding 2 van 3 Snapfōn ezONE LCD Screen Replacement, Remove the motherboard: stap 7, afbeelding 3 van 3
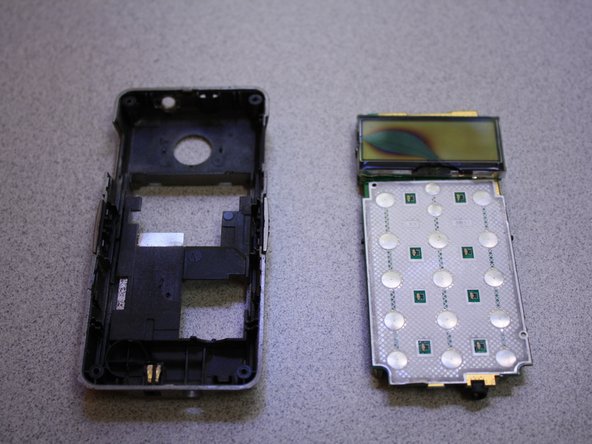
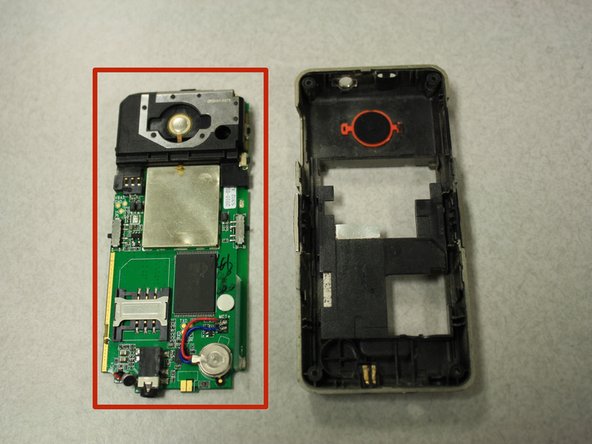
    • Separate the circuit board from the inside of the back case by prying between them with the opening tool.

    • The last picture is a view of the back of the circuit board.

  8. Snapfōn ezONE LCD Screen Replacement, Pry the screen back: stap 8, afbeelding 1 van 3 Snapfōn ezONE LCD Screen Replacement, Pry the screen back: stap 8, afbeelding 2 van 3 Snapfōn ezONE LCD Screen Replacement, Pry the screen back: stap 8, afbeelding 3 van 3
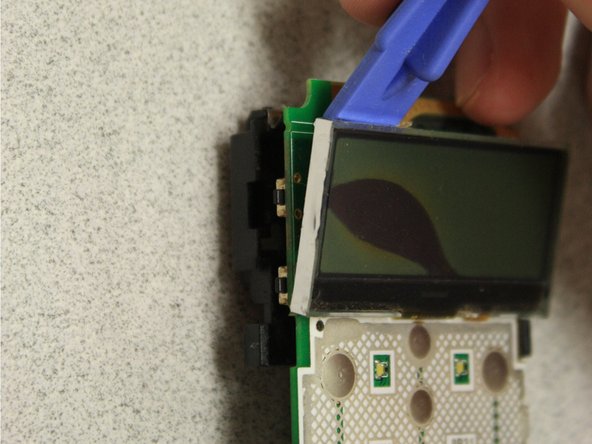
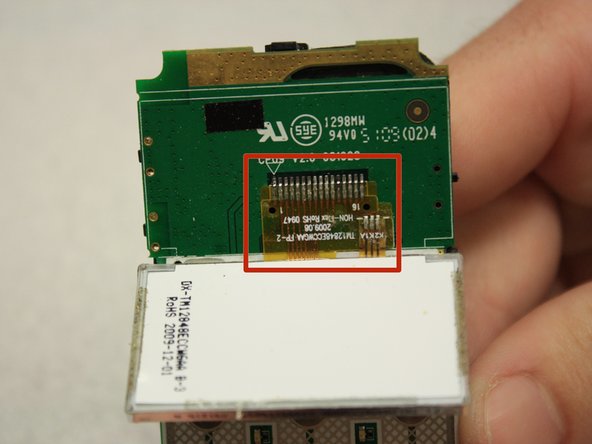
    • Pry the LCD screen off of the circuit board using the opening tool. The screen is connected to the motherboard with light adhesive, which is easy to remove.

    • The LCD screen will still be connected to the circuit board by a ribbon cable.

  9. Snapfōn ezONE LCD Screen Replacement, Disconnect the display: stap 9, afbeelding 1 van 1
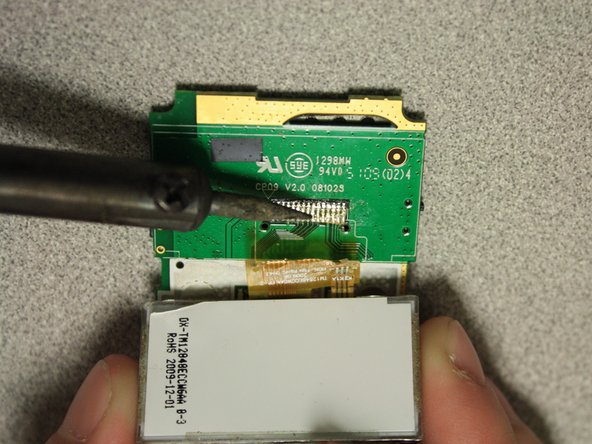
    • Use a soldering iron to melt away the connection between the ribbon cable and circuit board.

    • Be careful! High temperatures from the soldering iron may result in injury.

    • Only make contact with the solder connection so that none of the phone’s components are damaged by the heat.

  10. Snapfōn ezONE LCD Screen Replacement, Remove the display: stap 10, afbeelding 1 van 2 Snapfōn ezONE LCD Screen Replacement, Remove the display: stap 10, afbeelding 2 van 2
    • Once you heat the solder connection, lightly tug the ribbon cable free. The LCD screen will be completely removed from the device.

Conclusie

To reassemble your device with a new LCD screen, follow these instructions in reverse order.

Note: you will need to use the soldering iron again to attach the new LCD screen ribbon to the circuit board.

Één andere persoon heeft deze handleiding voltooid.

John Bender

Lid sinds: 03/26/14

818 Reputatie

8 handleidingen geschreven

Team

Clemson, Team 6-5, Benson Spring 2014 Lid van Clemson, Team 6-5, Benson Spring 2014

CLEM-BENSON-S14S6G5

3 Leden

16 handleidingen geschreven

0 opmerkingen

Voeg opmerking toe

Weergavestatistieken:

Afgelopen 24 uren: 0

Afgelopen 7 dagen: 1

Afgelopen 30 dagen: 5

Altijd: 427