Inleiding
The guide is designed specifically for the LG Vortex phone. This guide gives detailed instructions on the removal of the back case and the face from the frame.
Wat je nodig hebt
-
-
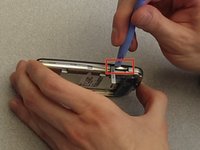
Find the two thumbnail ridges on the side and top of the phone. One is next to the micro SD slot and the other at the top of the phone
-
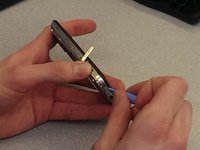
Once the ridges are located, use the blue plastic opening tool to pry the back cover away from the rest of the phone.
-
Remove the back cover and set it to the side.
-
-
-
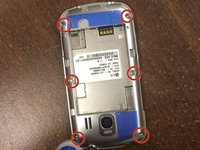
Use the precision screwdriver to remove the 6 screws along the edges of the phone.
-
There are 2 screws at the top in each corner, 2 in the middle on the sides, and 2 in the bottom corners.
-
-
-
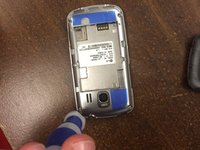
Use the blue plastic opening tool to remove the back frame from the rest of the phone.
-
Pry at the micro SD slot. Push the cover for the SD slot away from the front of the phone and pry the back frame away from the rest of the phone.
-
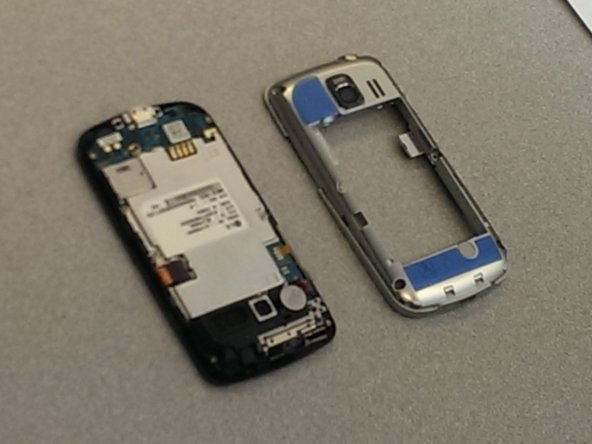
Pry your way around the entire phone to separate the face from the frame.
-


To reassemble your device, follow these instructions in reverse order.
Annuleren: ik heb deze handleiding niet afgemaakt.
3 andere personen hebben deze handleiding voltooid.
Team

Ohio State, Team 1-3, Buehl Spring 2014 Lid van Ohio State, Team 1-3, Buehl Spring 2014
OSU-BUEHL-S14S1G3
4 Leden
6 handleidingen geschreven