Deze versie kan foutieve bewerkingen bevatten. Schakel over naar de recentste gecontroleerde momentopname.
Wat je nodig hebt
-
Deze stap is niet vertaald. Help het te vertalen
-
Turn the computer upside down with the battery facing you.
-
-
Deze stap is niet vertaald. Help het te vertalen
-
Push the switch as far to the right as possible to unlock the battery.
-
-
Deze stap is niet vertaald. Help het te vertalen
-
Remove the battery using two hands and pull it away from the computer.
-
-
Deze stap is niet vertaald. Help het te vertalen
-
Unscrew the four Phillips #1 screws holding down the back panel. Then remove one 5.8mm Phillips #1 screw labeled "M" in the middle of the back panel.
-
Four 3.9mm Phillips #1 screws
-
One 5.8mm Phillips #1 screw
-
-
-
Deze stap is niet vertaald. Help het te vertalen
-
Using the highlighted indent, pull up and out to remove the back panel.
-
-
Deze stap is niet vertaald. Help het te vertalen
-
First, unscrew the six screws that are holding down the fan and heat sink with a Philips #1 screwdriver. Then use a Phillips #1 to remove the single screw near the bottom of the heat sink.
-
Six Silver Chrome 5.8mm Phillips #1 screws
-
One 5.8mm Phillips #1 screw
-
-
Deze stap is niet vertaald. Help het te vertalen
-
Carefully lift the fan and heat sink from the laptop.
-
-
Deze stap is niet vertaald. Help het te vertalen
-
Use your fingers or a spudger to remove the power pin connecting the fan to the laptop by pulling it straight up off the motherboard.
-
-
Deze stap is niet vertaald. Help het te vertalen
-
Use a Metal Spudger to turn the black plastic screw to the unlock position from the secure position of the CPU on the motherboard.
-
-
Deze stap is niet vertaald. Help het te vertalen
-
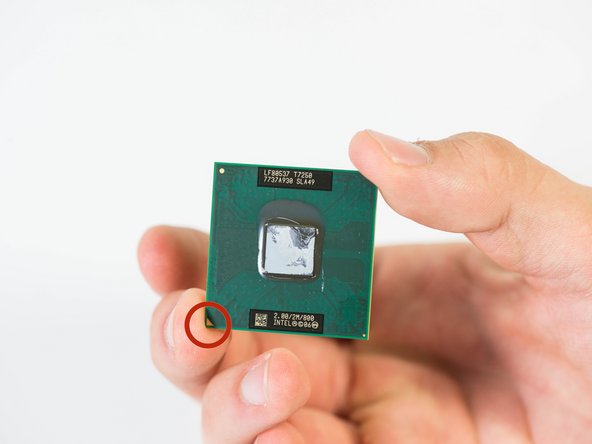
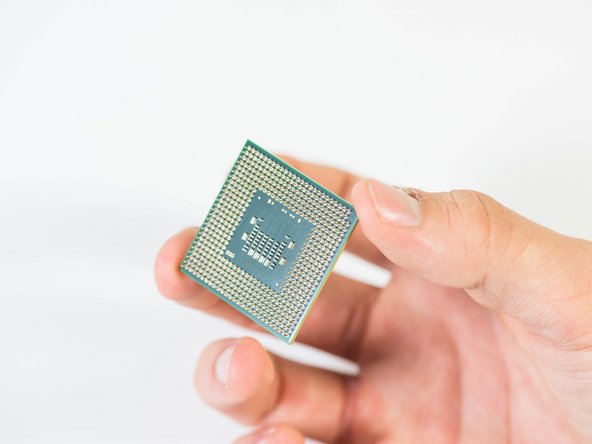
Carefully remove the CPU by pulling it straight up.
-
CPU Orientation triangle
-


Annuleren: ik heb deze handleiding niet afgemaakt.
2 andere personen hebben deze handleiding voltooid.
Team

Cal Poly, Team 18-4, Maness Winter 2015 Lid van Cal Poly, Team 18-4, Maness Winter 2015
CPSU-MANESS-W15S18G4
4 Leden
8 handleidingen geschreven