Ga door naar hoofdinhoud

Dell XPS 10 Motherboard Replacement

Wat je nodig hebt

  1. Dell XPS 10 Motherboard Replacement, Battery: stap 1, afbeelding 1 van 3 Dell XPS 10 Motherboard Replacement, Battery: stap 1, afbeelding 2 van 3 Dell XPS 10 Motherboard Replacement, Battery: stap 1, afbeelding 3 van 3
    • Slide one of the plastic opening tools in the crack on the side of the device with the windows button.

    • Slide the other plastic opening tool facing the opposite way in the crack next to the first one and pry the back cover off a little bit at a time or slide them around the edge as necessary.

    • Finally, slide the two plastic opening tools all around the case until it is open.

  2. Dell XPS 10 Motherboard Replacement: stap 2, afbeelding 1 van 3 Dell XPS 10 Motherboard Replacement: stap 2, afbeelding 2 van 3 Dell XPS 10 Motherboard Replacement: stap 2, afbeelding 3 van 3
    • Unscrew the three black, 4mm screws with a phillips screwdriver size PH 0 (one of which is under the gold colored ribbon cable.)

    • Unscrew the three gray, 3mm screws with the same screwdriver (phillips screwdriver size PH 0.)

    • Unplug the connector the connects the battery to the mother board.

    • Make sure to use a plastic opening tool instead of a metal spudger to avoid any unnecessary accidental shorting out of components.

  3. Dell XPS 10 Motherboard Replacement, Front and Rear Camera: stap 3, afbeelding 1 van 3 Dell XPS 10 Motherboard Replacement, Front and Rear Camera: stap 3, afbeelding 2 van 3 Dell XPS 10 Motherboard Replacement, Front and Rear Camera: stap 3, afbeelding 3 van 3
    • Unscrew the two screws shown circled in red in the picture.

    • Use a #0 Phillips screwdriver to remove the two 4 mm screws

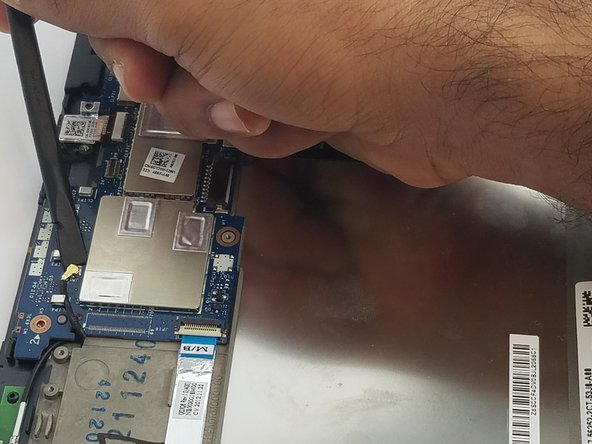
    • Lift up the plug that connects the camera to the motherboard using the plastic opening tool as shown in the pictures.

  4. Dell XPS 10 Motherboard Replacement: stap 4, afbeelding 1 van 2 Dell XPS 10 Motherboard Replacement: stap 4, afbeelding 2 van 2
    • After the rear facing camera is removed, you may now remove the front facing camera.

    • Use the nylon spudger to disconnect the cable on the motherboard.

    • Make sure you use the black plastic spudger to pry up the aluminum tape holding the front facing camera. Be careful as the tape is fragile.

  5. Dell XPS 10 Motherboard Replacement, Motherboard: stap 5, afbeelding 1 van 3 Dell XPS 10 Motherboard Replacement, Motherboard: stap 5, afbeelding 2 van 3 Dell XPS 10 Motherboard Replacement, Motherboard: stap 5, afbeelding 3 van 3
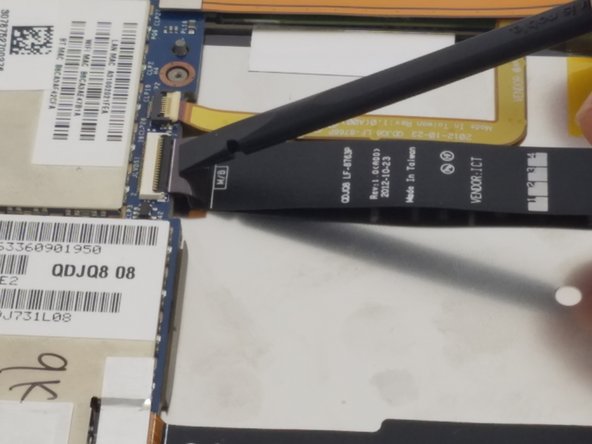
    • Use the black spudger to remove all of the ribbon cables except for the wide orange cable.

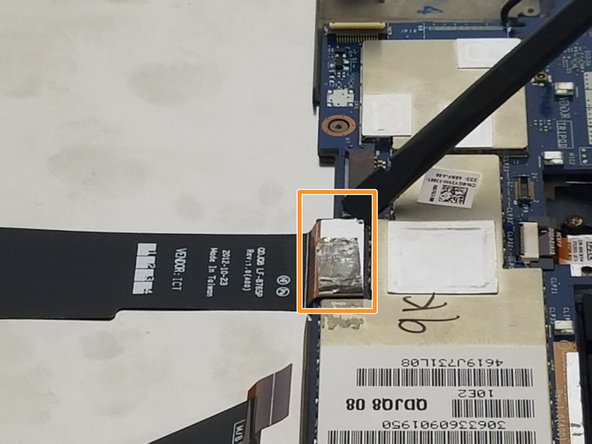
    • Use a plastic opening tool to remove the orange cable.

    • Use a #0 Phillips screwdriver to remove the two 3 mm screws.

  6. Dell XPS 10 Motherboard Replacement: stap 6, afbeelding 1 van 3 Dell XPS 10 Motherboard Replacement: stap 6, afbeelding 2 van 3 Dell XPS 10 Motherboard Replacement: stap 6, afbeelding 3 van 3
    • Continue to disconnect all of the ribbon cables from the motherboard.

    • Using the black spudger, remove the aluminum tape from the wide black cable. Be careful not to tear the tape as it is fragile.

    • Use a #0 Phillips screwdriver to remove the final two 3 mm screws.

Conclusie

To reassemble your device, follow these instructions in reverse order.

Één andere persoon heeft deze handleiding voltooid.

James

Lid sinds: 10/04/16

401 Reputatie

3 handleidingen geschreven

Team

USF Tampa, Team 2-1, Nance Fall 2016 Lid van USF Tampa, Team 2-1, Nance Fall 2016

USFT-NANCE-F16S2G1

3 Leden

5 handleidingen geschreven

0 opmerkingen

Voeg opmerking toe

Weergavestatistieken:

Afgelopen 24 uren: 0

Afgelopen 7 dagen: 3

Afgelopen 30 dagen: 17

Altijd: 1,890