Ga door naar hoofdinhoud

Dell Studio 1735 Hard Drive Replacement

Wat je nodig hebt

  1. Dell Studio 1735 Hard Drive Replacement, Battery: stap 1, afbeelding 1 van 1
    • Slide and click the battery latch release.

    • Slide the battery out of the battery bay.

  2. Dell Studio 1735 Hard Drive Replacement, Base Cover: stap 2, afbeelding 1 van 1
    • Loosen the eight captive screws on the base cover and lift the cover off the computer at an angle as shown in the figure.

  3. Dell Studio 1735 Hard Drive Replacement, Hard Drive: stap 3, afbeelding 1 van 1
    • Remove the four screws securing the hard drive assembly to the computer base.

    • Pull the blue pull-tab on the cable attached to the system board to disconnect the cable.

    • Pull the black pull-tab to lift the hard drive assembly out of the computer.

  4. Dell Studio 1735 Hard Drive Replacement: stap 4, afbeelding 1 van 2 Dell Studio 1735 Hard Drive Replacement: stap 4, afbeelding 2 van 2
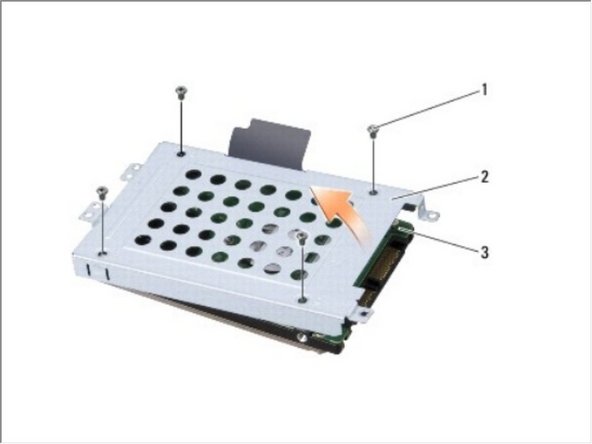
    • Pull the interposer to detach it from the hard drive.

    • Remove the four M3 x 3-mm screws securing the hard drive cage to the hard drive.

    • Lift the hard drive cage off the hard drive.

Conclusie

To reassemble your device, follow these instructions in reverse order.

Één andere persoon heeft deze handleiding voltooid.

Johnathan Hammond

Lid sinds: 02/28/18

44.989 Reputatie

408 handleidingen geschreven

Team

RampUP America, Inc. Lid van RampUP America, Inc.

Community

42 Leden

1.989 handleidingen geschreven

0 opmerkingen

Voeg opmerking toe

Weergavestatistieken:

Afgelopen 24 uren: 0

Afgelopen 7 dagen: 0

Afgelopen 30 dagen: 5

Altijd: 231