Inleiding
The display is one of the most vital pieces of equipment on any electronic device; Without the display there is no way of monitoring your Dell Latitude E7470.
Signs that you need to replace your display are: cracked or damaged screen, low lighting of screen, or display will not show anything. However, follow this guide correctly and you will have your computer back up and running in no time.
Before you start the disassembly process, make sure that it is indeed your display that is the issue, rather than your motherboard or something else. Than you want to start by completely powering your device off; working on a device while it is on can be very damaging.
Wat je nodig hebt
-
Stap 1 Back Cover
Voorzichtig: stap 1 komt van een handleiding die in bewerking is.
-
Remove the eight 4 mm screws on the back cover using a Phillips #0 screwdriver.
-
-
-
Use the pull tab on the battery connector to lift the connector straight up off its socket on the motherboard, disconnecting it.
Personally, I would remove the battery as the first stage battery should be disconnected before any work is completed.
-
-
-
Remove the single 4 mm Phillips screw securing the bottom left corner of the battery.
-
If you are removing an extended capacity battery, remove the Phillips screw securing the bottom right corner of the battery.
My laptop had 2 screws holding the battery. I am not sure why. It may be useful to check whether yours has 2 as well. Unlike the laptop’s back cover, after unscrewing the screws on the battery, you have to remove the screws.
-
-
-
-
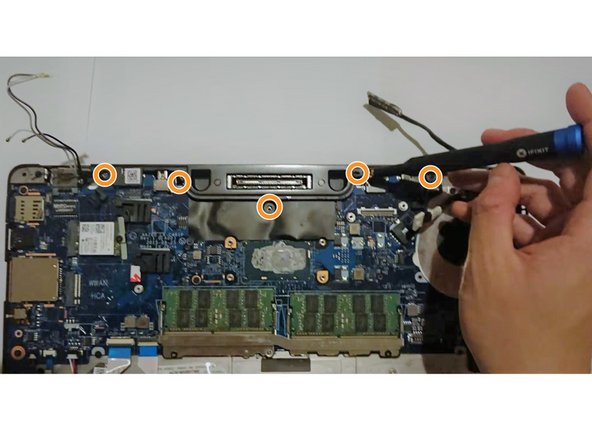
Remove screws which are indicated by red circles . Gently unplug the write connector, marked by the red square, out of the grey socket.
-


To reassemble your device, follow these instructions in reverse order.
To reassemble your device, follow these instructions in reverse order.
Annuleren: ik heb deze handleiding niet afgemaakt.
Één andere persoon heeft deze handleiding voltooid.
Team

Duke University Pratt School of Engineering, Team S4-G3, Matos-Garner Fall 2019 Lid van Duke University Pratt School of Engineering, Team S4-G3, Matos-Garner Fall 2019
DUKEPSE-MATOS-GARNER-F19S4G3
4 Leden
11 handleidingen geschreven
3 opmerkingen
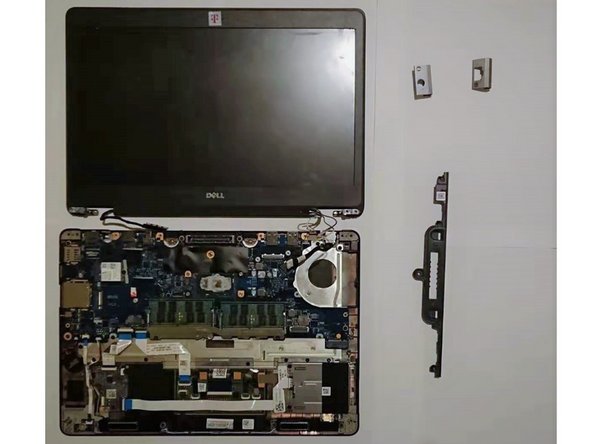
You do not need to take the entire computer apart. The bezel can come off while still hinged to the main body giving you access to the four screws holding on the display. Unless you need to replace the main display ribbon cable, the screen itself is straightforward to replace.
If you are replacing the bezel at the same time - don't forget to check that the clear film has been removed from the webcam lens. A foggy image is not reassuring when testing the reassembled computer.
After unscrewing the 8 screws, they stay on the back cover.
Victor Ashiedu - Antwoord